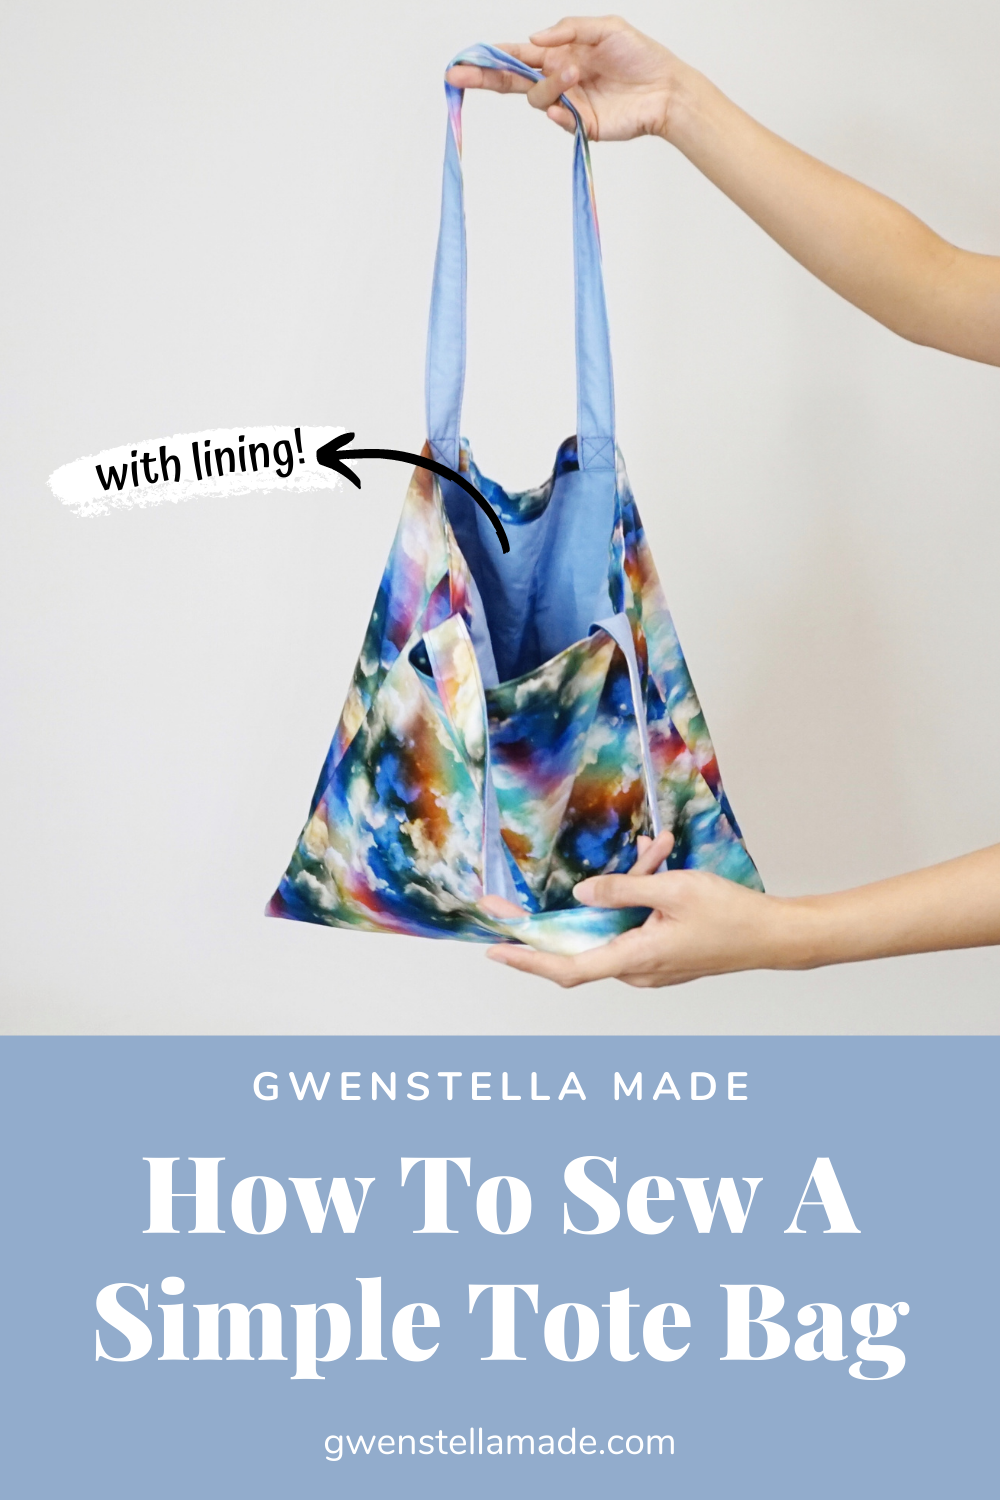
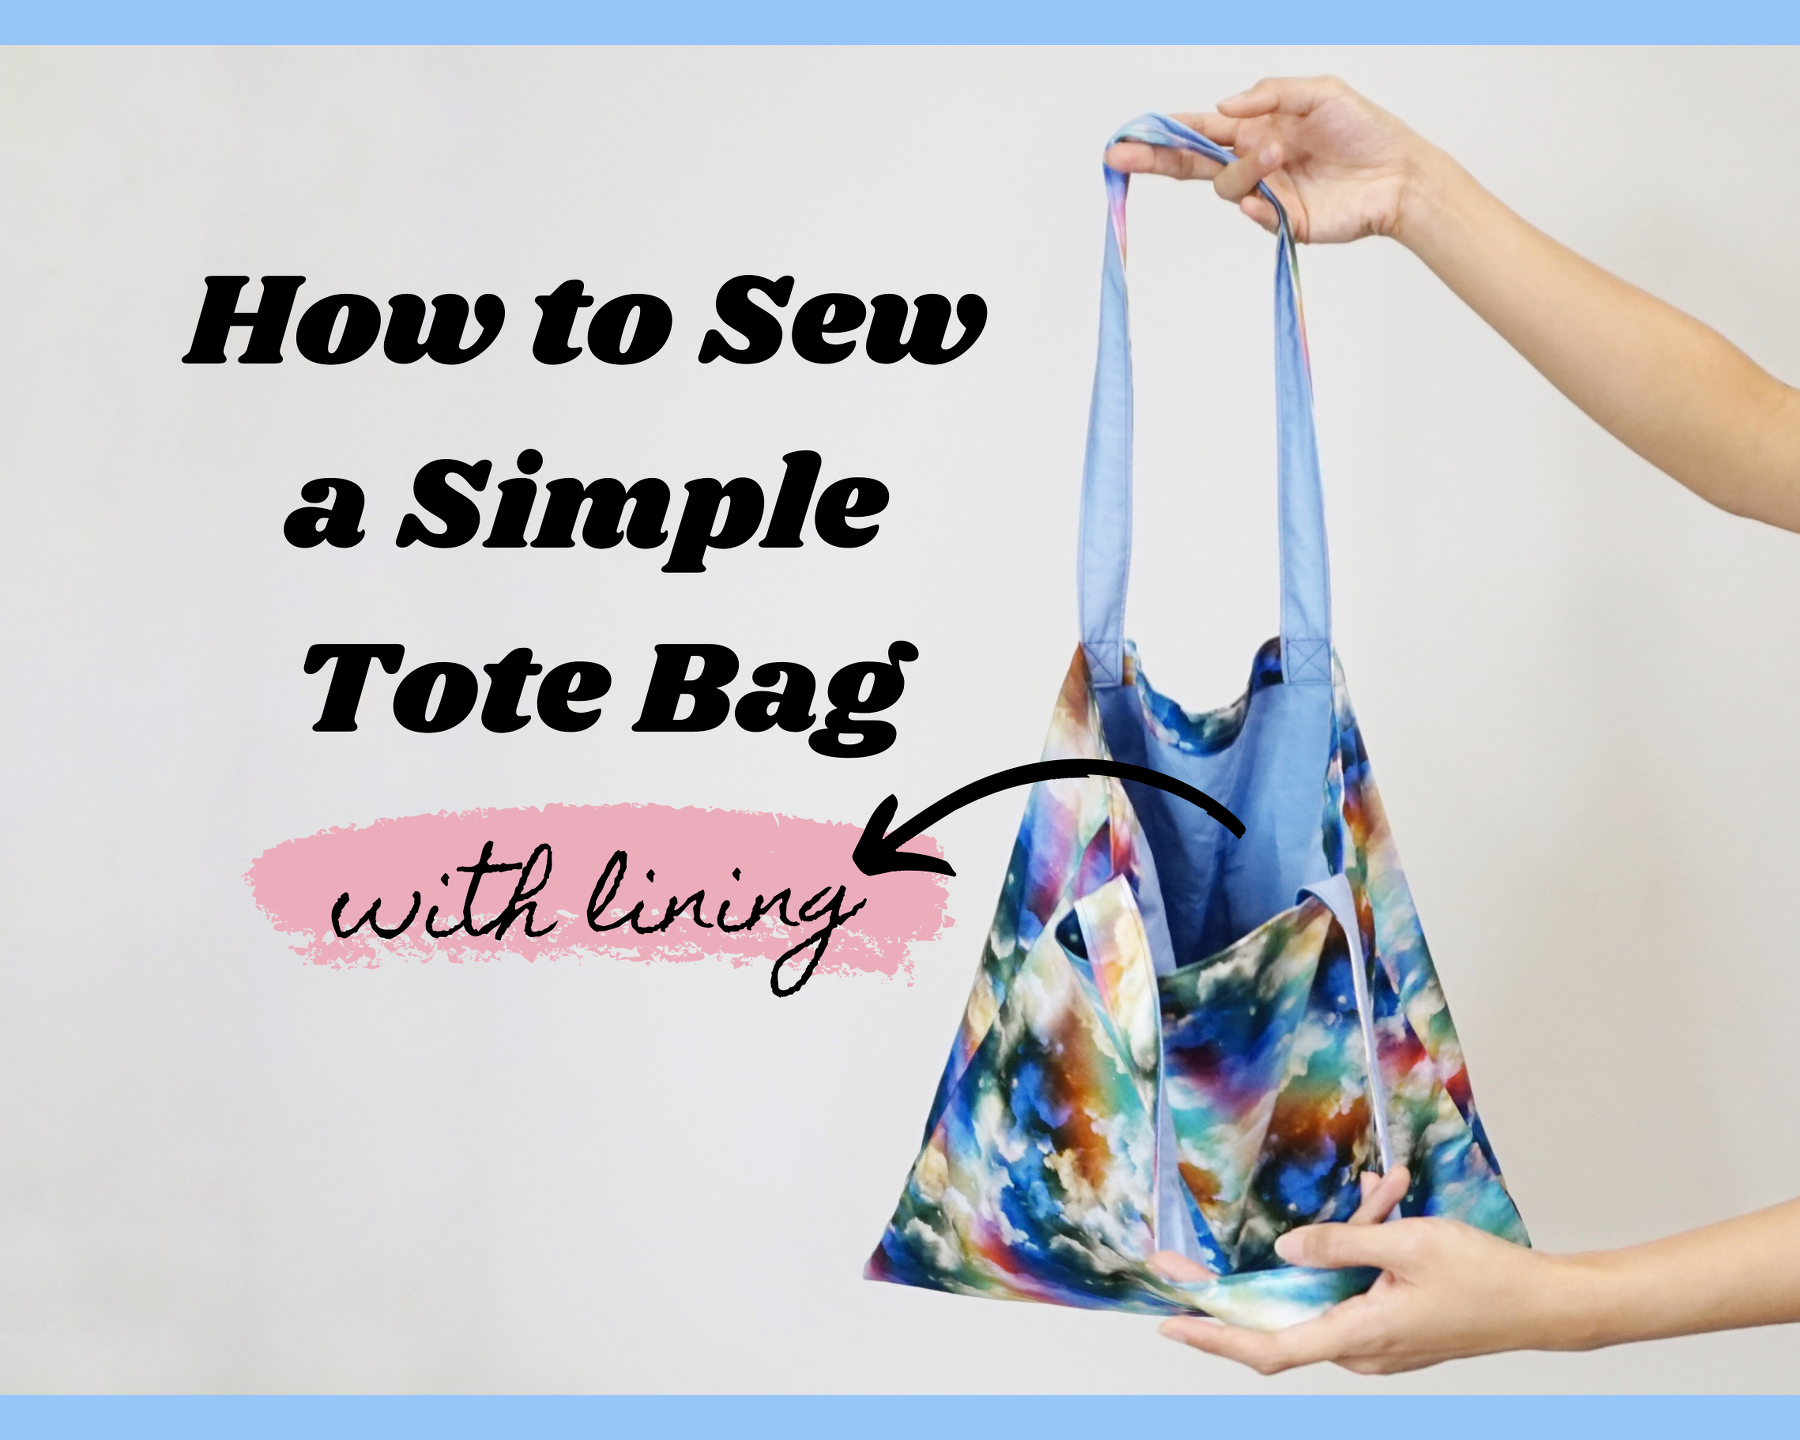
How To Sew A Simple Tote Bag With Lining


A few weeks ago, I bought 1 yard of this beautiful rainbow cloud fabric on a whim from a local fabric destash Facebook group. I don't need new stuff but I really just wanted to make something with this fabric so I made a little "COVID-safe" kit for grocery shopping for my friend in Australia. The kit I made and mailed to her is made up of 1 Hybrid Face Mask, 1 hat, and 1 tote bag with lining. Here's a tutorial on how to sew this simple tote bag with lining.
As the pandemic continues to rage in many parts of the world, I have found myself without much motivation to sew any garments for myself. What's the point!? I rarely head out for social activities these days. This simple tote bag with lining is one of the many bag sewing projects I have been working on. If you're like me and feeling the desire to venture a little out of sewing garments, this sewing project is a great place to start.
Using less than 1 yard of fabric in total, this simple tote bag with lining is also a great sewing project for working with "quarantine materials" (i.e., just your remnant stash). The entire project from start to finish only took 1 afternoon! It was a really easy and satisfying sew. I hope you're feeling excited about this sewing project as I am about sharing this project with you.
Abbreviations
RS = right side(s)
WS = wrong side(s)
MC = main colour (i.e. the fabric that is showing on the outside)
CC = contrast colour (i.e. the fabric that is used as the lining)
Materials
Sewing machine or sewing needle for hand sewing
Sewing thread
Fabric scissors
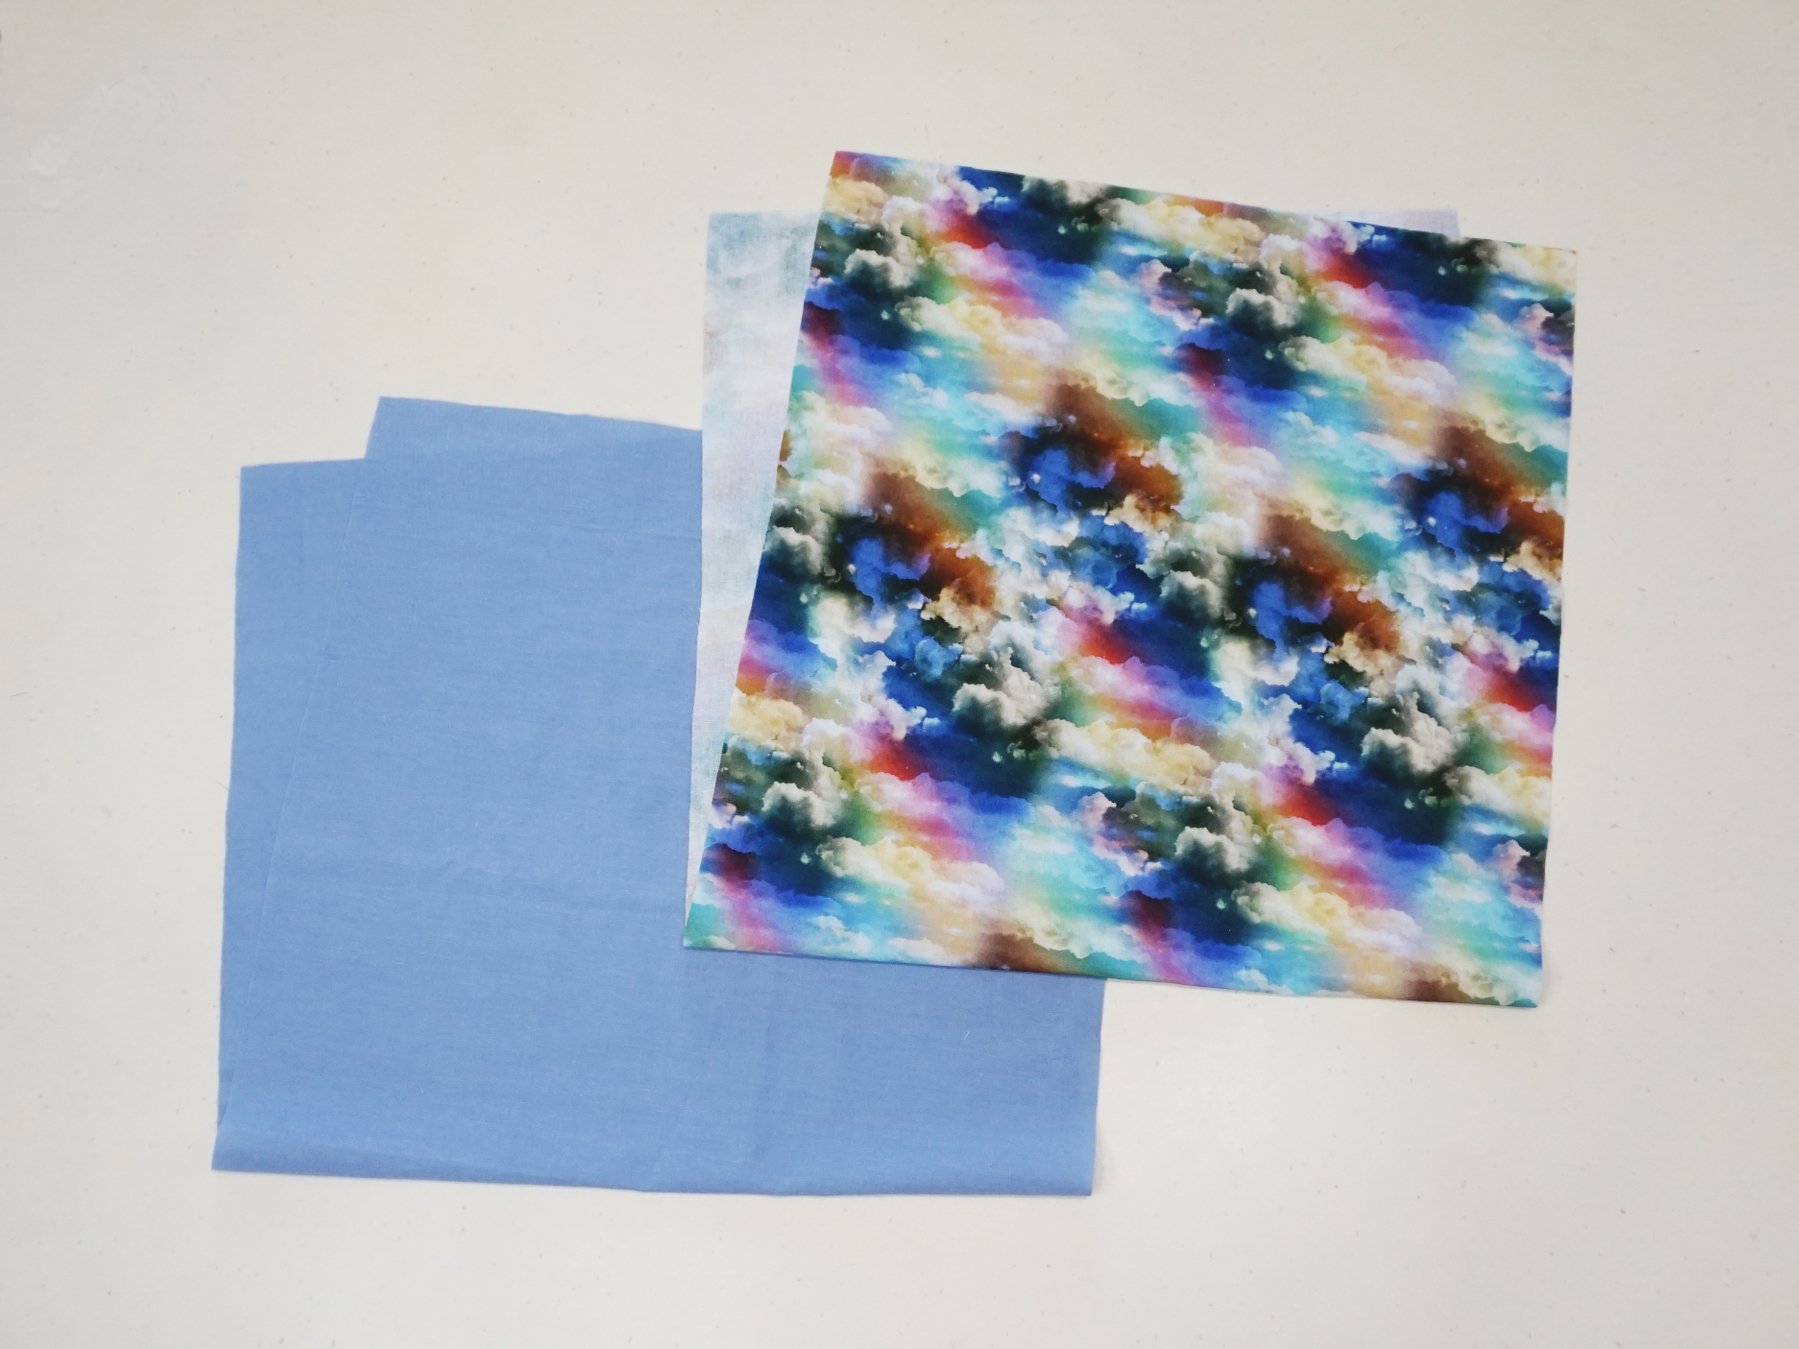
Main fabric (1/2 yard) in MC
Lining fabric (1/2 yards) in CC
Both the main and lining fabrics used to make this tote bag are lightweight polycotton blend. The main fabric is the rainbow cloud fabric (i.e. main colour, MC) while the lining is a plain light purple/blue fabric (i.e. contrasting colour, CC).
You may decide to use the same fabric for both the main and lining pieces. But I have designed this bag using MC and CC fabrics because this helps to save cost when your MC fabric is expensive. If your MC fabric is less affordable, you can still save cost by using an affordable fabric in CC as the lining.
The use of MC and CC fabrics is also helpful when you are working with your stash and have limited yardage for the main fabric!
How to Sew a Simple Tote Bag (with lining)
Step 1: Cut fabric
Cut fabric for bag body
MC: Cut 1 rectangle measuring 33" long and 15.5" wide
CC: Cut 1 rectangle measuring 29.75" long and 15.5" wide
Cut fabric for straps

Each piece measures 25" long and 1 7/8" wide
MC: Cut 2 pieces
CC: Cut 2 pieces
Step 2: Sew straps
With RS together, pin 1 MC strap and 1 CC strap piece together. Sew along the long edges using 2/8" seam allowance
Backstitch at the start and end of this stitch line

Turn the strap right side out using a safety pin (or your choice of turning tool)


Smooth the sides out so the seams are showing. I like to do this by gently “rolling” the seams with my fingers until the seams are no longer buried inside.

Topstitch long edges, approximately 1/8" from the edge.

Repeat for the other strap.

Step 3: Sew bag body

Fold the WS of the bag body together in half lengthwise, then sew along the sides using 3/8" seam allowance
Do this for both MC and CC pieces
Step 4: Pin MC and CC bag body pieces together
Taking the MC bag body, fold 5/8" of the top raw edge down, WS together
Stitch 3/8" from the folded edge

Turn CC bag body RS out, then place MC bag body into CC bag body
At this point, MC and CC bag body pieces should have WS together
The MC bag body should be ~ 1" longer than CC bag body
Pin MC and CC bag body pieces together

Tip: Start by aligning and pinning the side seams of the MC and CC pieces together, then continue pinning around the top of the bag. Make sure that your pins are ~ 1" from the top raw edge of the CC piece.
Fold and/or press the sewn edge of the MC bag body down by 1"
Pin in place

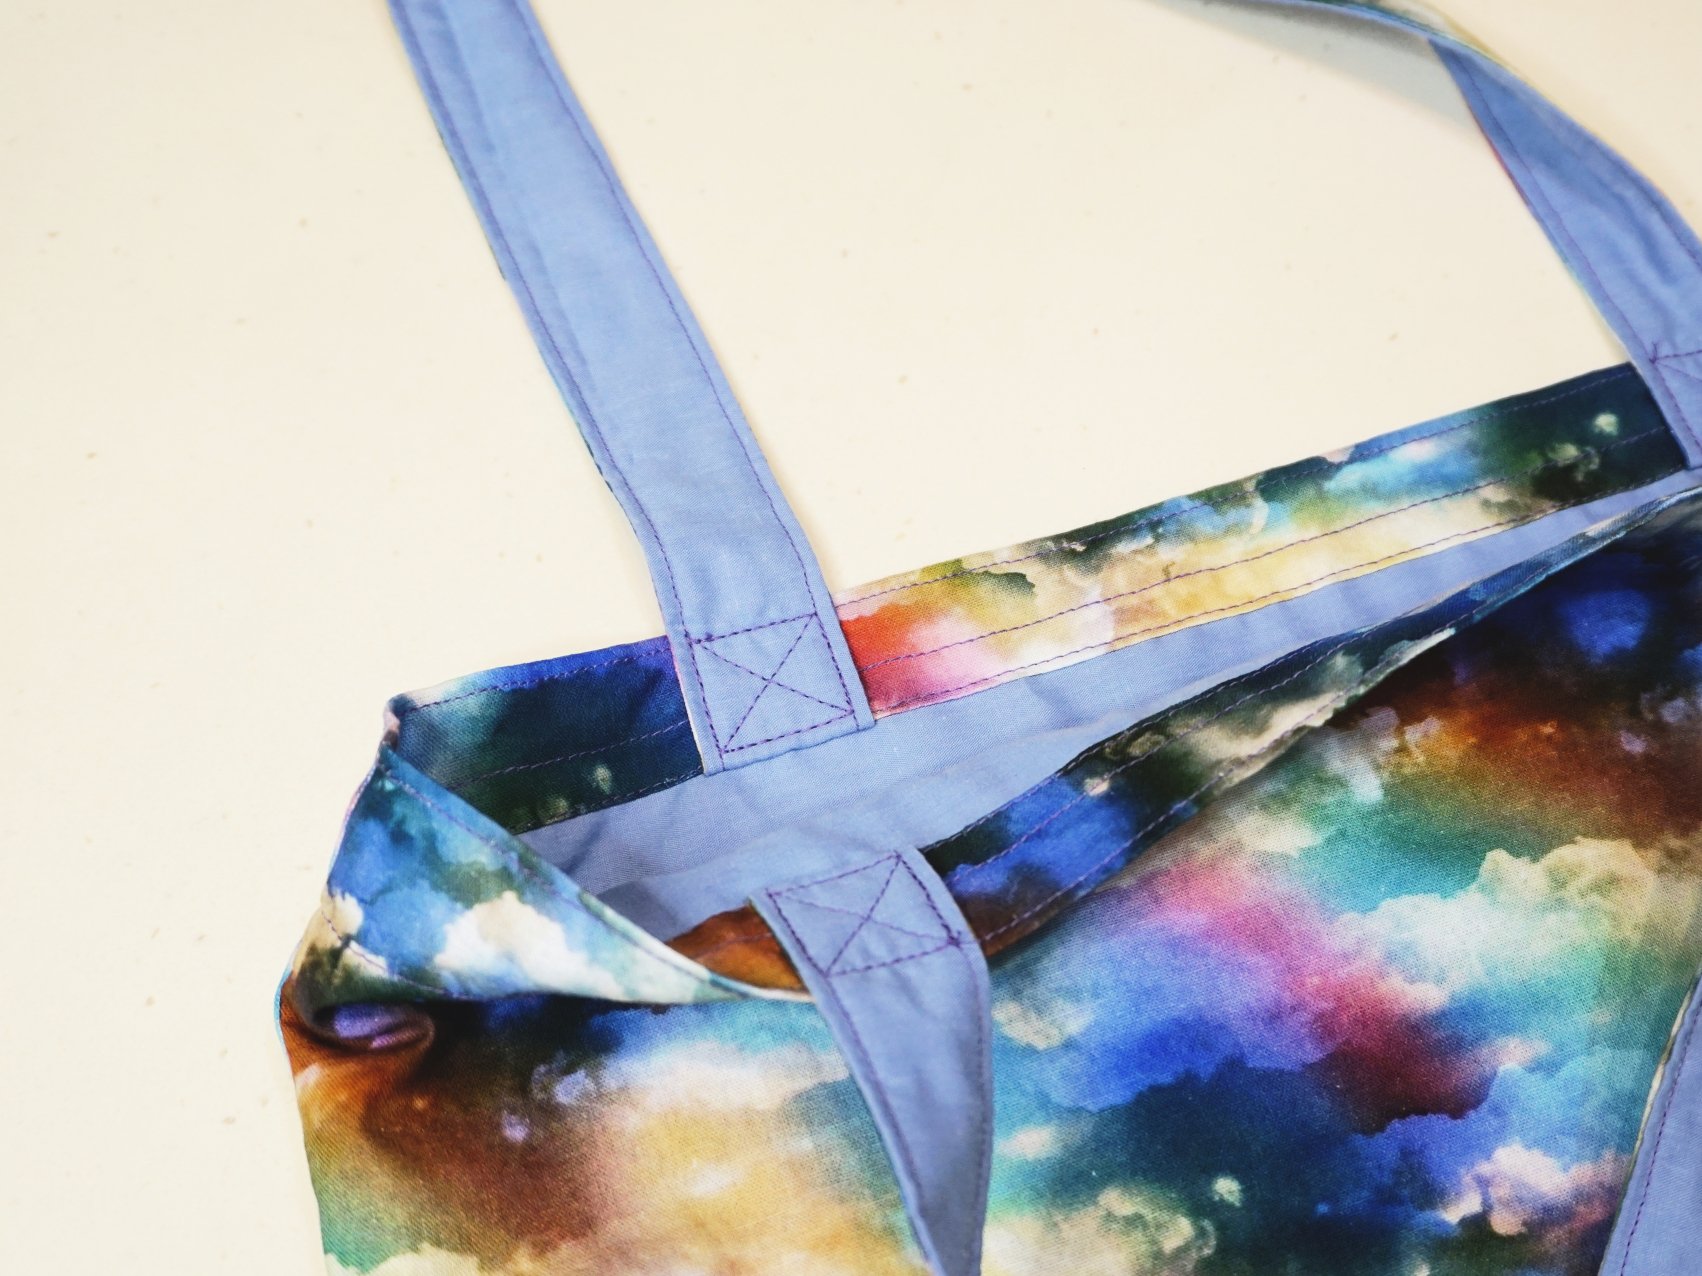
Step 5: Position straps for sewing
Position the straps under the folded top edge of the MC bag body: Place the raw edge of the straps 3/8" under the fold and the outer edge of the straps 3" from the side seams
Ensure that the CC of the strap faces the CC of the bag body


Step 6: Sew straps in place
Sew straps in place by stitching along the top and bottom edge of the folded bag opening, ~ 1/8" from each edge

Turn straps up and sew reinforcing stitches in the shape of a box with a cross in it (see photo)


P.S.: I also made an extra mask for myself!
And you're done with sewing your simple tote bag with lining! I hope you like this quick and easy sewing tutorial on how to sew a simple tote bag with lining. Would you be making this for yourself or for a loved one?