

How To Sew A Tote Bag - Foldable Grocery Bag variation


A few months ago, I shared a simple tutorial on how to sew a simple tote bag with lining. Today, I am sharing a variation of the simple tote bag. Here's how to sew a foldable grocery bag with boxed corners for your shopping!
This sewing project is suitable for a confident beginner. If you have read and tried my original tutorial on sewing a simple tote bag and want to try something different, this project is for you! You will learn to make boxed corners (without special drafting) and attach an extra pair of ties to a tote bag with this new sewing project.
Abbreviations
RS = right side(s)
WS = wrong side(s)
Materials
Sewing machine or sewing needle for hand sewing
Sewing thread
Fabric scissors
1/2 yd for non-directional prints; 1 yard for directional prints
My finished grocery bag measures approximately 15.5" wide and 14.5" long (excluding the base). While my original simple tote bag project features a lining, this grocery bag is made without a lining.
To ensure optimal 'foldability' and function for your grocery bag, choose a lightweight fabric made of a strong fibre. A loose-weaved, lightweight linen or a lightweight polycotton will be great.
The fabric I used for this project is a loose-weaved, lightweight polycotton that is advertised as a curtain fabric in the upholstery section of the fabric store. It's the same fabric that I used for my cushion project. When I said ~same~, I meant the ~exact~ fabric.
When I found out that I would be moving to the USA in less than 2 months, I started working on projects for things I know I would need for my new life in the US. I knew I wouldn't ship this cushion over but I also knew I would need a grocery bag, so I decided to upcycle my cushion cover! Since I am working with a limited yardage, I also ended up working with a low-waste design using smaller seam allowances and regular rectangles to save on fabric.
How to Sew a Foldable Grocery Bag
Follow the steps below to sew your own foldable grocery bag. Feel free to read my original tote bag tutorial for a mini orientation!

1. Cut fabric
Bag body: Cut 1 piece of 36" x 16 1/2" rectangle
Straps: Cut 4 pieces of 13 3/4" x 1 3/4" rectangle
Ties: Cut 2 pieces of 1 1/8" x 10 1/4" rectangles.
Note: Seam allowances are included in the measurements above and will be specified throughout the tutorial.
2. Sew the bag body

Fold the rectangle in half lengthwise and sew along the sides using a 2/8" seam allowance
Finish the raw edge with a small zig-zag stitch.
3. Create the boxed corners / base for the bag
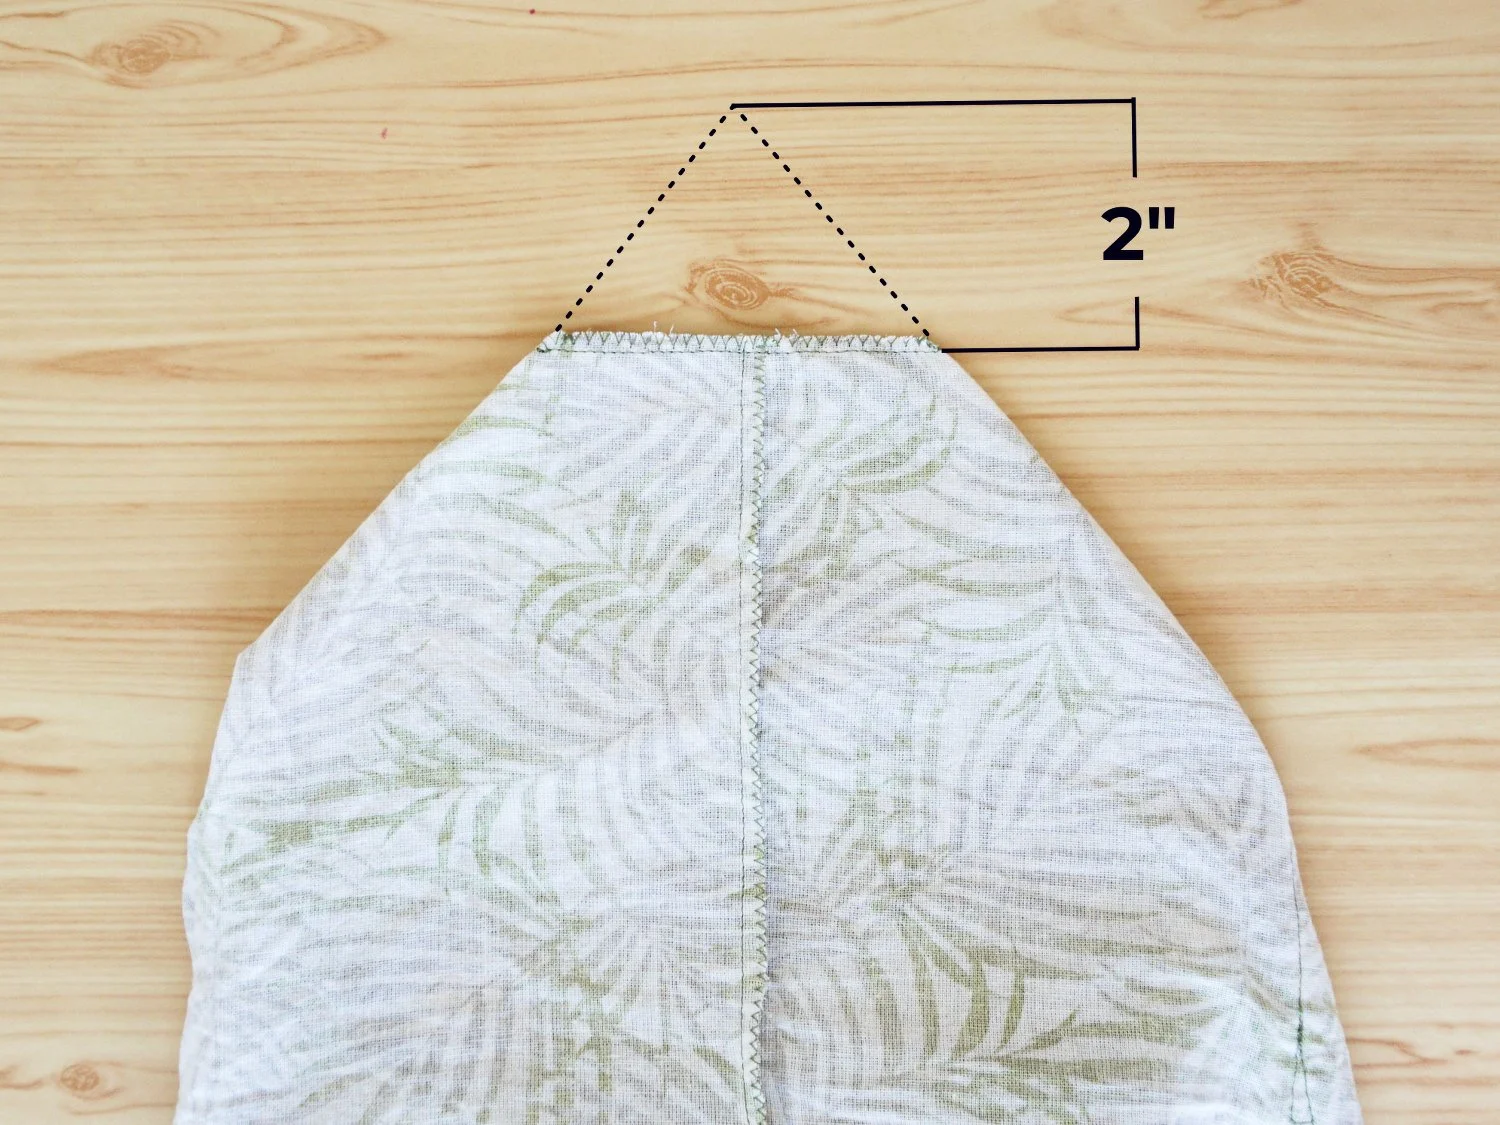
Start with one of the corners of the bag. Align the side seam with the bottom of the bag. Mark out and sew a straight line 2" from the tip of the corner. Cut approximately 1/8" from the stitched line. Finish the raw edge with a small zig-zag stitch.
Repeat for the other corner.
4. Prepare the bag handles
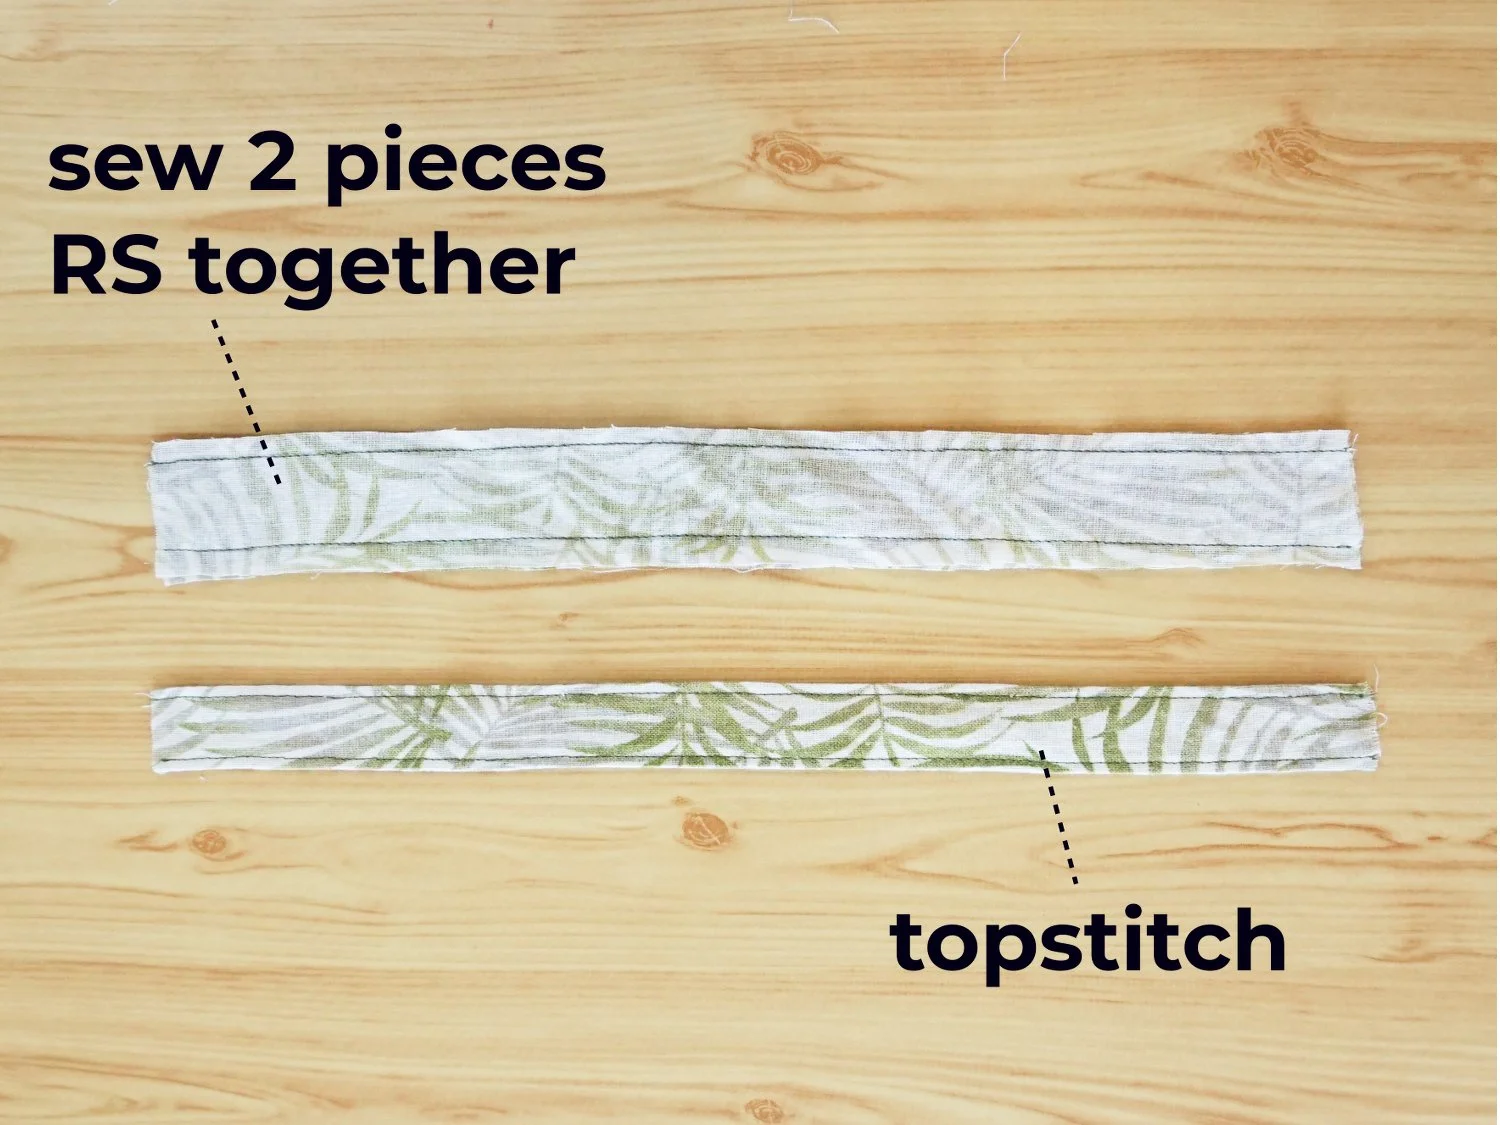
To make 1 handle, sew 2 pieces of strap rectangles RS together with 3/8" seam allowance, then turn the handle RS out and topstitch approximately 1/8" from the edge.
Repeat for the 2nd handle.
5. Prepare the ties for securing the foldable bag
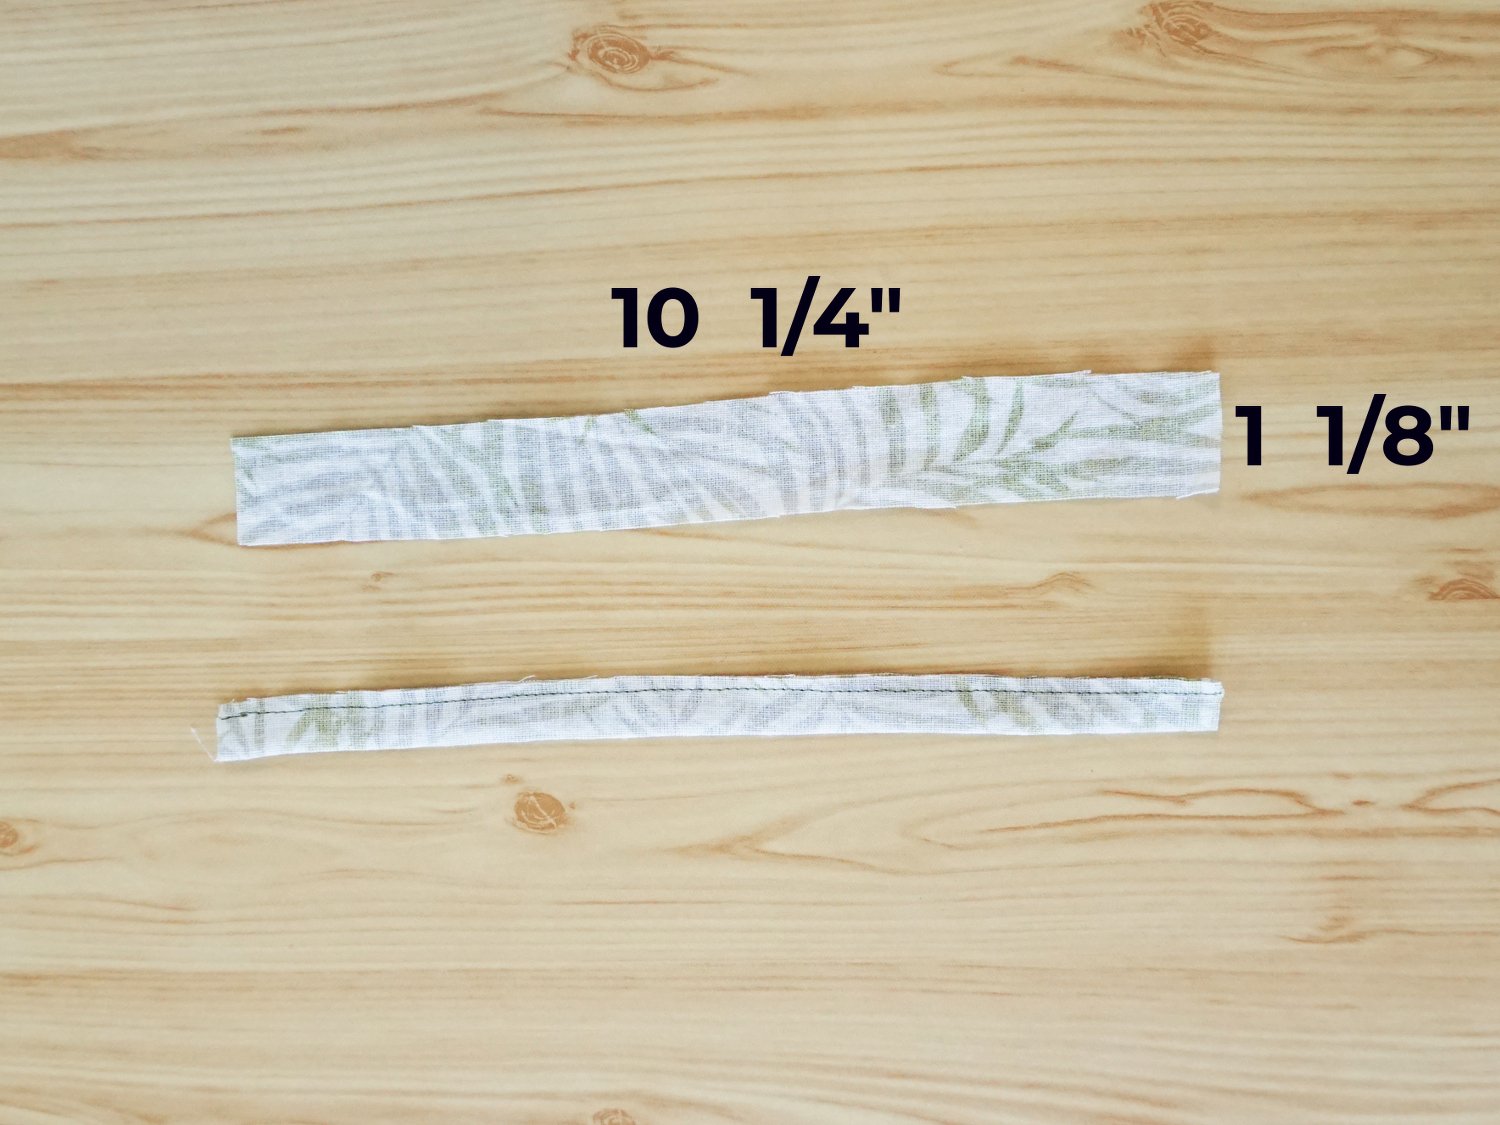
Fold each tie rectangle in half lengthwise and stitch in place with 1/8" seam allowance. Turn the tie RS out either with the help of a safety pin or a loop turner.
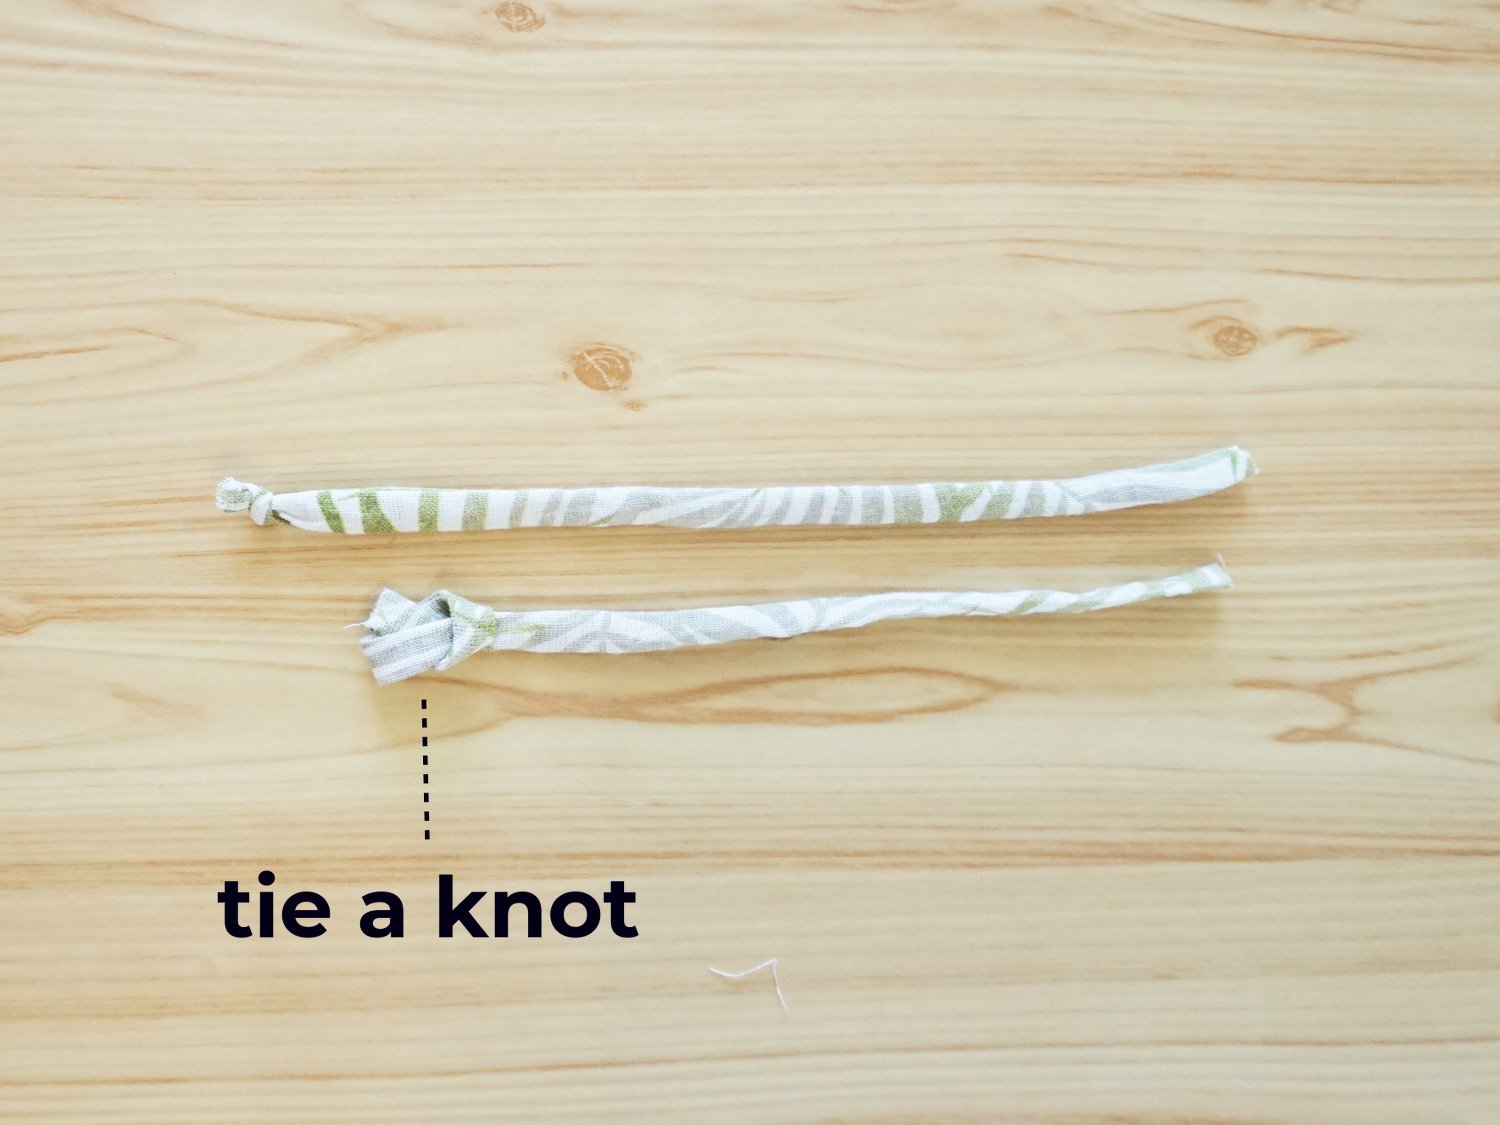
Finish one end of each tie with a small knot.
*The smaller seam allowance makes it easier to turn the slim tie inside out. You may also wish to cut a wider rectangle (i.e. 4cm x 26cm) to use a 3/8" seam allowance and then trim the seams to 1/8" before turning it RS out.
6. Sew straps to bag
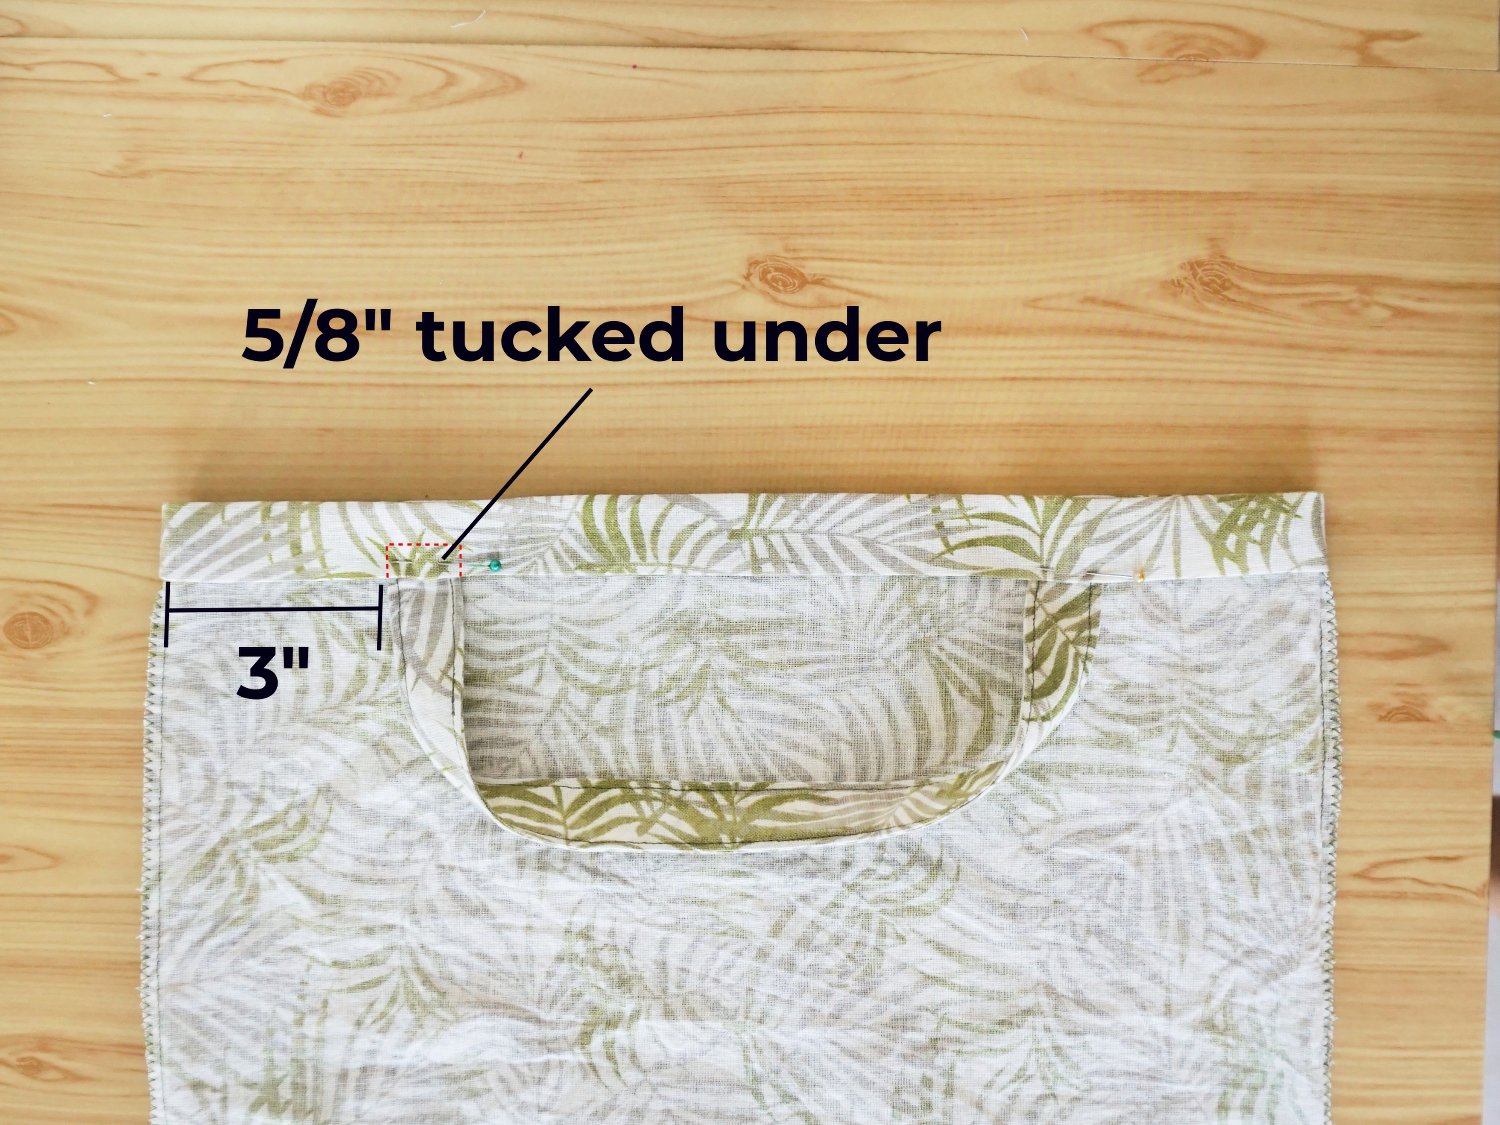
Make a double-fold hem along the top edge of the bag. Start by folding the top raw edge of the bag down by 5/8", then fold it again by 1".
Position the strap. Place one end of the strap 3" from the side seam of the bag and tuck the raw short edge of the strap 5/8" under the double-fold hem. Repeat for the other raw end of the strap.
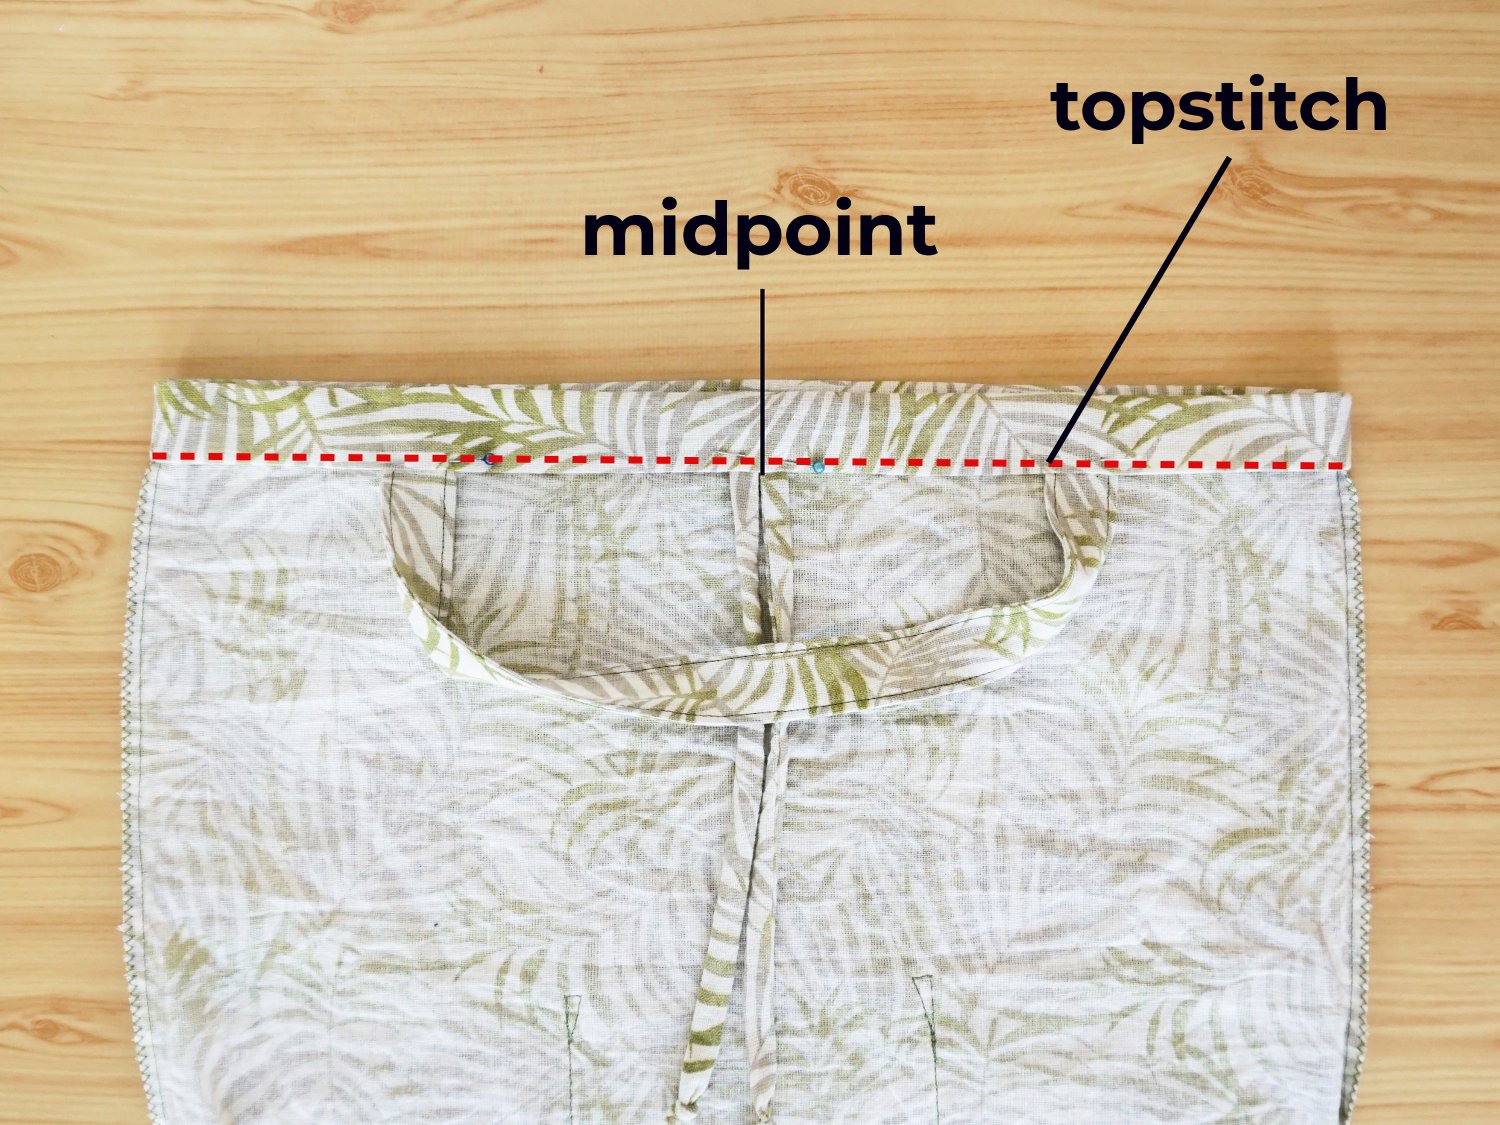
Place the ties next to the midline of the top edge of the bag, tucking the raw edges in approximately 5/8" under the hem.
Topstitch along the bottom of the double-fold fold hem first, while the bag straps and ties are facing down (i.e. towards the bottom of the bag). Then, turn the straps and ties up, and topstitch along the top of the hem

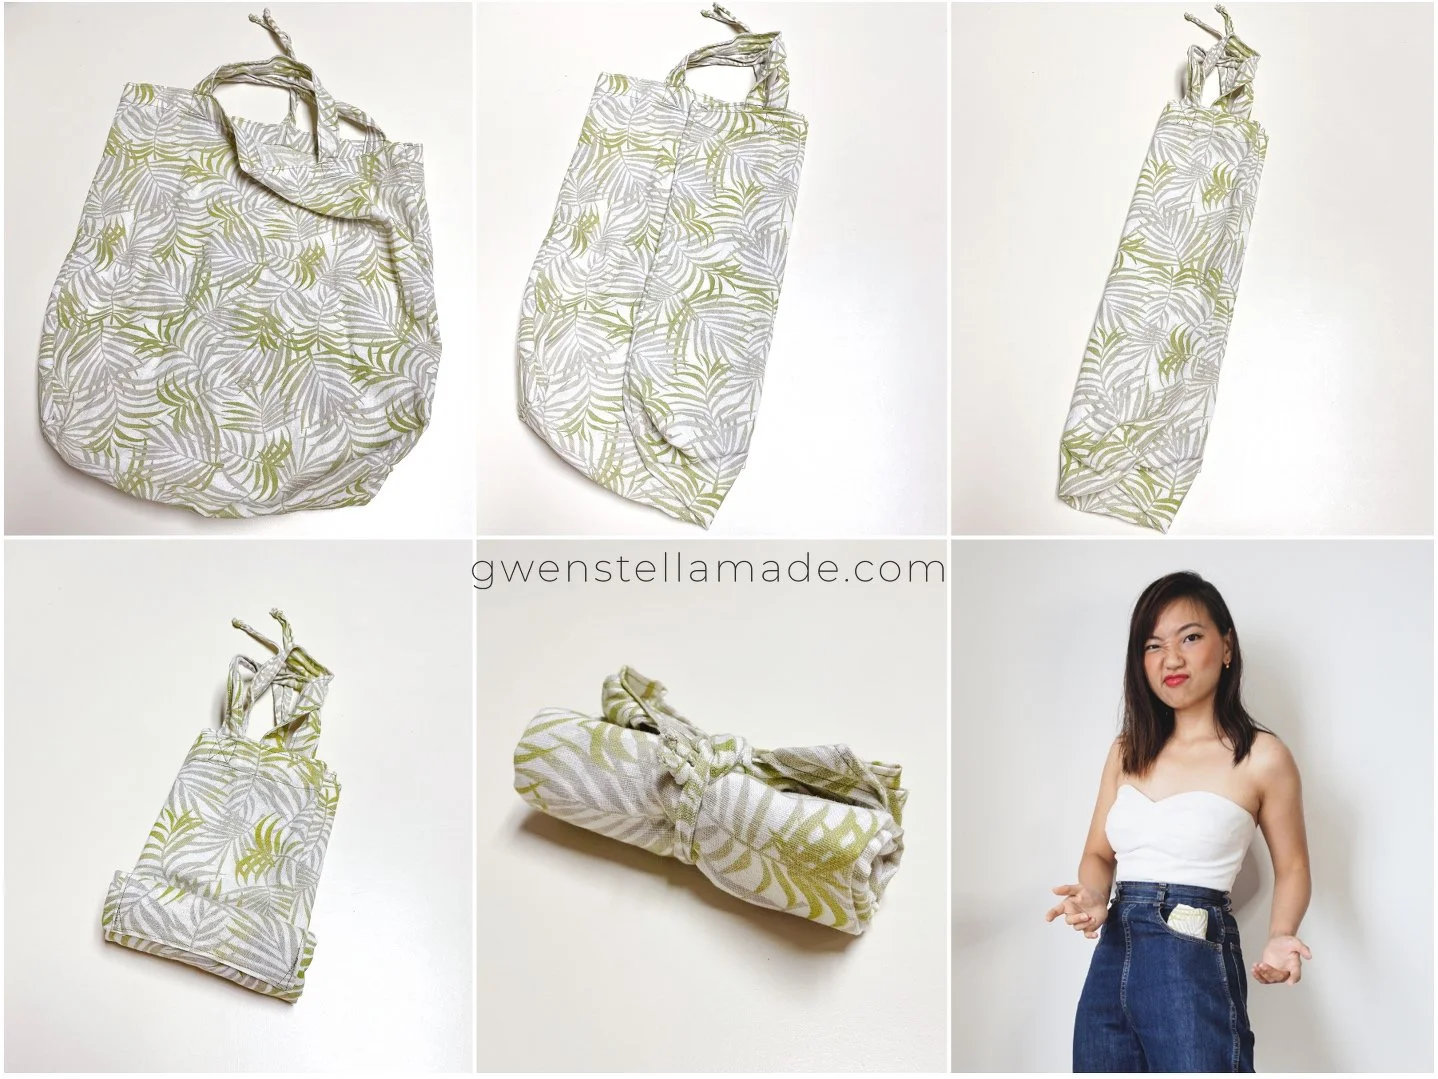
Storing the foldable grocery bag
To roll up the foldable grocery bag for storing in your drawer or bag, start by having the side of the bag with the ties facing a flat surface. Then fold the sides of the bag lengthwise. After that, roll the bag slowly from the bottom to the top. Don't forget to tuck the handles in! Finally, wind the ties around the roll and tuck them under itself. The knots from the ties will prevent the tuck from coming undone too easily.


Let me know what you think about this sewing project in the comments below! I'd also love to see your versions of this bag so feel free to tag me on Instagram @gwenstella.made when you make and share this bag.
