

How To Sew A Reversible Hat (link to free pattern included)


A few months ago, I discovered the free hat patterns on DRCOS's website and began experimenting with the different free patterns available. I made a few for myself and a couple for my friends' children. Here's a step-by-step photo tutorial on how to sew a hat using one of the free patterns from DRCOS's site!
Hat designs and free patterns
The hat I am showing in this photo tutorial is the Cloche pattern in Size 52 (aka 52cm in head circumference, for children). I have also made 4 other hats in addition to the one featured in this tutorial on how to sew a hat.

Polka Dot Rain Hat

This is made with the Cloche pattern in the selected adult size with a modified, wider brim.
Rainbow Hat
This is made with the Cloche pattern in the selected adult size with no modifications.

Pink Floral Hat
This is made with the Cloche 2 pattern in the selected adult size with modifications to the brim design.

Pink Monstera Hat
This is made with the Cloche 4 pattern in the selected kid's size with no modifications.

Picking a size
DRCOS's hat patterns are available in a wide range of sizes for both children and adults. To pick the right size for yourself, measure the circumference of your head in front of a mirror. Using a flexible measuring tape, run the tape over the middle of your forehead and around the back of your head.
If you are making the hat as a gift for a child and want it as a surprise, you can try to use a head circumference and age chart to guess the size to print and sew, such as this chart and this chart. In my opinion, bigger is always better when making for a little one because they grow so quickly! A bigger hat is something they can grow into and a smaller hat, unfortunately, simply will not fit...
This hat I made for a friend's child is cut and sewn to Size 52. I thought it would be slightly bigger than what he needs now because he is not even 2 years old. It ended up fitting him perfectly. Turns out, his head circumference is in the 90th growth percentile!
How to Sew a Hat

Once you have picked a design and a pattern, you're ready to sew! As I mentioned, this photo tutorial features the basic Cloche pattern. As this is a basic hat pattern, the steps in this tutorial will also help you with the Cloche3 and Cloche4 patterns
Gather materials

0.5 yards of main fabric - pick a stable, medium to heavy-weight fabric such as denim, canvas, duck, or even corduroy
0.5 yards of lining - pick a medium-weight fabric in plain colours or a fun, colourful print for a reversible look or simply use the same main fabric
Matching thread
Needle for handsewing
Sharp fabric scissors
Sewing machine (optional since hand sewing is possible)
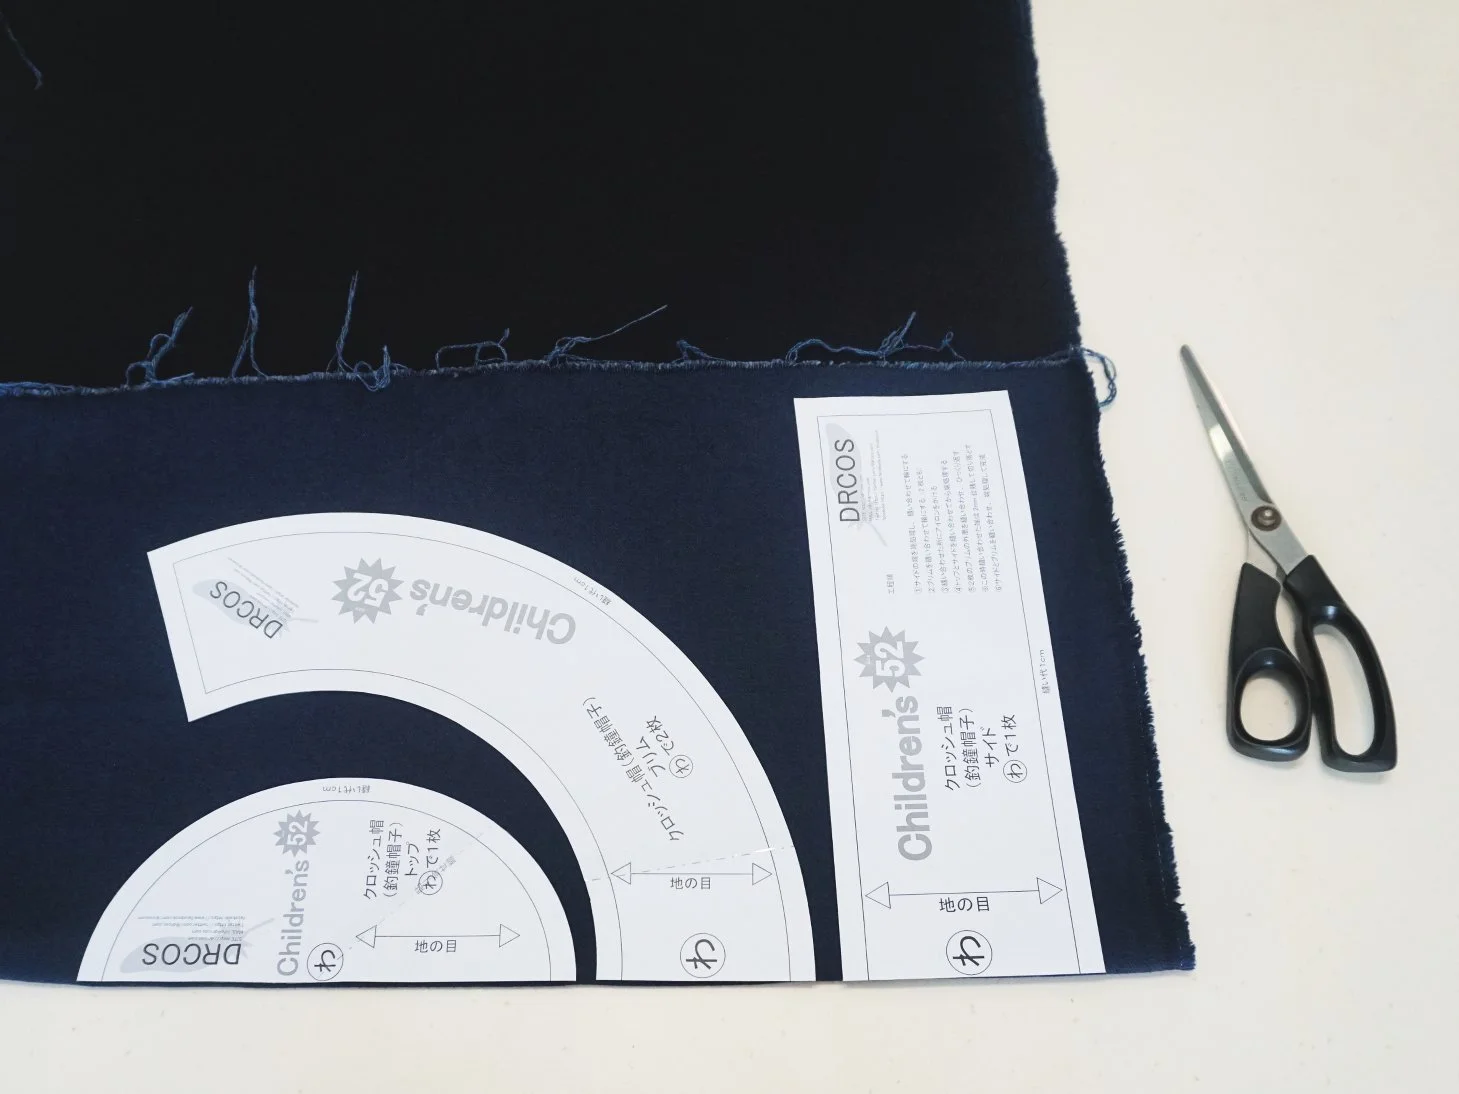
Printing and cutting the pattern
DRCOS has included PDF patterns for printing on A4 and US letter papers. If you are working with the latter, scroll towards the bottom of the page for correct PDF.
Japanese patterns usually utilise a 1cm seam allowance and this one is no different. A 1cm seam allowance is included in the paper pattern. While there is no test square to check that your print is true to scale, you can do so by using the test print document provided. I also like to measure and check all the seam allowances that go lengthwise and crosswise on the paper to make sure that they are all 1cm wide.

If you are making 1 hat with the same fabric for main and lining pieces,
Crown: Cut 2 on the fold with main fabric
Side band: Cut 2 on the fold with main fabric
Brim: Cut 2 on the fold with main fabric
If you are making hat with a lining,
Crown: Cut 1 on the fold with main fabric, 1 on the fold with lining fabric
Side band: Cut 1 on the fold with main fabric, 1 on the fold with lining fabric
Brim: Cut 1 on the fold with main fabric, 1 on the fold with lining fabric
The original Cloche pattern asks to cut 1 of the crown and 1 of the side band (on the fold), and 2 of the brim on the fold to make 1 hat. This means that the raw seams of the side band and crown would be shown. Since having a lining gives a more polished finish and versatility as a reversible hat, I decided to cut 2 pieces of the crown, side band and brim to make 1 hat instead. In fact, I did this for all the hats I made using the patterns from DRCOS's site.
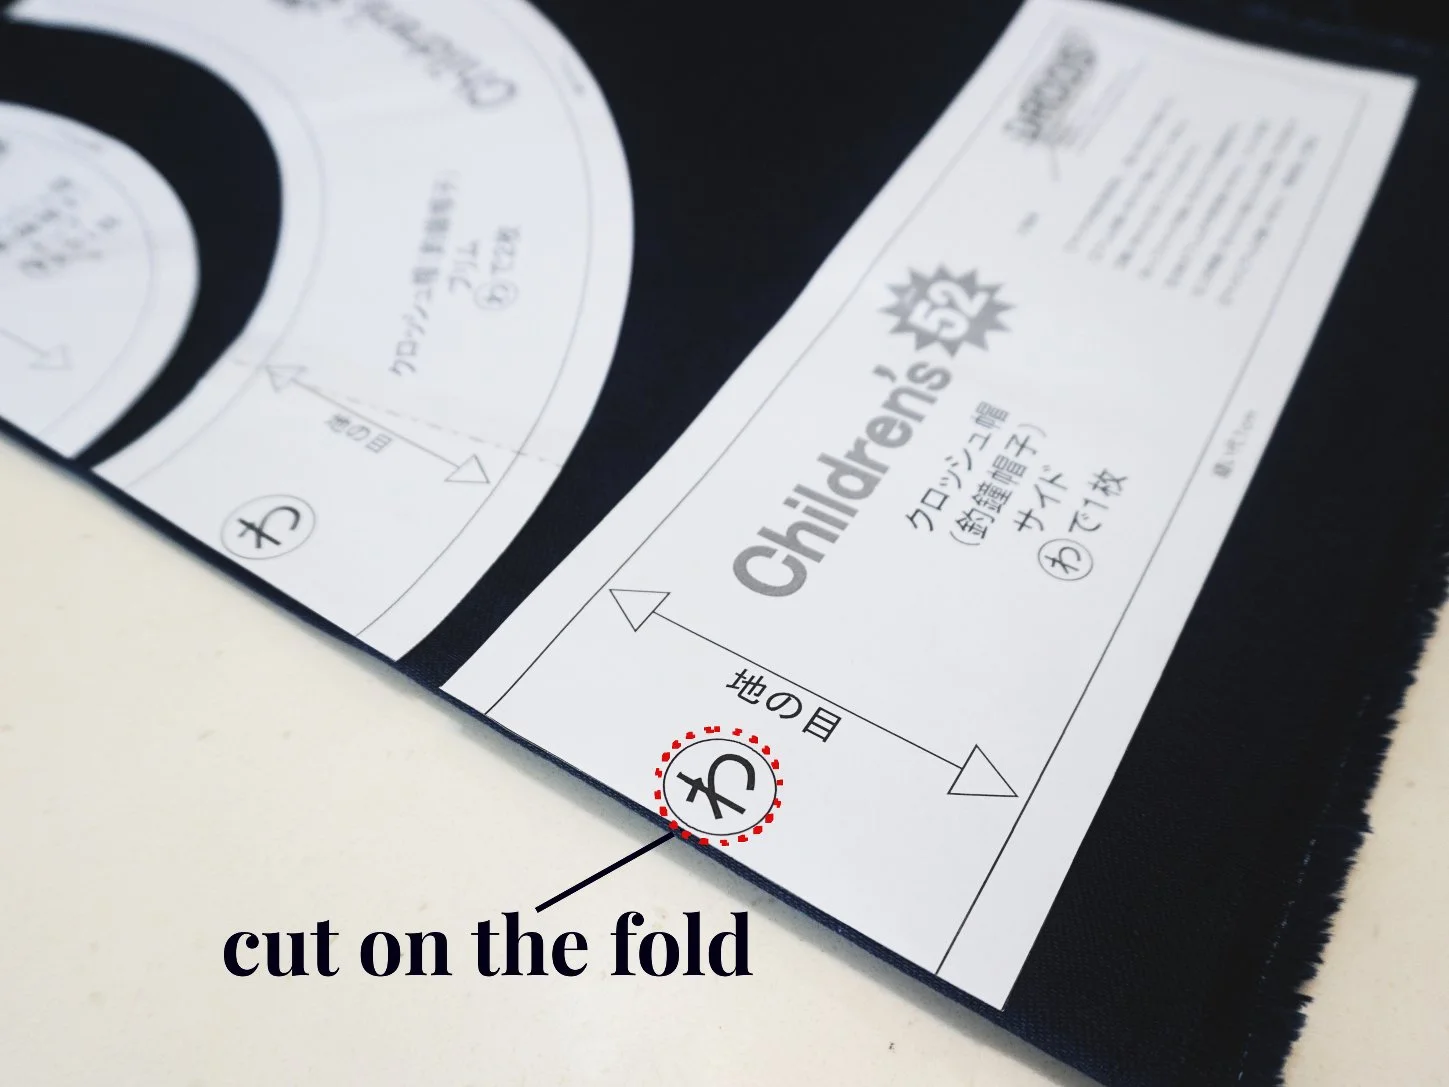
For some sizes and other hat patterns, you may or may not be cutting all the pieces on the fold. Look out for this character in a circle. If you see it, it means you have to cut the piece on the fold.
Steps to sewing the hat
A summary
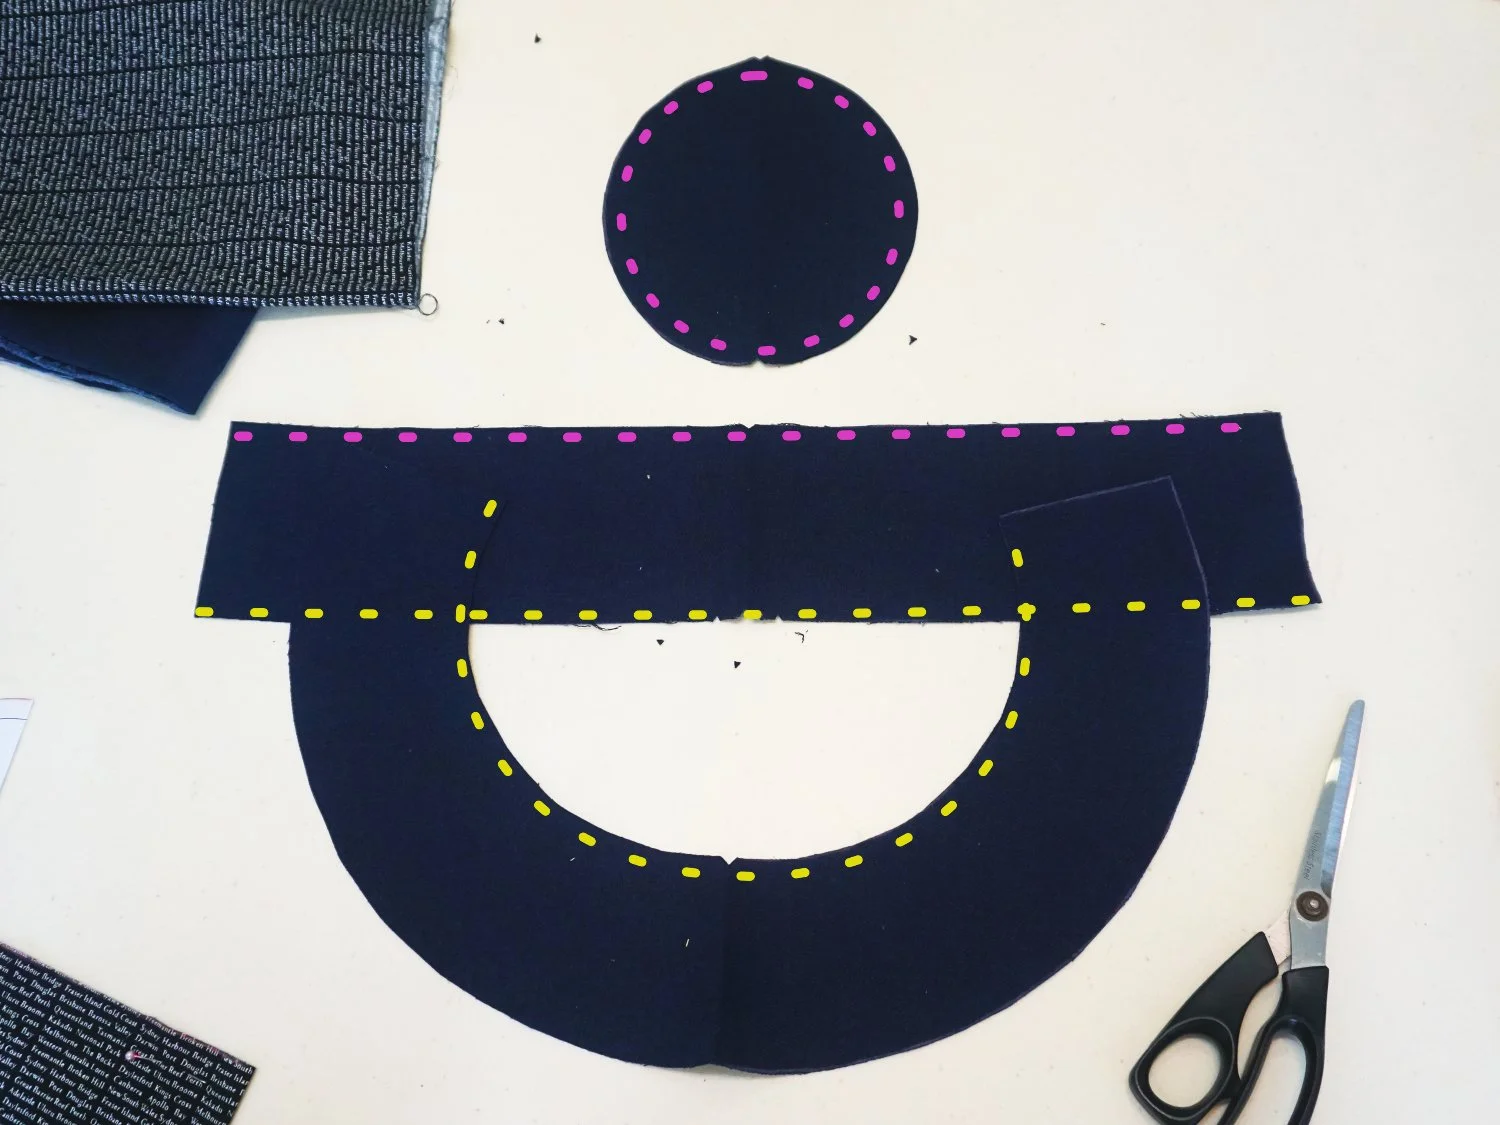
Here's a picture to help you visualise how the pieces come together. Pink dotted lines go together and yellow dotted lines go together. Basically, we will be attaching one long edge of the side band to the crown, and the other long edge of the side band to the inner circumference of the brim.
1. Mark fabric pieces with notches
Using sharp scissors, cut notches to mark the midpoints of the fabric pieces. Follow the crosses in the photo below to mark the notches.

After cutting the pattern pieces out, the notches should be located in the following spots marked out in circles below:


Do this for both main and lining fabric pieces. This will help you to align the pieces together more easily during the process of sewing later.
2. Sew side seams of side band and brim
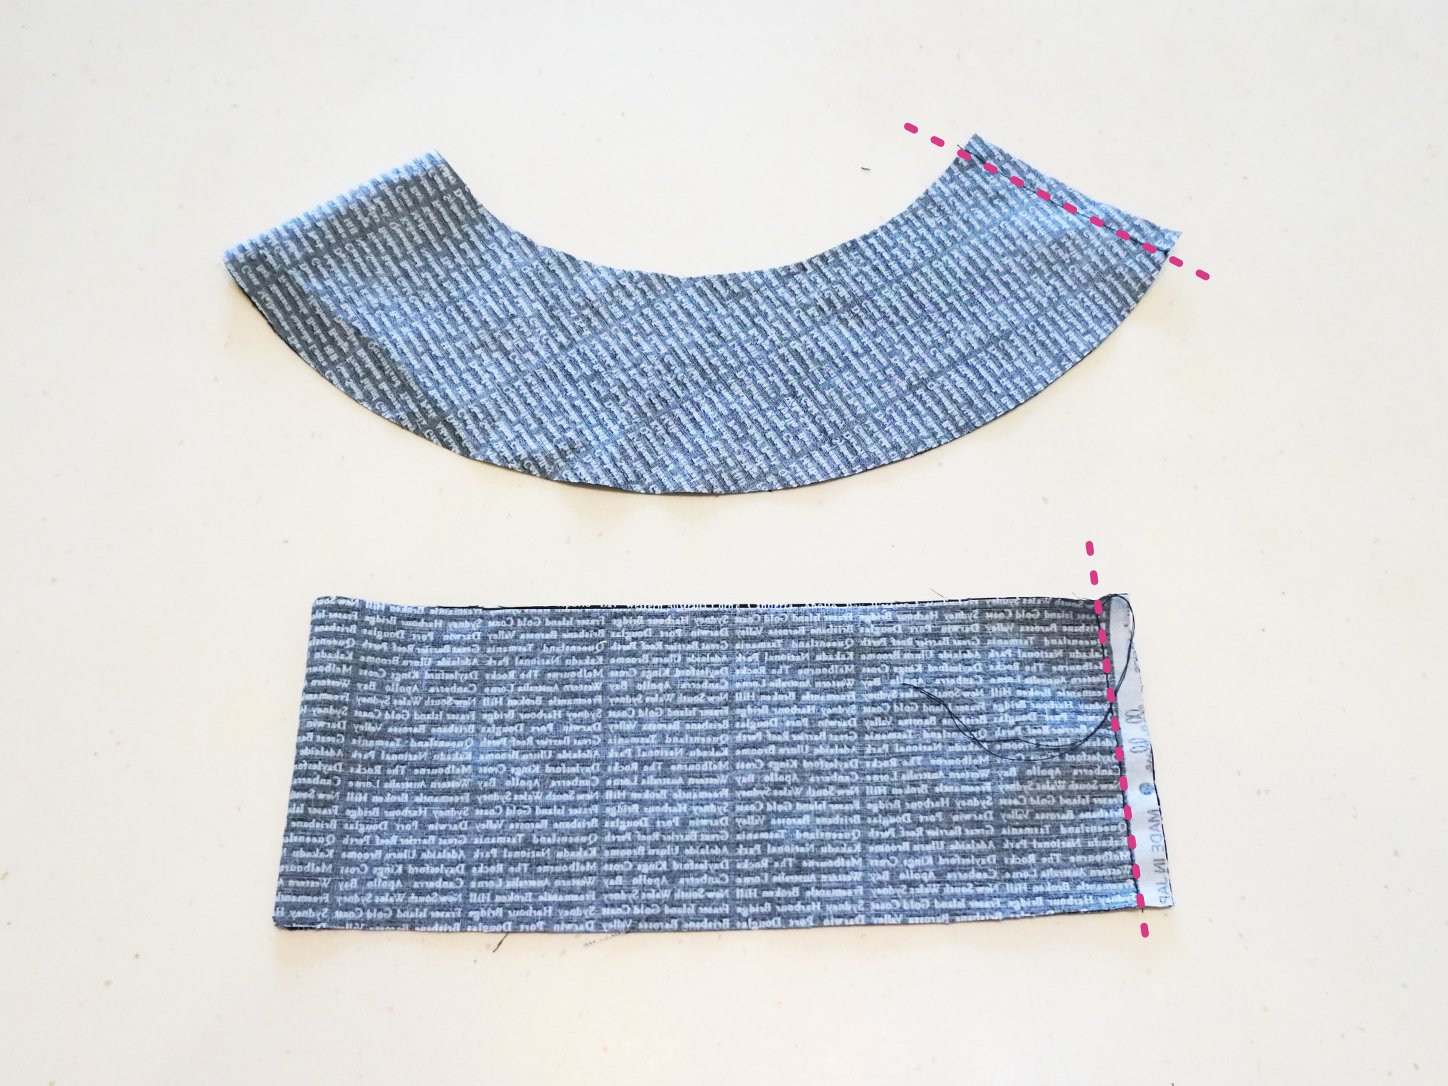
With RS together, sew the side seams of the side band and brim (see red dotted line). Do this for both main and lining pieces. Remember to use 1cm seam allowance!
3. Snip side band for ease

Using a pair of sharp scissors, make small snips of ~1/4" along the long edges of the side band (see red dotted line above). This is to make ease and to allow the side band to align with the rounded edges of the crown and the inner circumference of the brim.
These little snips will spread as you sew, and it is completely normal.
Do this for both main and lining pieces.
3. Sew side band and crown

Pin the side band to the crown, RS together. Start by aligning the notches, then pin the rest of the edges together. The notches act as a guide to ensure that the centre of the crown aligns with the midline and side seam of the side band.

Snips along the side band will spread as you sew. This is normal.
While sewing the side band and the crown together, it is normal for the snips on the side band to spread open (see red arrow).

After sewing, trim the seam allowance to approximately 1/4".
Do this for both main and lining pieces.
4. Sew side band and brim

First, pin the side band to the inner circumference of the brim. Similar to the previous step, align the notches and side seams together then pin the rest of the edge together.
Then continue to sew the side and the brim together, spreading the snips on the side band for ease as you go.

After sewing, trim the seam allowance to approximately 1/4".
Do this for both main and lining pieces.
5. Sew main fabric and lining together

By this stage, you will have both main and lining fabric pieces sewn together like a hat. Now, we need to sew them together.
With right sides together, pin the main and lining hat pieces together. Sew all along the brim with 1cm seam allowance, leaving a 3 - 4" opening to turn the hat right side out (see red dotted line). Backstitch at the start and end of this stitch line so that the stitches don't come undone when you turn the hat inside out.

After sewing, trim the seam allowance to approximately 1/8 to 1/4" all along the brim except the opening section.
6. Topstitch the brim

Turn the hat RS out and hand stitch the opening together. Make sure that the brim looks like a continuous circle when handsewing!

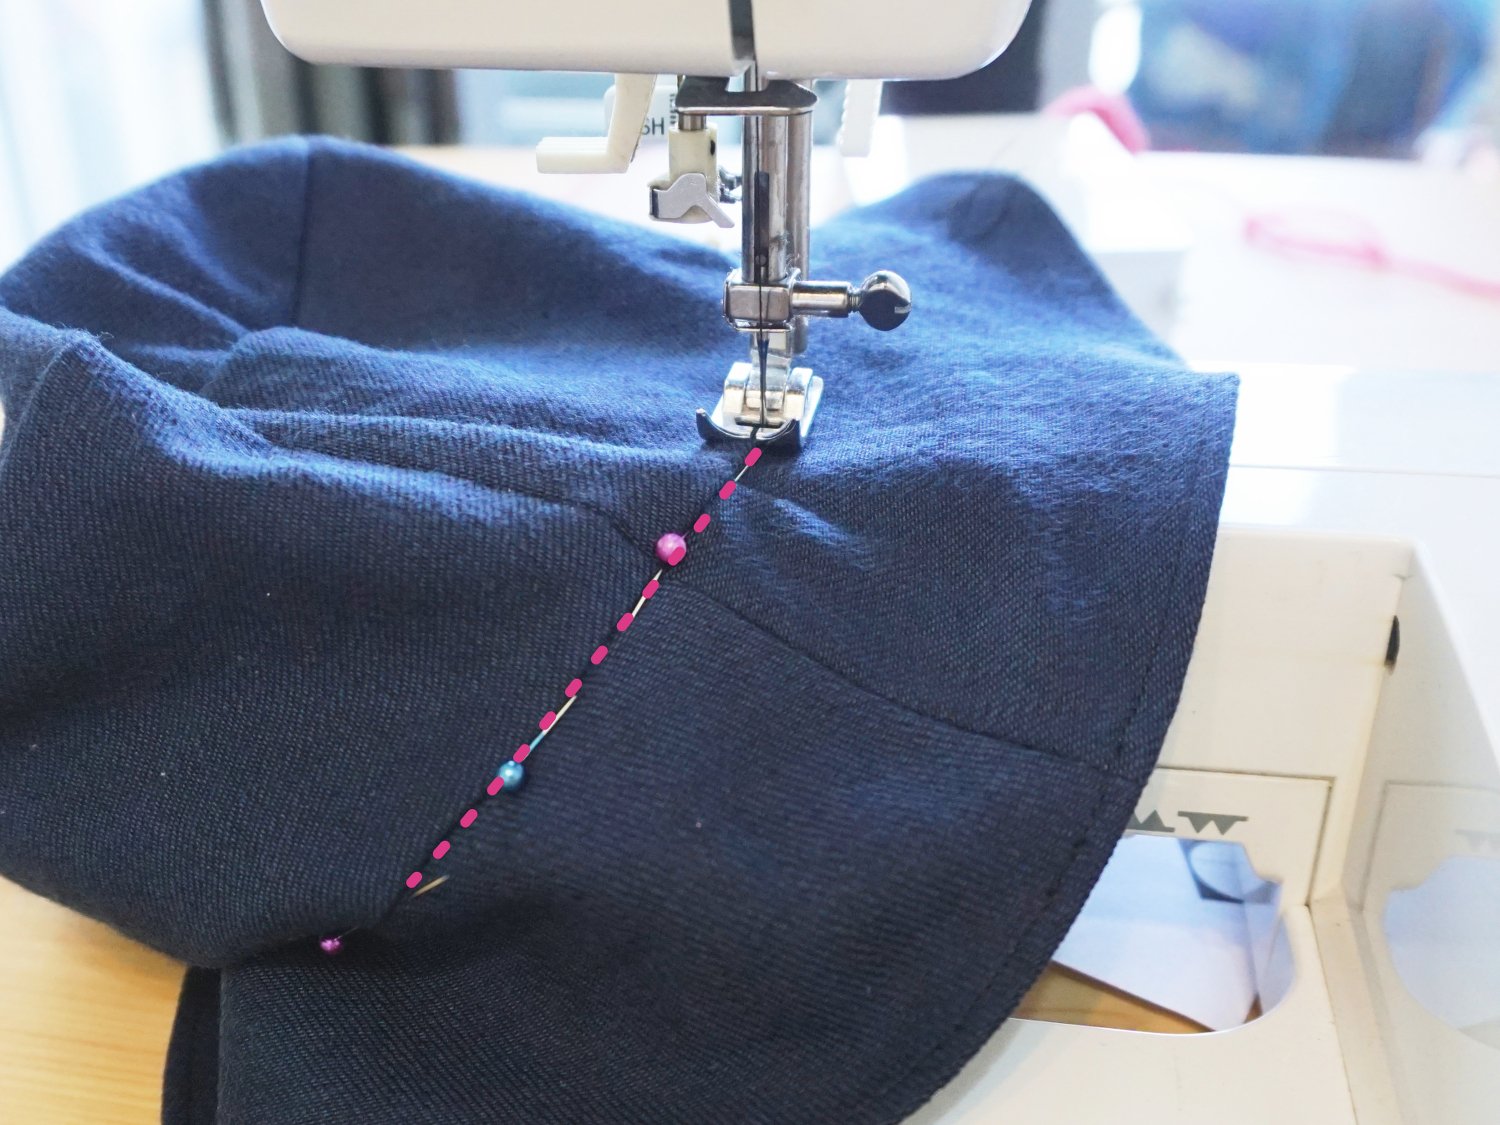
Finish with topstitching along the brim, approximately 1/8 to 1/4" from the edge (see pink dotted line).
7. Attach lining to main fabric
To prevent the lining from getting separated from the main piece too easily, I also suggest sewing the hat along the seam where the side band and the brim meet. You can topstitch along the bottom edge of the side band, or stitch in the ditch for an invisible finish like I did (see pink dotted line).
Stitching in the ditch will need more patience and sometimes the stitches don't end up in the right place on the inside of the hat, and that's okay especially when you are using a thread in the same colour as the lining or using a lining fabric with a busy print!

Making your own unique hat
And that's how to sew a hat using the free Cloche pattern from DRCOS's site! This hat is such a basic pattern, I recommend you to try something different once you have mastered the steps to sewing the basic pattern. Here are some suggestions for jazzing up a simple hat pattern:
Use a scalloped edge for the brim

I added a scalloped hem to one of my versions of the Burnside Bibs and you can use the same concept to add a scalloped edge to the paper pattern
Use a laminated cotton or other sturdy waterproof fabric for a rain hat

Why yes, I made a rain hat years ago and I might have made another one to go with my Raspberry Rucksack.
(Disclaimer: Laminated cotton is remnant fabric originally gifted to me by Minerva in exchange for a blog post)
Add a ric-rac while doing the topstitching
Or you can even go big and add a pom pom trimming along the edge of the brim like I did with my pineapple shorts ^_^
Supplementary video reference
If you think that you need a video to help you through the process of sewing, do follow my Instagram @gwenstella.made because I will be posting a short IGTV on how to sew a hat using the Cloche4 pattern!
Like this tutorial and value my work?
If you have found this tutorial helpful, please take a moment to share it with your friends. If you would like to, you can also buy me a Ko-Fi! x
