

How To Sew An Adjustable Apron
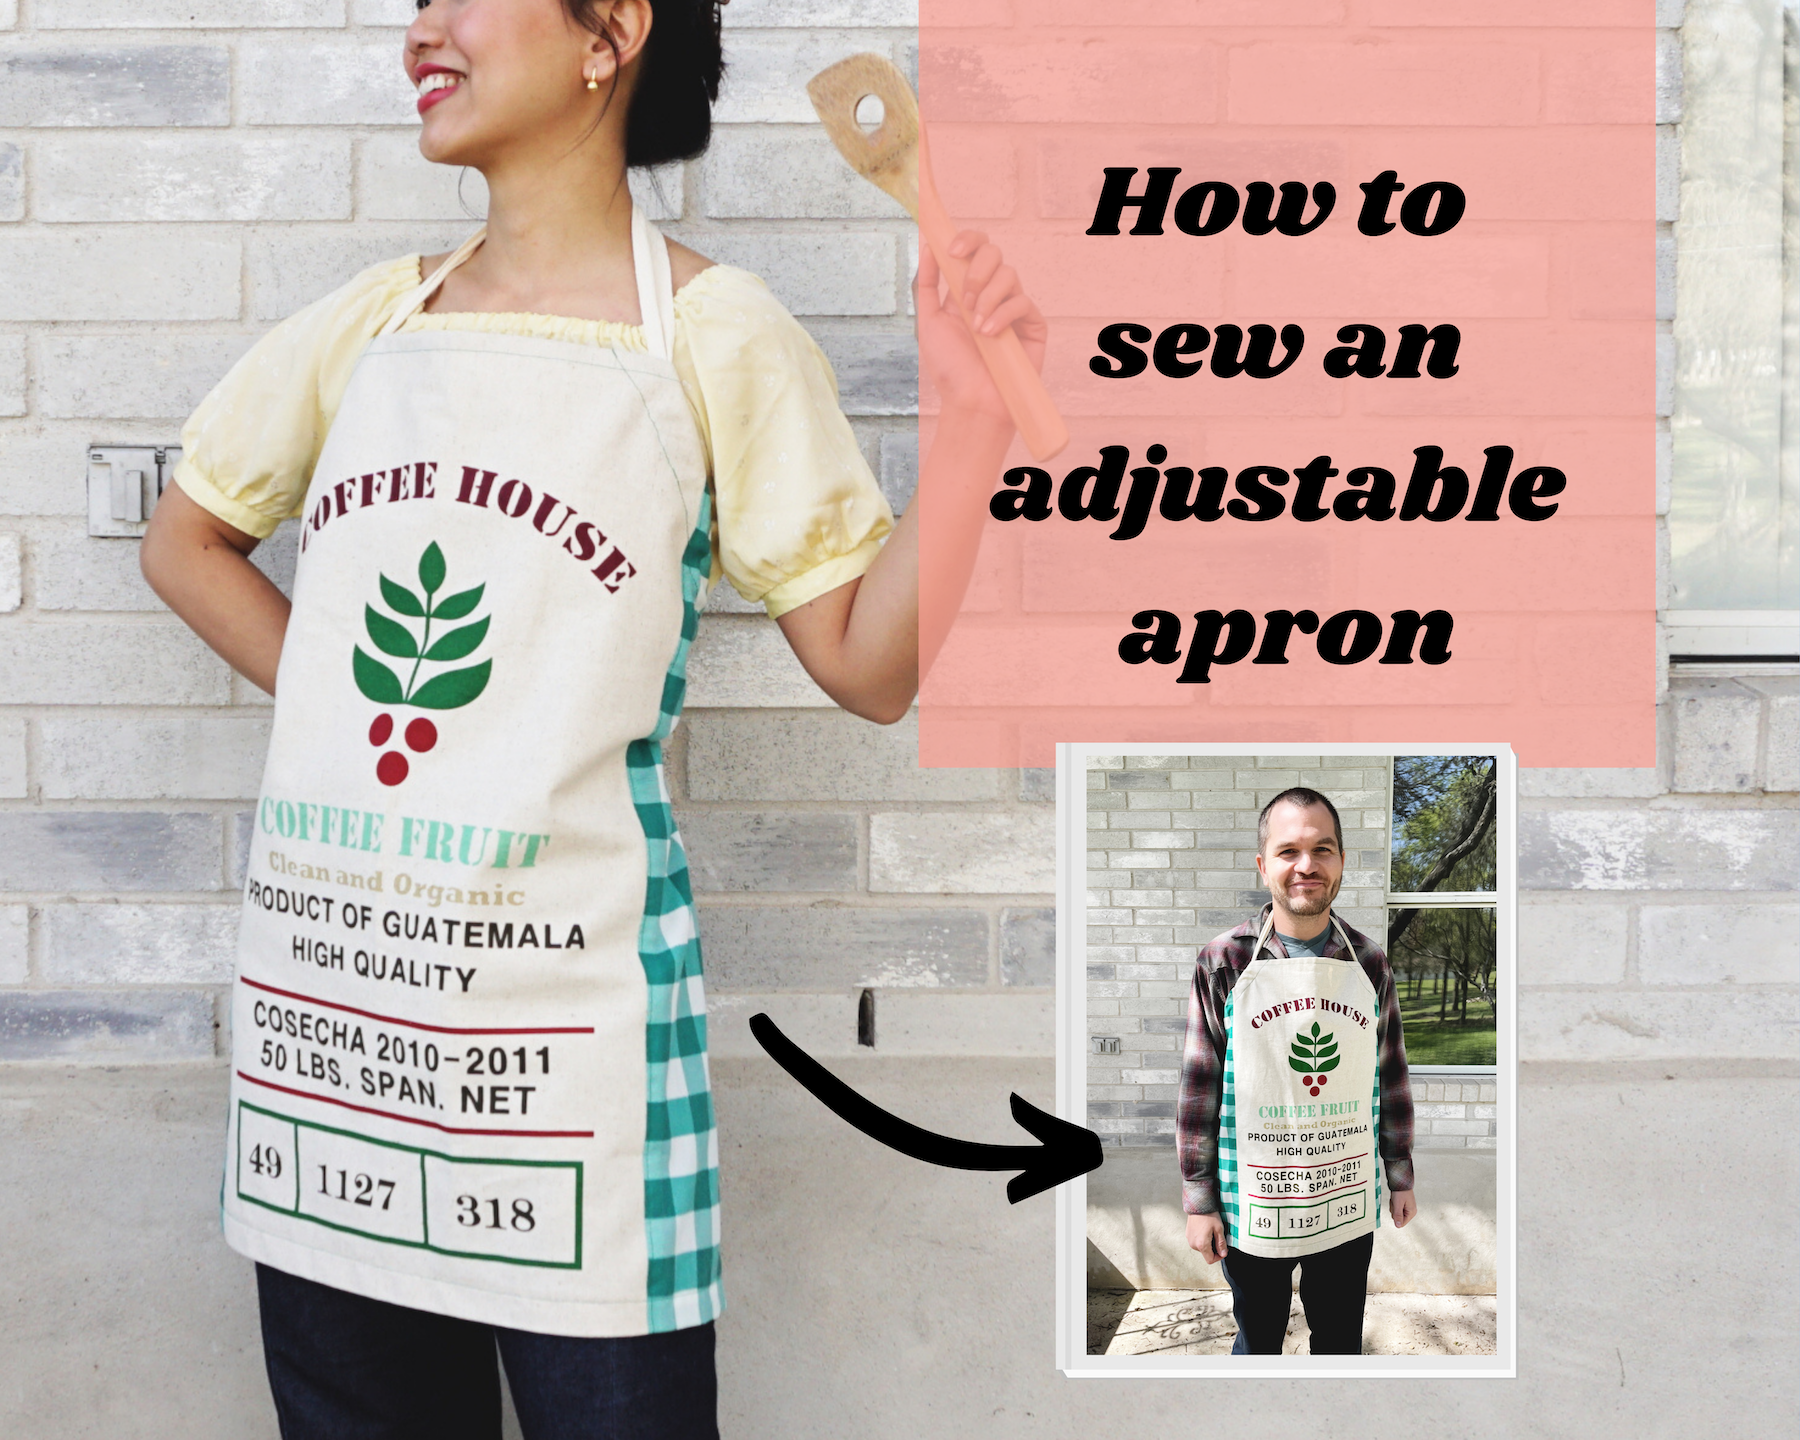
It has been only a few months since I moved to Texas and I am finding myself spending more time in the kitchen than ever. Other than learning to cook with produce that are more easily available here, I am also cooking dishes that remind me of home. And so, I decided it was time for me to make my own apron that I will love to wear - that's the beauty of knowing how to sew right? If you are thinking about making one as well, keep reading to learn how to sew an adjustable apron!
Project overview
This is a beginner-friendly and budget-friendly sewing project that requires less than 1 yard of fabric.
Finished measurements
The apron featured in this tutorial measures 12" long and 25.5" wide (excluding the strap).

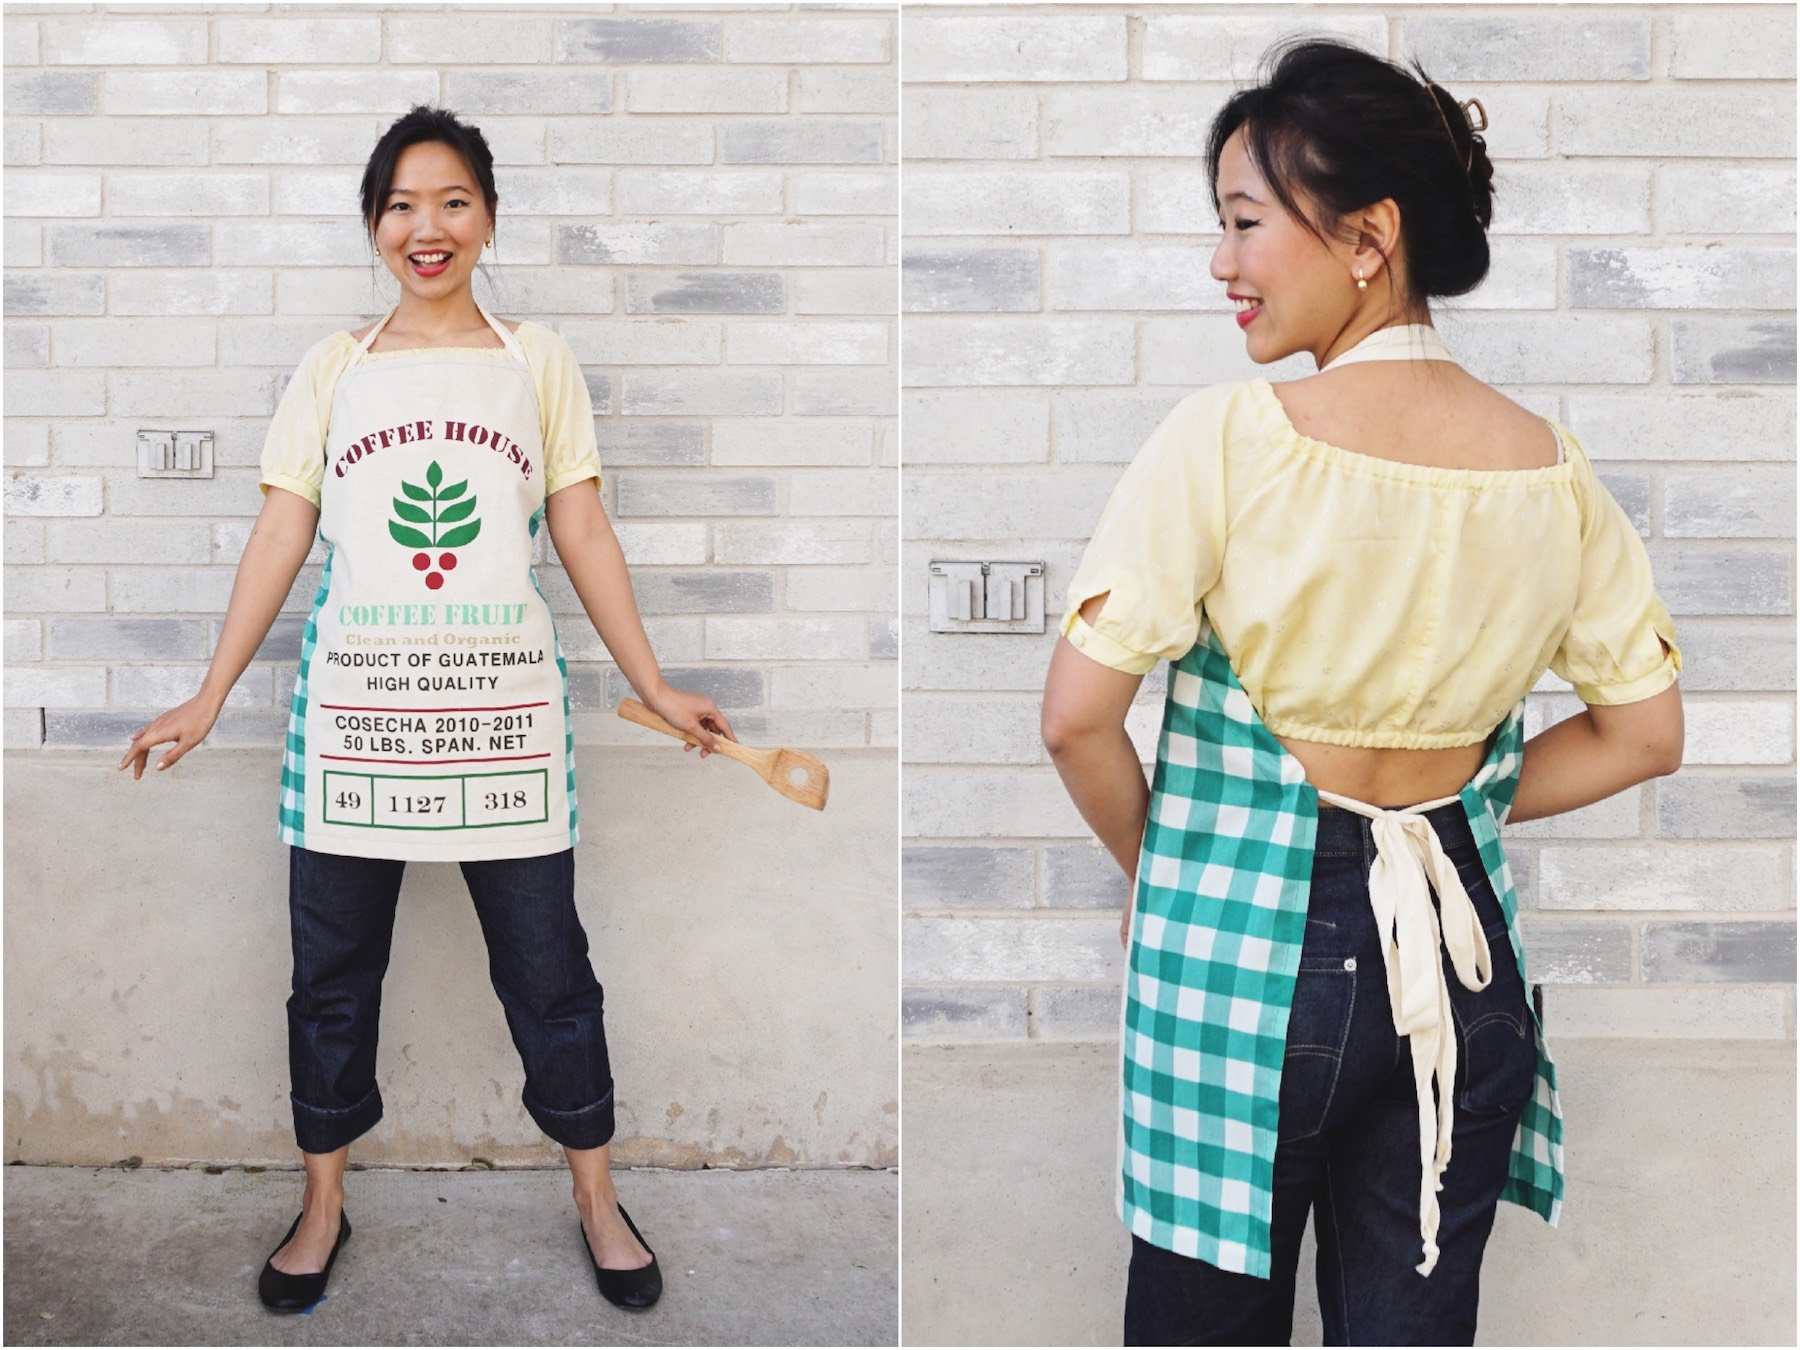
A collage of 2 photos with Gwen on the left and her husband Steven on the right. Both are facing the camera on the front to show the difference in fit for the same apron. The apron covers the whole front body for both individuals.
Front view with the same apron worn by myself and my husband

A collage of 2 photos featuring Gwen on the left and her husband Steven on the right. Both have their backs facing the camera. They are wearing the same apron. Gwen has the apron wrapping her sides while Steven has most of his back exposed.
Back view with the same apron worn on both myself and my husband
For reference, I am 5'2" / 157 cm tall with the body measurement of B31W26/H33. My husband (pictured), is approximately 6' 0" / 182 cm tall with 42" chest. As you can see, the apron covers the front for both of us. However, most of the back of my husband is exposed. Some tips on modifying the pattern to fit a different body size can be found at the end of this sewing tutorial.
Materials
Main body
0.8 yards of fabric (either 45" or 60" wide)
The main body can be sewn using a whole rectangular piece of fabric or pieced together using scraps like I did for mine. Whichever way you choose to make your main body, the only key is to make sure that the rectangle you are starting with is 28.5" x 30" as shown in Step 1 below.
Choose a light to medium-weight fabric for a basic kitchen apron. I suggest fabrics like linen and dress-weight cotton/polycotton for this.
Pick a heavier weight fabric for a hardier apron for rough work like carpentry and shoe-making. Fabrics like denim and canvas will work well for this purpose.
My own apron is made up of a fabric panel from Nesshome on the front, with a green gingham polycotton fabric (repurposed from an old sewing project) stitched to the sides to make up the main body.

Strap / tie
3 yards of cotton twill tape or grosgrain ribbon for the strap
The strap should be 1" wide. You may also wish to sew your own strap using the remainder yardage from cutting the main body for the apron.

How to sew an adjustable apron
Step 1
Cut a rectangle measuring 28.5" x 30".

If you are stitching up scrap pieces of fabrics together to make up this rectangle, you can also press the seam one side and topstitch the seam down for a more polished finish.

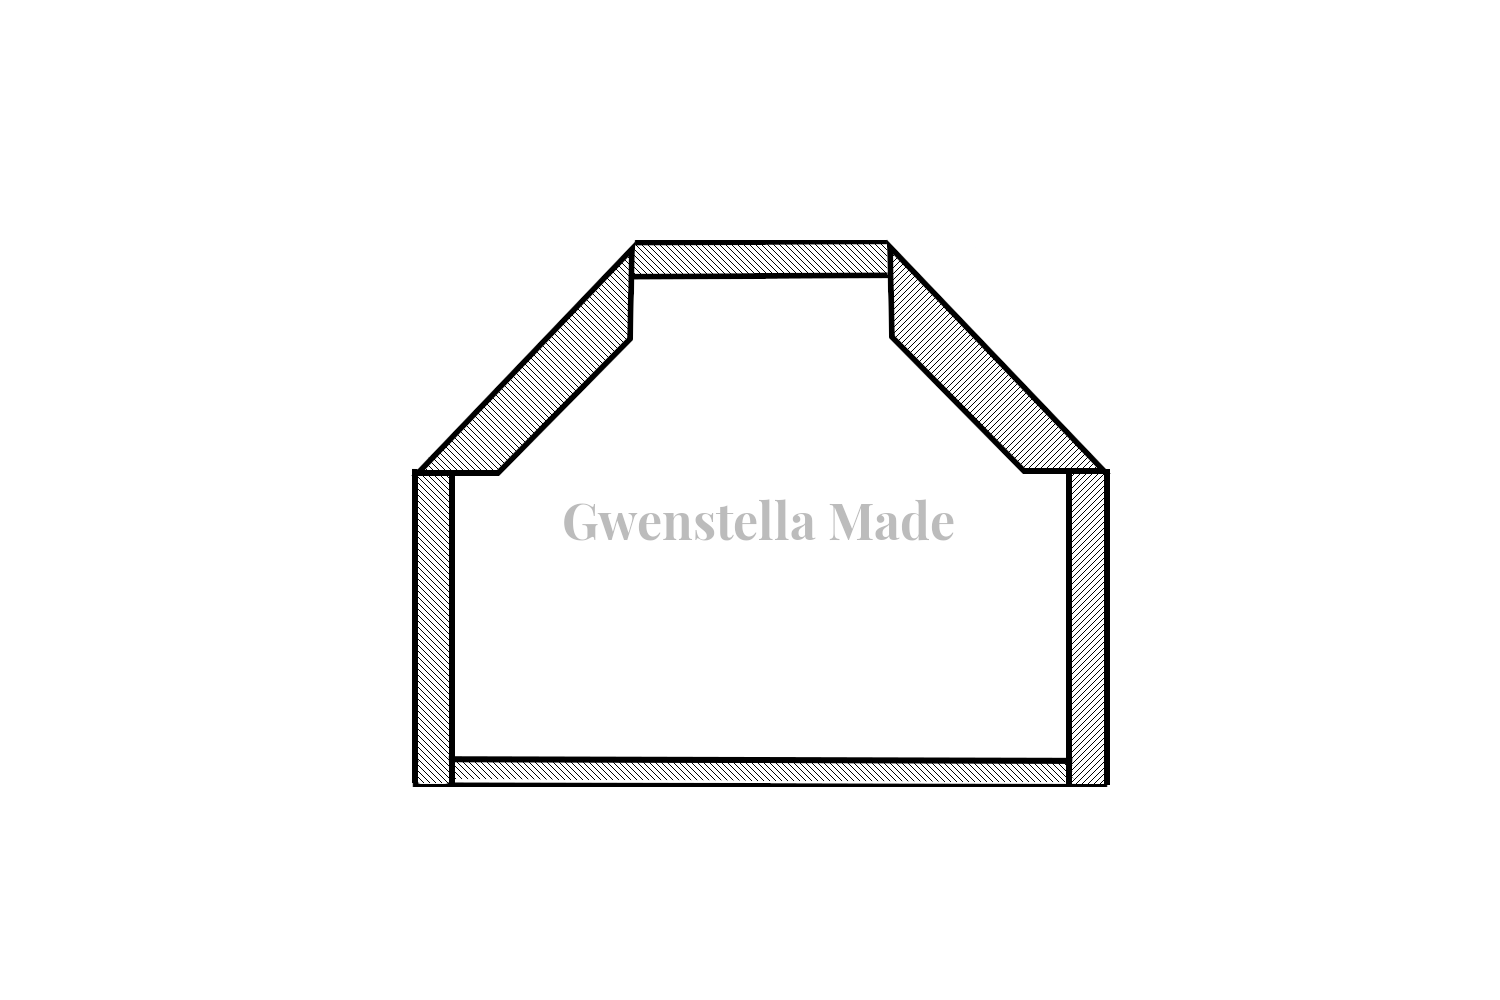
Step 2
Cut triangles off the top corners

Using a straight ruler and the diagram below as a guide, cut a triangle off the top left and right corners of the rectangle.
Step 3
Sew double-fold hems along the top and bottom of the apron.
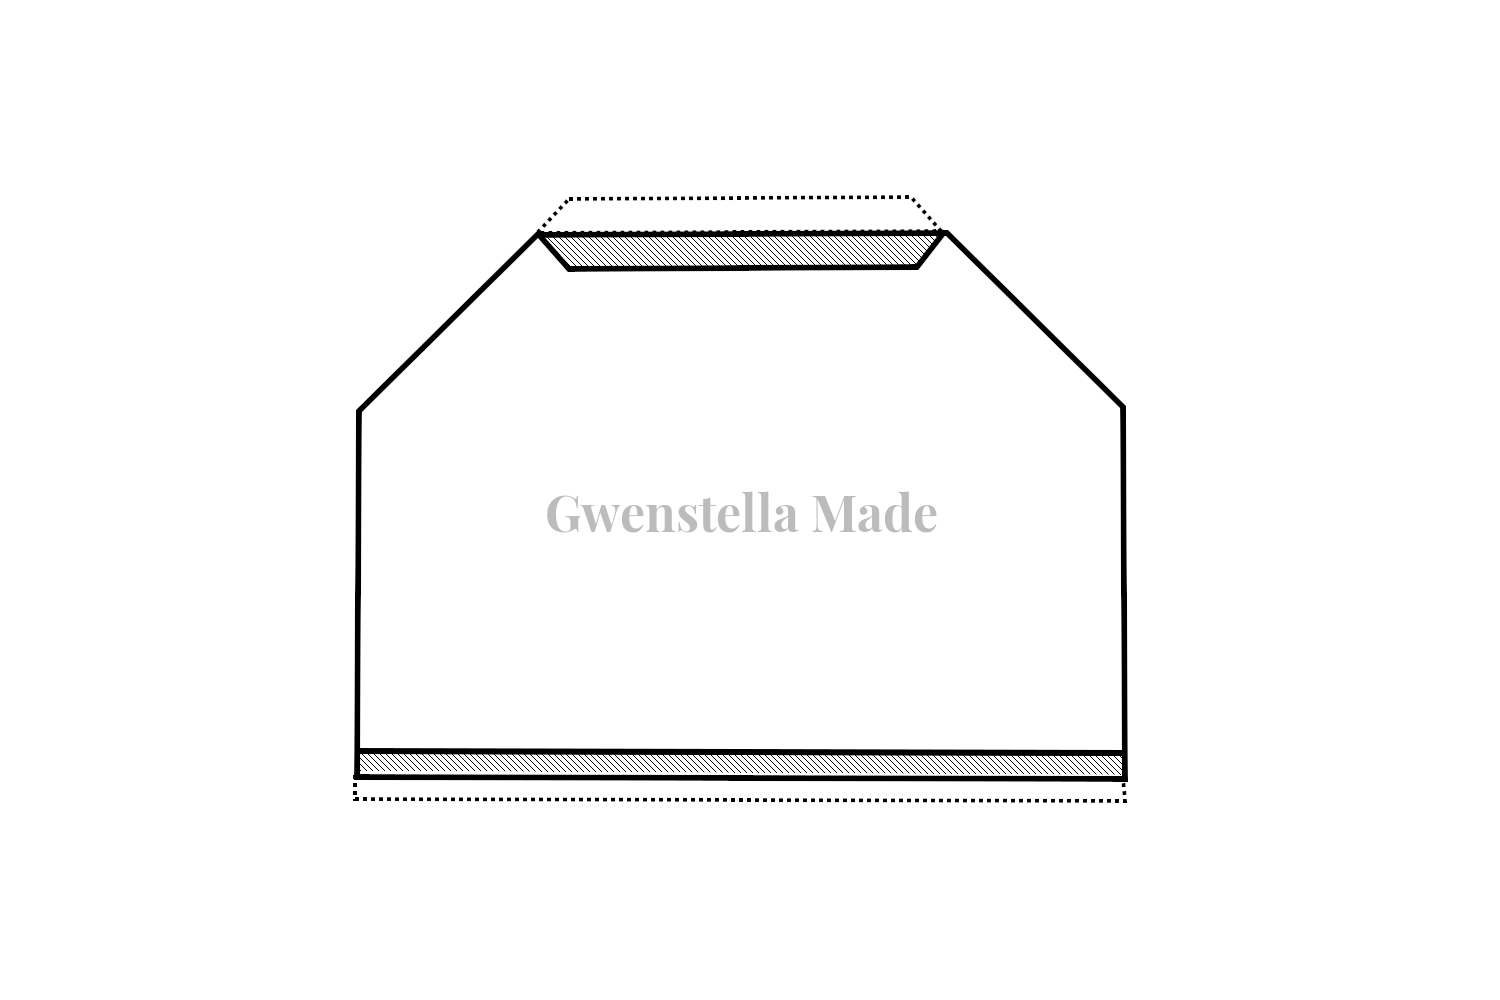
Start by folding 0.5" of the raw edge towards the WS, then fold another 0.5" towards the WS. Press double-fold hem with an iron, then stitch hem in place (see blue lines).

Do this for both the top and bottom edges of the apron.
Step 4
Sew double-fold hems along the sides of the apron

Start by folding 0.5" of the raw edge towards the WS, then fold another 0.5" towards the WS. Press double-fold hem with an iron, then stitch hem in place (see blue lines).
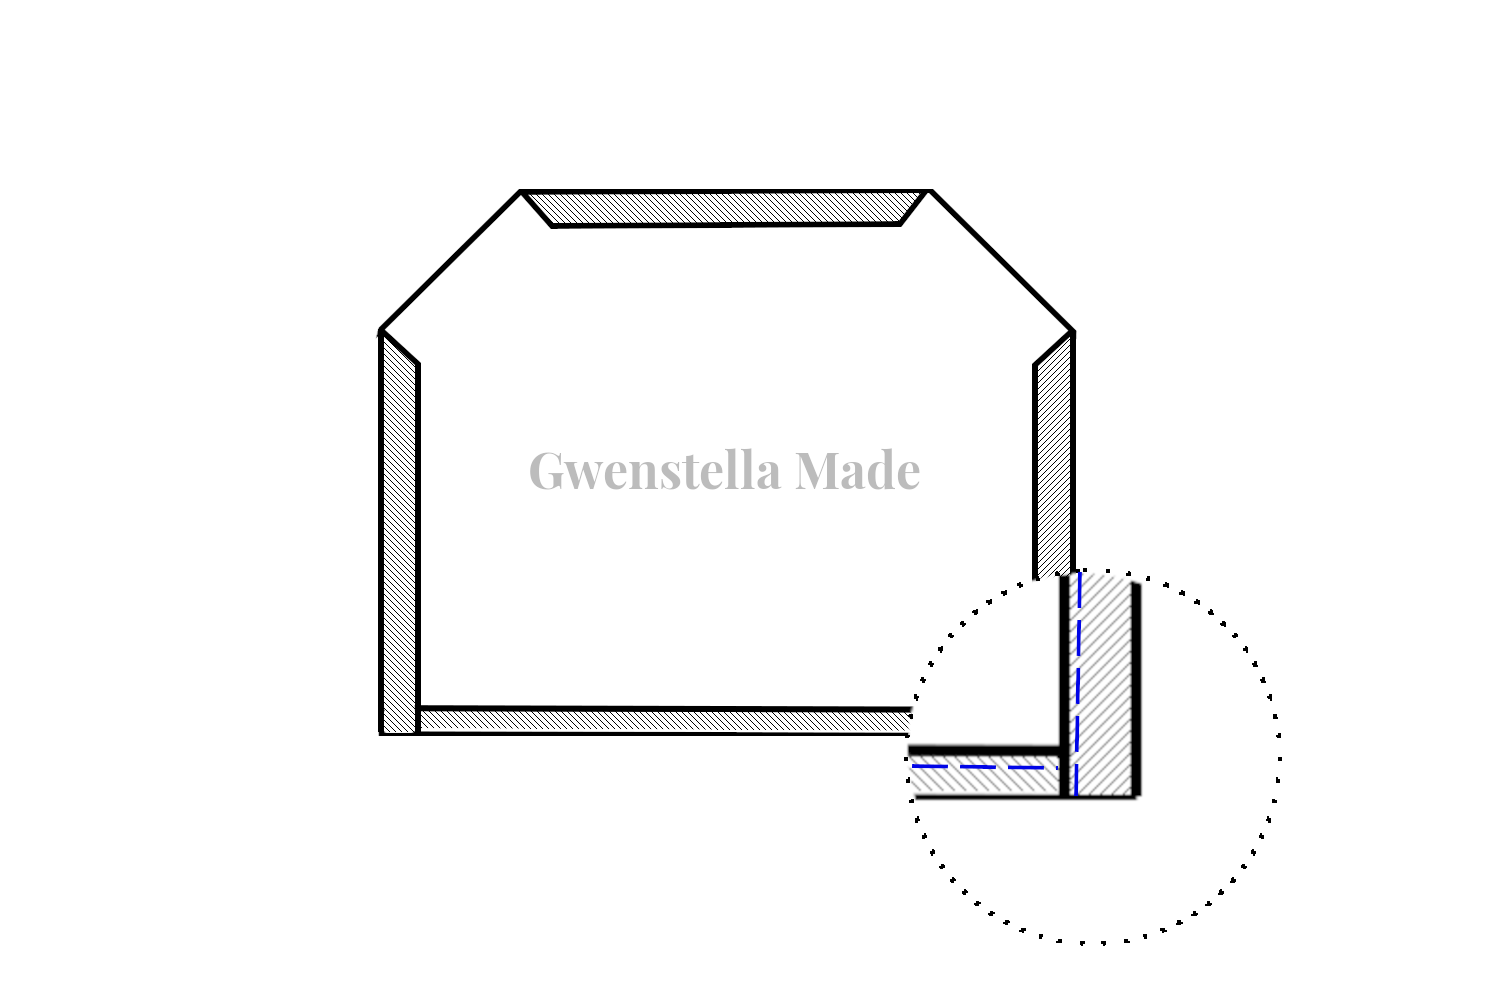
Do this for both left and right sides of the apron.
Step 5
Sew channels for inserting adjustable straps
Begin by folding 0.5" of the raw edge towards the WS, then fold another 1". Press double-fold hem with an iron, then stitch hem in place (see blue lines).

Do this for both sides of the apron.
Step 6
Insert straps and stitch in place
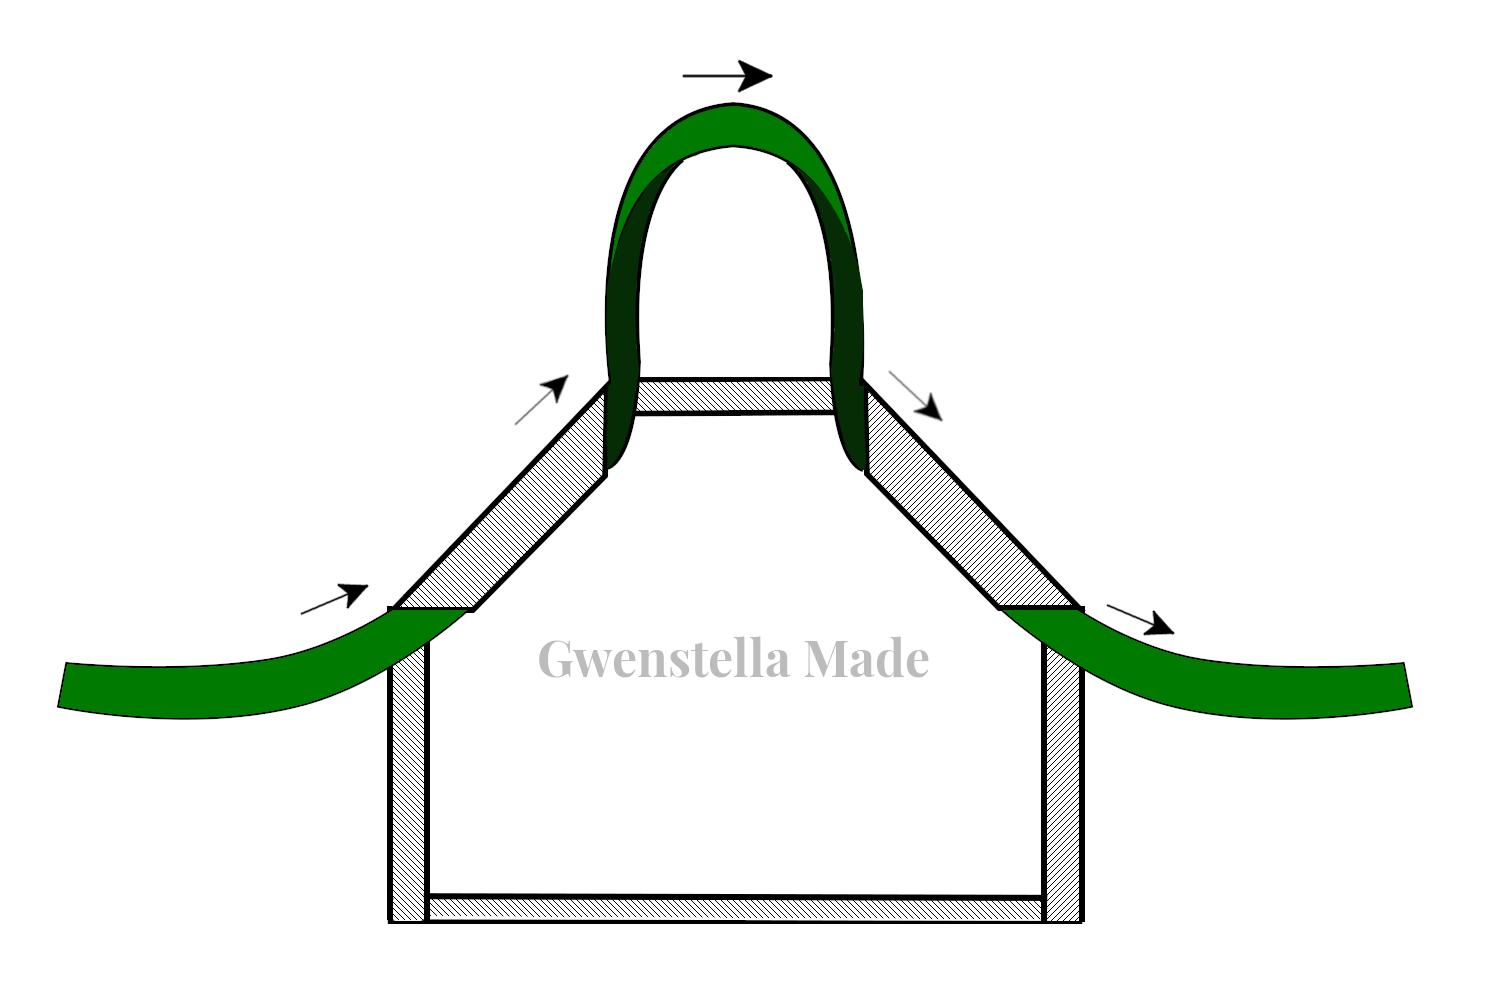
Start with the WS of the apron facing you. Place a safety pin at one end of a continuous length of grosgrain ribbon or cotton twill tape (i.e. uncut from the rest of the spool). Then, thread the ribbon/tape through the channels in the direction as shown in the diagram.
Try the apron on to determine the desired length of strap you want. If you prefer wearing your apron with the ties on the front of your body and/or lower from the bottom of your neck, you will end up requiring a longer length of ribbon/tape.
Cut the desired length of ribbon/tape. For a more finished look, you may seal the raw cut edges by folding and sewing the edges. If you are using a polyester grosgrain ribbon, you may seal the raw cut edges simply by burning the raw edge.
For my apron, I simply used an overhand knot to prevent the ends of the cotton twill from fraying!

Finally, adjust the strap so the ends on each side are the same distance from the apron and that the midpoint of the strap will sit on the back of the neck. Then, pin and stitch the strap in place along the bottom of the channels. Sewing the stitch the straps in place at the bottom


There you have it! You have finished sewing your adjustable apron. This apron is adjustable because the strap is not completely sewn in position. It can be placed over the head easily, and worn with ties on the front or the back.
Modifying the adjustable apron
Using different material for the straps
Since cotton twill tape and grosgrain ribbon may not be in everyone's sewing basket, you can utilise the remaining yardage from the fabric to make your own 1" wide strap. However, you will have to pin the apron to your body to determine the length of strap you need before sewing.
If you are making the main body of the apron with a heavyweight fabric for use in a workshop (e.g., carpentry, bike maintenance), I suggest using a medium-weight cotton webbing to "match" the main body. You can also use a narrow leather strap and screw-on rivets for a more professional look! ;)
Making a larger size
As shown in the image above, this apron is able to cover the front of my husband's body but leaves most of his back exposed. Also, the apron sits above the middle of his thighs. As mentioned, my husband is 6' 0" / 183 cm tall with a 42" chest.
To make an apron to fit a wider body, simply start with a rectangle that is wider, i.e. 28.5" by (30" + desired increase in width). To make an apron to fit a taller body, start with a rectangle that is longer, i.e. (28.5" + desired increase in length) by 30".
Share your makes with me!
I hope you enjoy this beginner-friendly tutorial on how to sew an adjustable apron. If you do make an apron using my tutorial, do tag me or drop me a comment so I can have a look!