

How To Draft A Petal Hat (for all ages and sizes)

A few posts ago, I shared a step-by-step sewing tutorial on how to sew a reversible bucket hat using a free pattern available on DRCOS's site. I have been experimenting with different hat patterns since and came across this adorable "Flop Hat" that is also available on DRCOS's site. Currently, my Instagram friend Wendy (@bbreath.designs) and I are hosting a Petal Hat Sewalong on Instagram using this design. We have named it "Petal Hat" because it reminds us of the petals on a flower! The free printable pattern available on DRCOS's site is a great go-to for people with access to a printer. However, similar to my Hybrid Face Mask design, I know that not everyone has access to a printer so I have written a tutorial for drafting this pattern for your own size. Besides, it's always great to have the ability to draft a pattern according to your size especially when it's a small project like this! So, here is a tutorial on how to draft the Petal Hat for any size. By following the drafting instructions in this tutorial, you will be able to make a petal hat for all ages and head sizes!

The Petal Hat worn right side out

The Petal Hat worn inside out - yes, it's reversible!
Gathering the materials
Before drafting, gathering the following materials:
measuring tape
paper (1 - 2 pieces of A4 or US letter)
pen and/or pencil
straight ruler
Optional
French curve ruler
Measuring the head
This step is important to draft the Petal Hat pattern for any size.

Measuring the circumference of the hat

Measuring across the head from ear to ear
Using a measuring tape, measure the following parts of your head:
Circumference of your head - this is where the widest part of the hat sits on your head
Across the top of the head from ear to ear - this is how tall the hat will be
We will be starting our drafting with 2 measurements: A & B
A = across the top of the head from ear to ear
B = circumference of your head + 2cm (3/4") for ease
Make sure you have A & B measurements written down because we will be using them for drafting the petal hat pattern!
Drawing Tips
To draft this pattern, we will be starting with straight lines and then using them as guides to draw the final figure. We will be drawing straight lines that are parallel and/or perpendicular to each other. Make sure that your straight lines are not swaying left or right at an angle. If you have access to grid paper and long straight ruler, that will be helpful too.
The final outline is made up of gentle curved lines. You may wish to draw them with a free hand, or use a French curve ruler to help you.
You may make mistake while drafting, so if this is your first try at drafting, start with a pencil. Once you are happy with the final figure, you may outline the final pattern with a dark pen or marker.
Start drawing at the centre of the paper. At any point when you have to draw outside the paper, attach another piece of paper for more space to draw.
How to draft the Petal Hat Pattern for any size
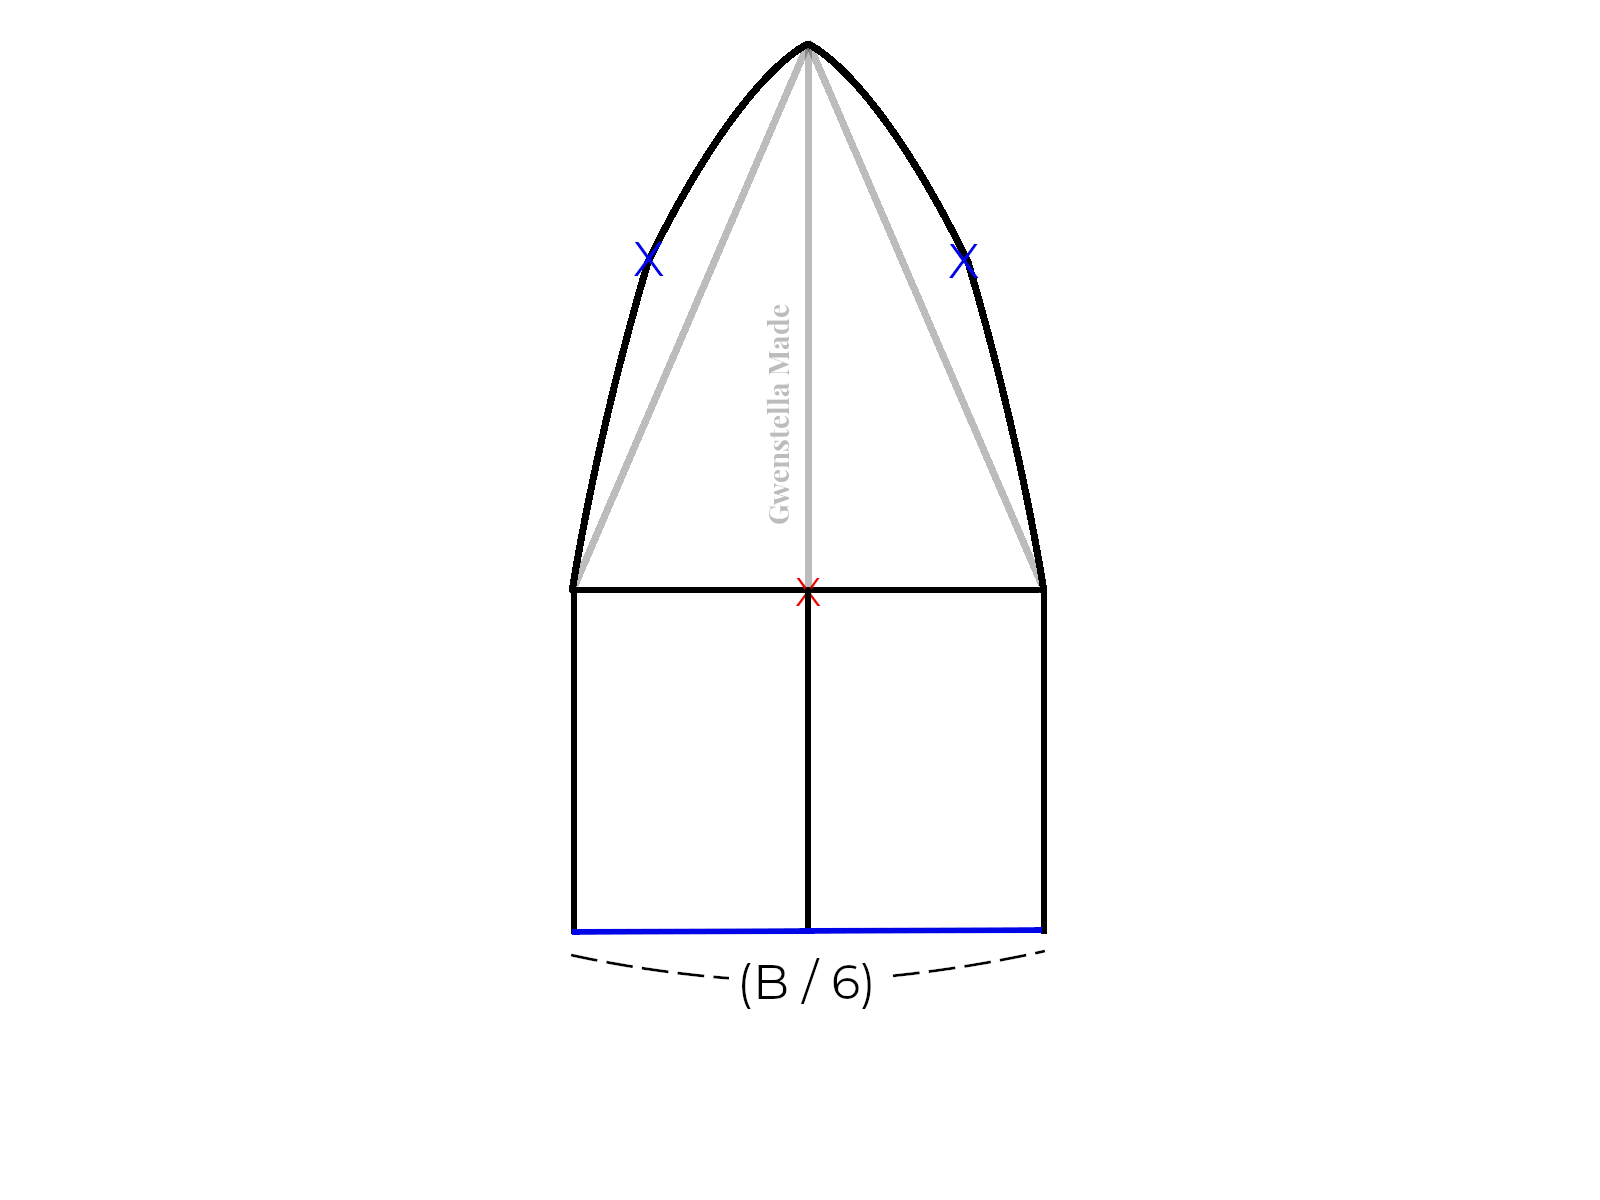
Step 1
Using a straight ruler and a pen, draw a horizontal line measuring (B / 6). Mark the midpoint with an ‘X’.
[See blue lines and red X]

Step 2
Starting from the midpoint, draw a line perpendicular to the horizontal line. This line is (A / 2) long.
[See blue lines]

Step 3
Join the lines with 2 more straight lines to make a triangle.
[See blue lines]

Step 4
Draw a horizontal line 7cm (2.75”) from the top of the triangle. Using this horizontal line as a guide, mark a point 1cm (3/8”) outside the triangle.
[See blue lines and blue X]

Step 5
Draw a convex curve joining the top of the triangle, blue X, and the bottom of the triangle. You may use a french ruler to help or do free-hand drawing.
[See curved blue lines]


Suggested use of French curve ruler
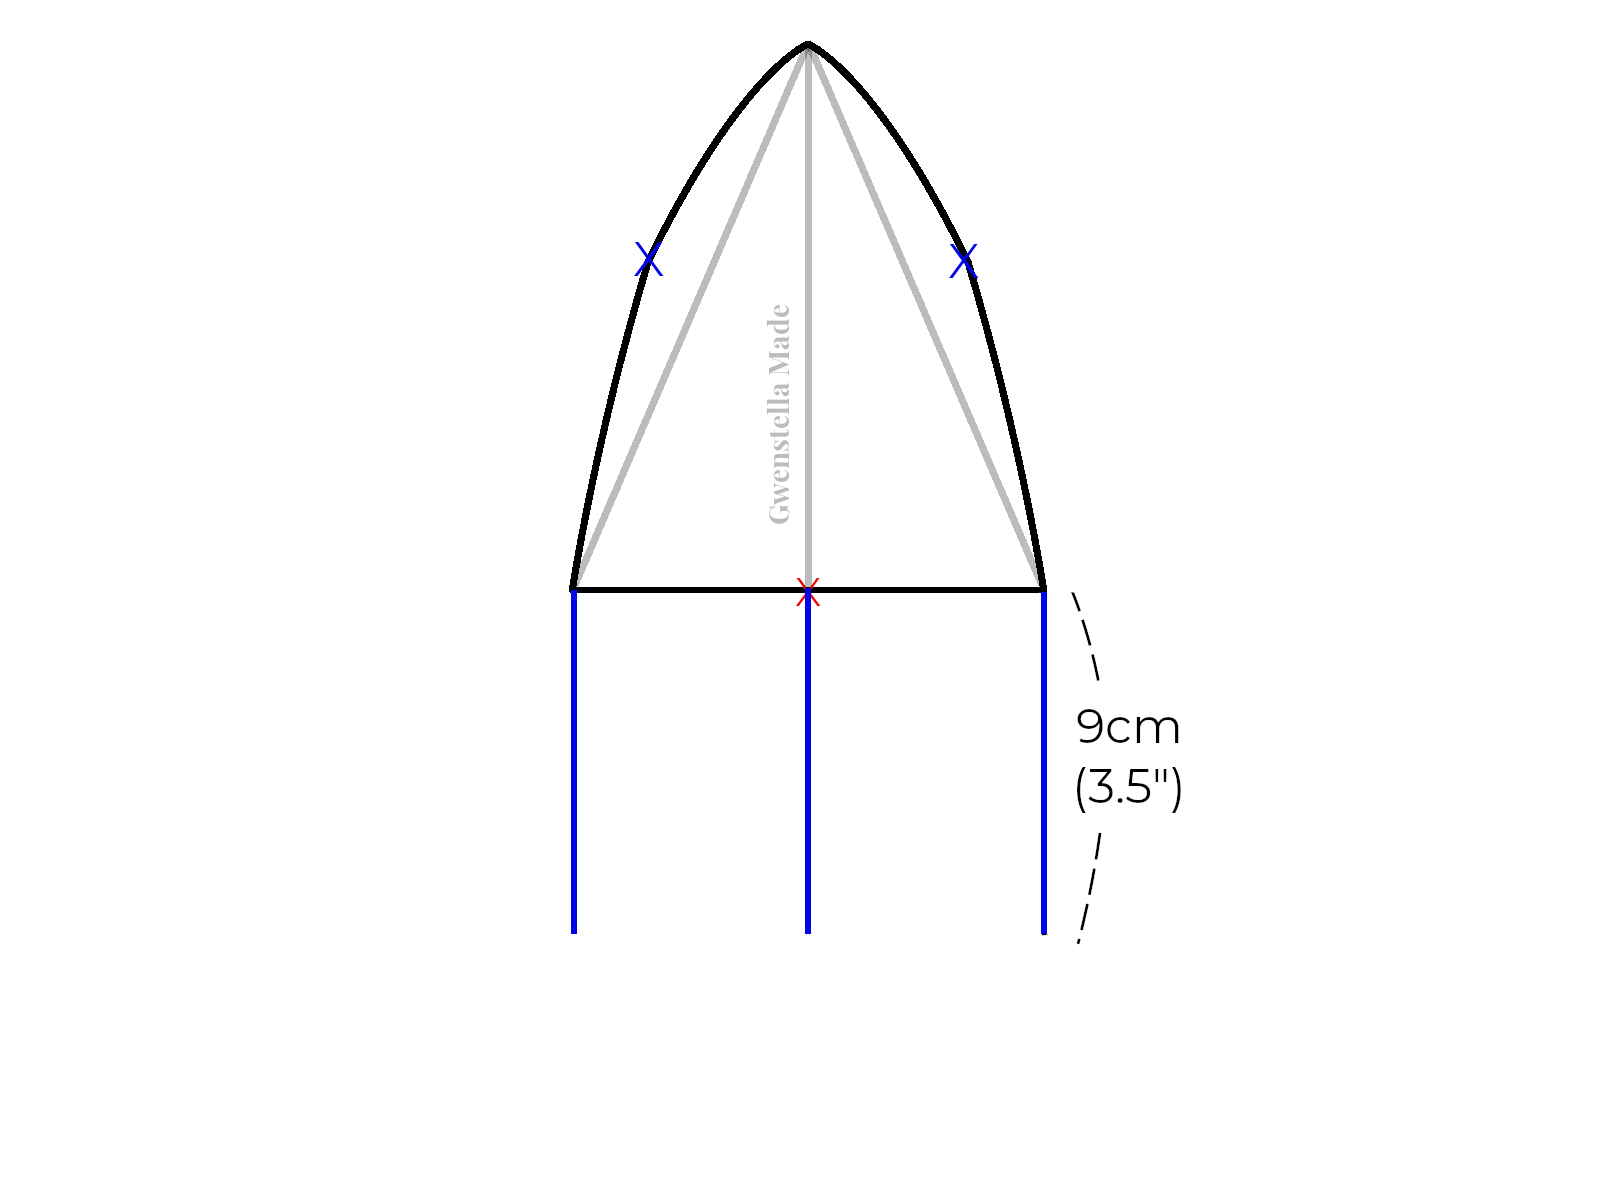
Step 6
Using the midpoint marked ‘X’ and the bottom corners of the triangle as starting points, draw 3 vertical lines. Each vertical line is 9 cm (3.5”) long.
[See blue lines]
Step 7
Join the end of all 3 vertical lines with 1 horizontal line at the bottom. This horizontal line should measure (B / 6).
[See blue line]
Step 8
Mark a point 2cm (0.75”) to the left and right of the bottom of the rectangles. Do this for both sides.
[See blue lines and blue X]

Step 9
Draw a concave curve from one end of the middle horizontal line of the figure to the blue X. Do this for both sides. This curve is very gentle, almost like a straight line.
[See blue lines and blue X]


Suggested use of French curve ruler
Step 10
Mark a point 0.75cm (1/4”) below the vertical line in the middle of the figure.
[See blue line and green X]

Step 11
Using the 2 blue X and middle green X as a guide, draw a convex curve at the bottom of the figure.
[See blue line, blue X and green X]


Suggested use of French curve ruler
Step 12
Add a 1cm (3/8”) seam allowance along the entire figure and you have finished drafting your hat pattern!
[See blue line]

Ready to sew?
Well, after you have drafted the Petal Hat pattern for any size, the next step is to sew the pattern! Wendy and I will be sharing the steps to sewing in the coming weeks. Subscribe to my Youtube channel (Gwenstella Made) for a step-by-step sewing tutorial on how to sew the petal hat. Don't forget to also follow Wendy (@bbreath.designs) and me (@gwenstella.made) on Instagram if you are interested in getting additional inspiration on how to modify this basic hat pattern!