

How to sew a cardigan with rectangles
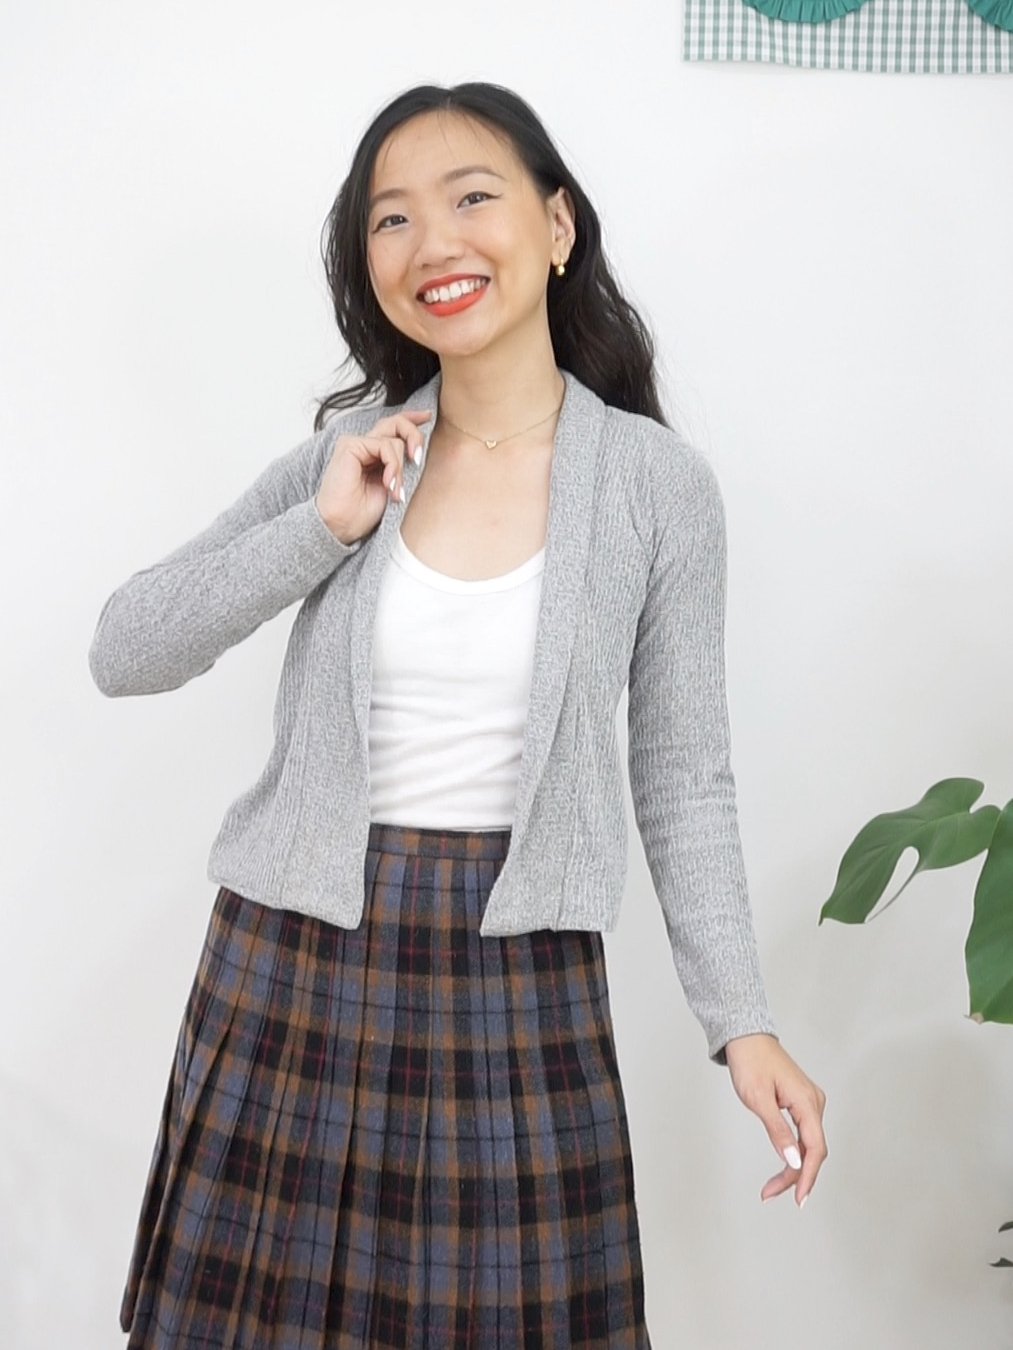

Have you ever tried sewing with just rectangles? I probably have made the “rectangles only” skirt with an elasticised waistband sometime during my first 2 years of sewing. I haven’t tried sewing with just rectangles in a long time and was curious to see how it would work with a design that’s not a skirt. And so, I tried this sewing project as a little sewing experiment. See how to sew a cardigan with rectangles in this blog post!
The design


The concept for this design is pretty straightforward. The cardigan is made up of the following rectangular pieces:
Back: 1 x large rectangle
Front: 2 x narrow rectangles
Collar: 2 x long rectangles
Sleeve: 2 x quadilateral
So, the sleeve pieces are not technically rectangles but a 4-sided polygon (i.e. quadilateral) that is drawn FROM a rectangle first. I’ll explain that in just a bit after going through the body measurements you need to take for drafting the rectangles.
Measuring the body
Before drafting the rectangle pattern pieces, take the following body measurements with a measuring tape:
shoulder to mid hip

This is basically the length of the cardigan. Make sure your measuring tape goes over the fullest part of the front of your body.
If you want a cropped cardigan, take the length of your shoulder to waist. If you want a dress-length cradigan, take the length of your shoulder to knees… or longer!
Shoulder to shoulder
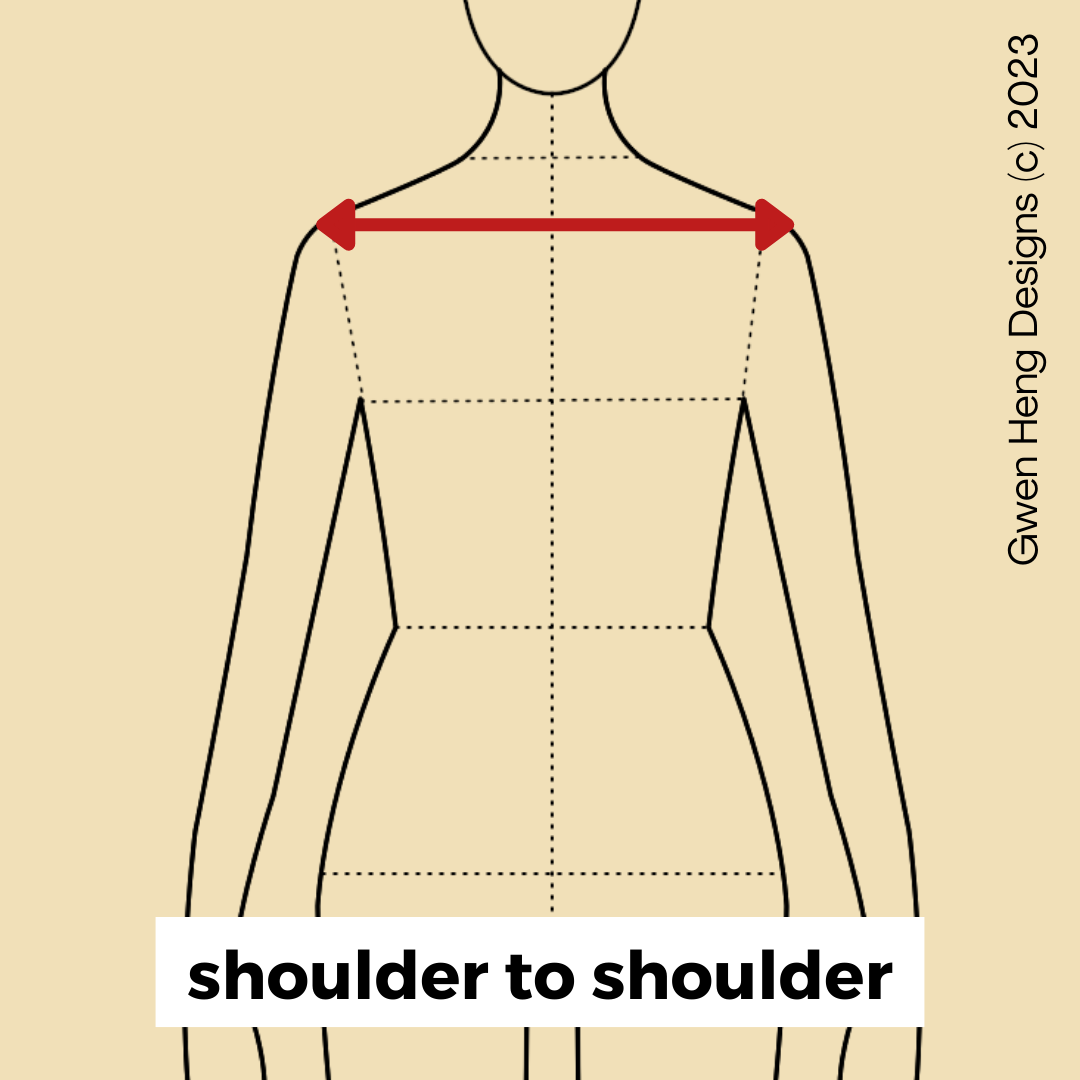
ALTERNATIVE TO SHOULDER-TO-SHOULDER:
Bust OR underbust divided by 2
One of my viewers on Youtube suggested measuring the bust instead of shoulder-to-shoulder for a better fit. I think that’s a fabulous idea!
I’m pretty petite so taking the measurement of the bust or shoulder-to-shoulder doesn’t make a big difference. But if you’re curvy, this is probably a better option.
So, if you’re curvy, take the measurement around your bust and divide it by 2. Also, if your underbust is bigger than your bust, then take that measurement instead.
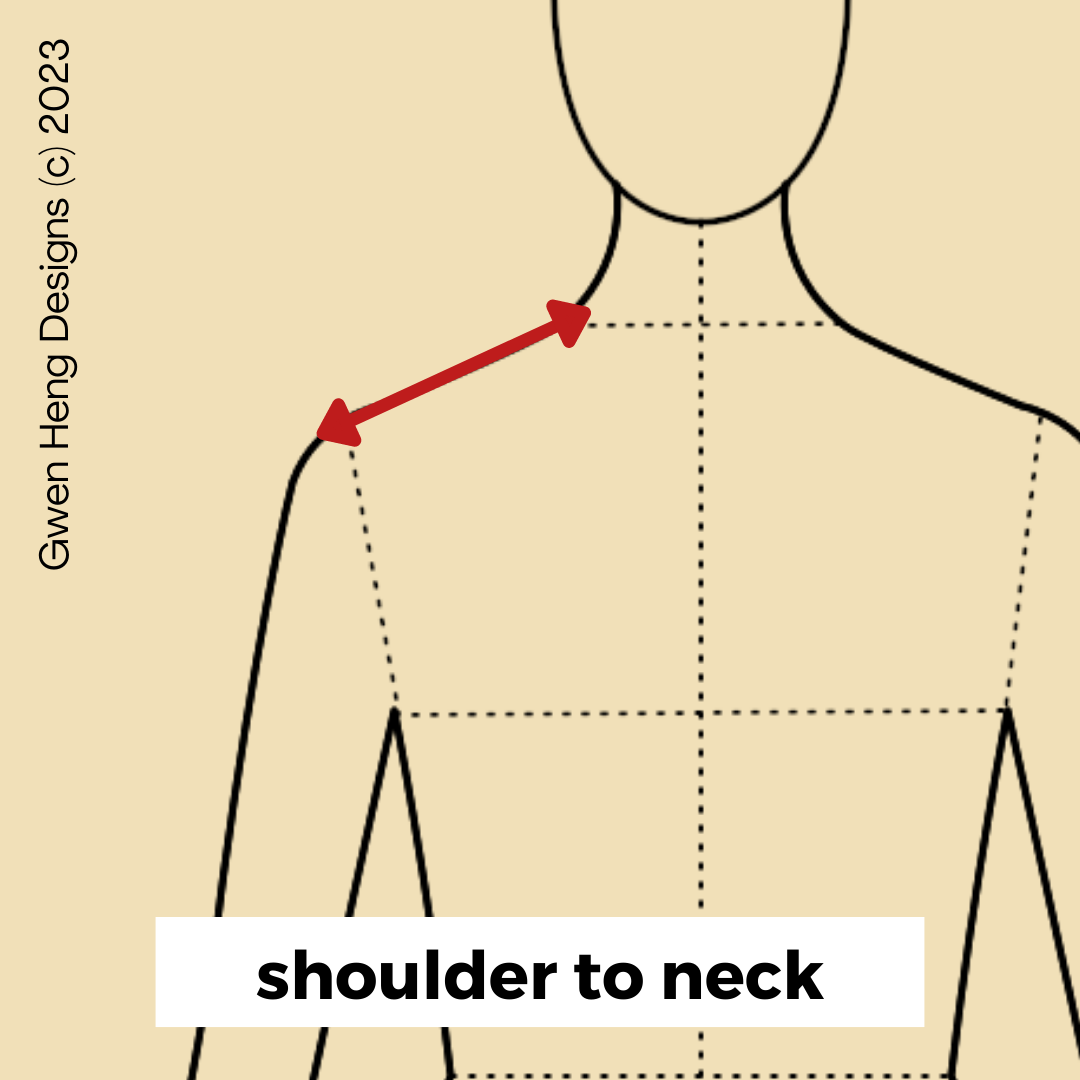
Shoulder to neck
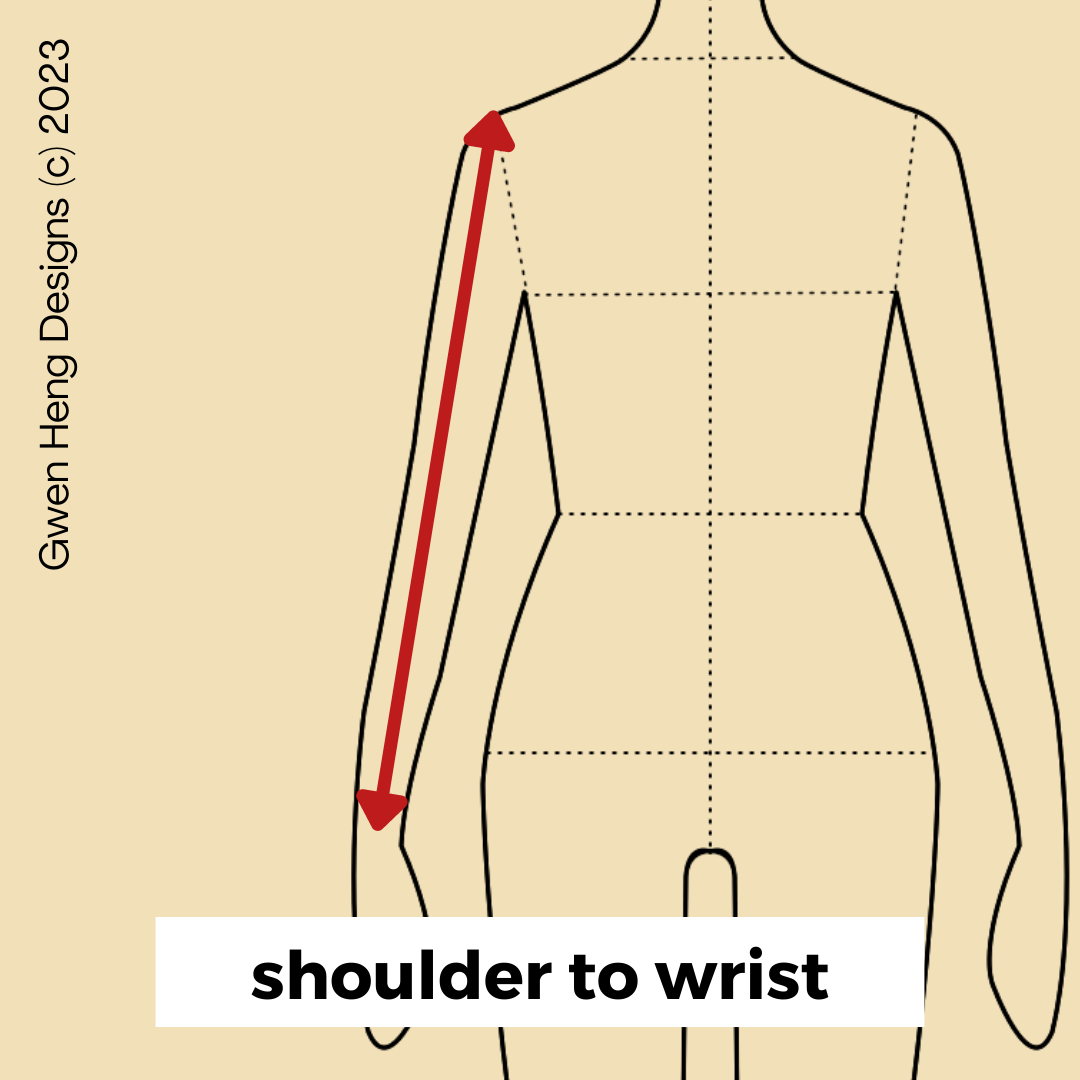
Shoulder to wrist
Bicep circumference

Make sure you wrap your measuring tape around the thickest part of your upper arm!
Wrist circumference

Don’t worry about getting PRECISE body measurements. This cardigan is designed for sewing with knits which has a more forgiving fit. As long as you’re not off in your measurements by 1/2” or more, you’re fine!
Drafting the pattern
Now we are going to do some math! If this isn’t your cup of tea, I have a handy Google sheet formatted with the formulas so all you have to do is key in your body measurements!
Click on this link to view the Google sheet, make a copy for yourself, and punch in your body measurements in the new copy of the Google sheet.
How to sew a cardigan with rectangles: Click this link to see Google Sheet for drafting
If you like do it yourself or make adjustments to the pattern like adding more ease, here’s the formula for the different pattern pieces:
*Note: My formula uses a seam allowance of ⅜”
Back rectangle (cut 1)
Width = shoulder to shoulder + 1” ease + ¾” seam allowance
Length = shoulder to mid hip + 1” hem allowance + ⅜” seam allowance

Front rectangle (cut 2)
Width = shoulder to neck + 1” ease + ¾” seam allowance
Length = shoulder to mid hip + 1” hem allowance + ⅜” seam allowance

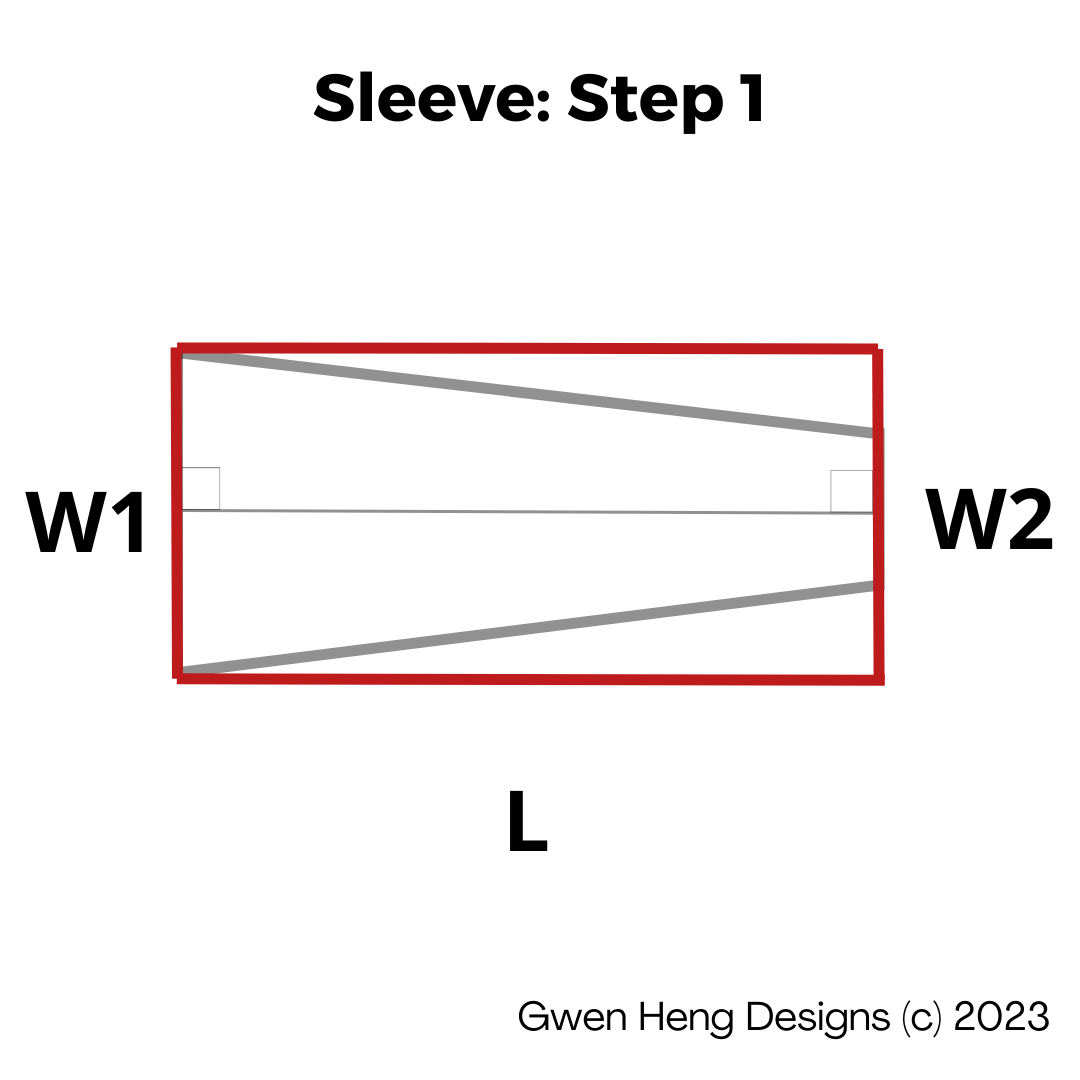
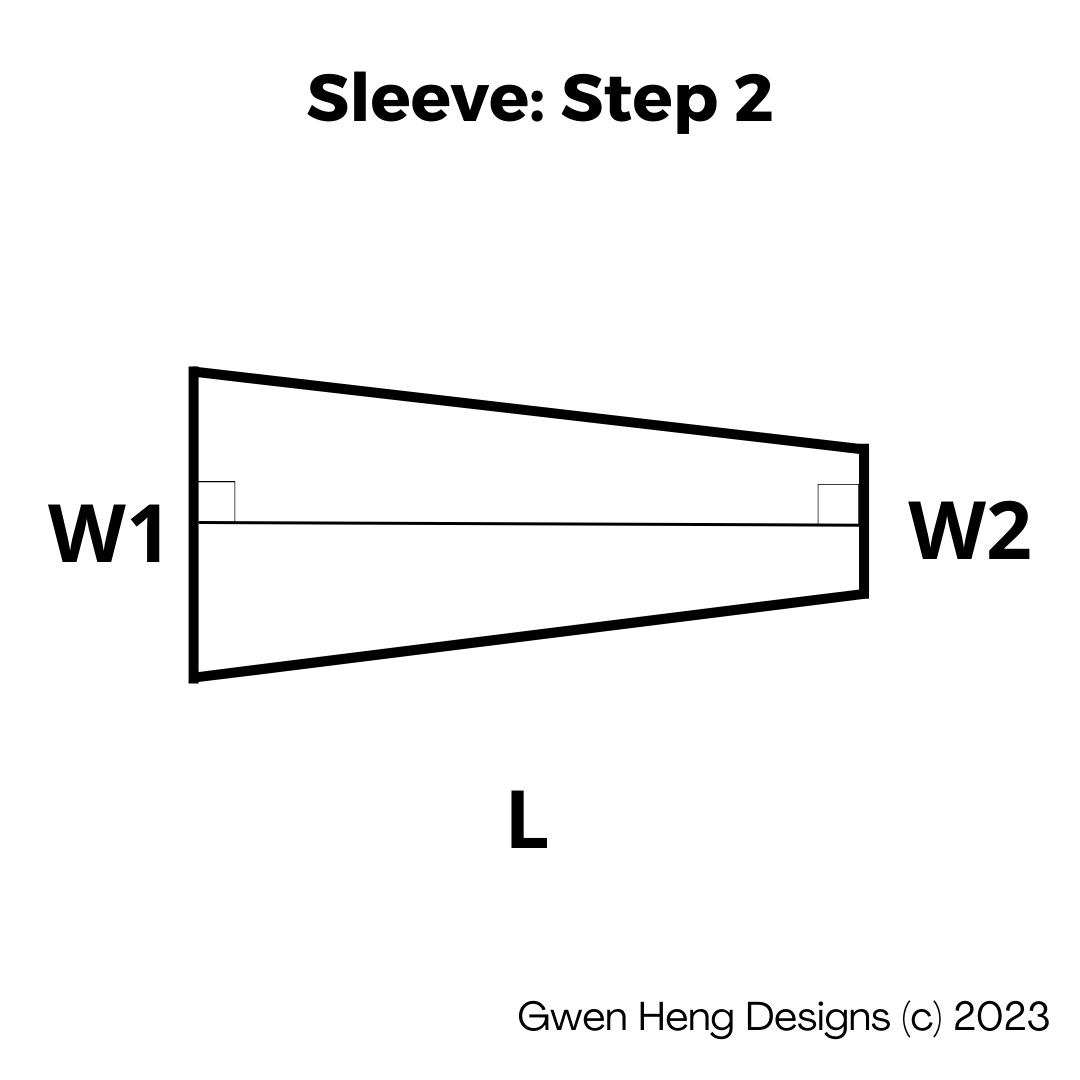
Sleeve quadilateral (cut 2)
Length = shoulder to wrist + ¾” seam allowance
Width 1 = bicep circumference + 1” ease + ¾” seam allowance
Width 2 = wrist circumference + 1” ease + ¾” seam allowance

This sleeve quadilateral can be drafted by first drawing a rectangle. Start with a rectangle of L x W1, then mark out the midpoint of one of the short sides, and measure out W2. Draw diagonal lines from the ends of W2 from one side of the rectangle to the ends of W1 on the other side of the rectangle.
Collar rectangle (cut 2)
Length = [ shoulder to shoulder - shoulder to neck ] + shoulder to mid hip + ¾” seam allowance
Width = [ (however wide you want the collar to be) x 2 ] + ¾” seam allowance
I wanted my collar to have a finished width of 3”, so the width of my collar piece was:
Width = [ (3”) x 2 ] + ¾” seam allowance

I decided to cut my collar piece as 2 pieces rather than a single long skinny rectangle because i was working with a remnant piece of fabric and didn’t have enough length for a piece that long. In any case, I think cutting a loonggggggg skinny piece of rectangle is just… not fun at all.
Sewing the cardigan
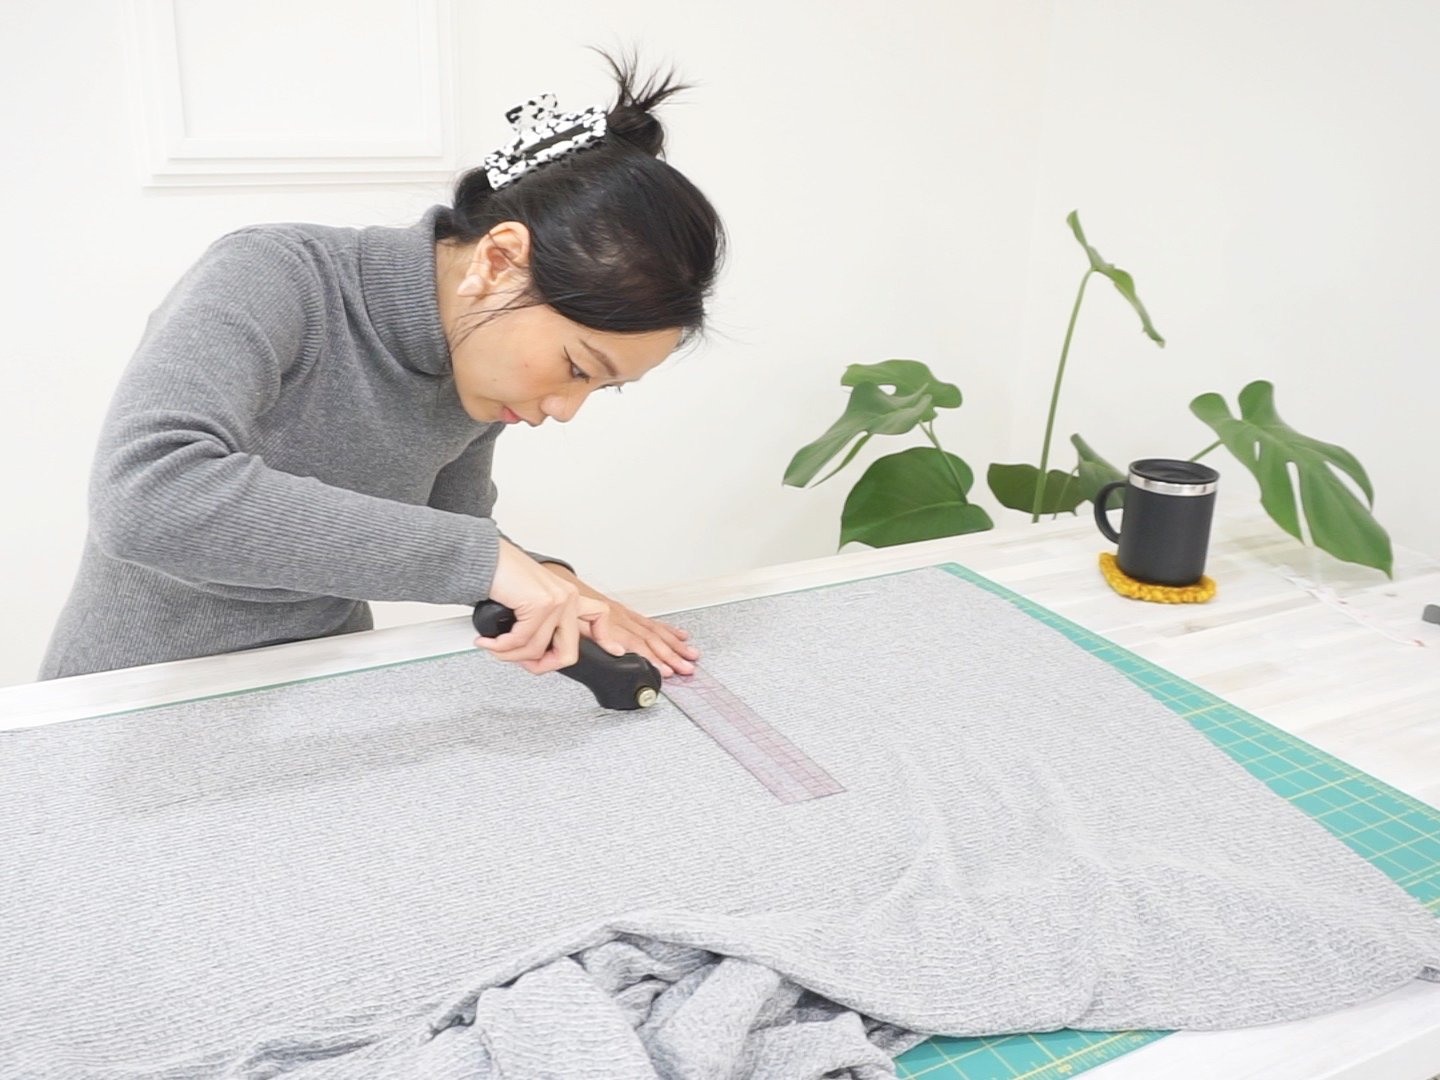
You can watch the sewing process on Youtube!
More “sewing with rectangles” projects?
This sewing project, though imperfect, was really fun in the sense that it allowed me to think differently from the usual process of sewing with patterns or drafting my own patterns with a sloper. If you’re interested in more sewing with “simple shapes” type projects, check out my drafting and sewing process of a Cult Gaia inspired top. I plan to do more of these with time so leave a comment and let me know what you’d like to see more of! x