

How to sew a lined vest (+ draft your own pattern)

I'm back with another Autumn/Winter sewing project! This week, I made a fully-lined vest using a deep, burgundy red bedsheet I thrifted. In this tutorial, I will show you how to draft and sew a lined vest from start to finish!

I know it looks like I made the entire outfit, but my skirt is actually a piece I bought in Batam many years ago. This skirt is actually part of a school uniform in Batam which I purchased at a supermarket. The classic pleated skirt design was too good to pass up!
The burgundy red bedsheet is a piece that I thrifted earlier in summer this year. When I saw that colour, I knew I had to have it to sew some coordinating garment to go with this skirt and the other deep red pieces I picked for my current A/W capsule. And here I am, finally making the "perfect" coordinating garment with it.
Watch how to draft and sew a lined vest on Youtube
How to draft a lined vest
I drafted my self-lined vest using my personal bodice sloper (with side bust and waist darts). Here are my notes from drafting the pattern:
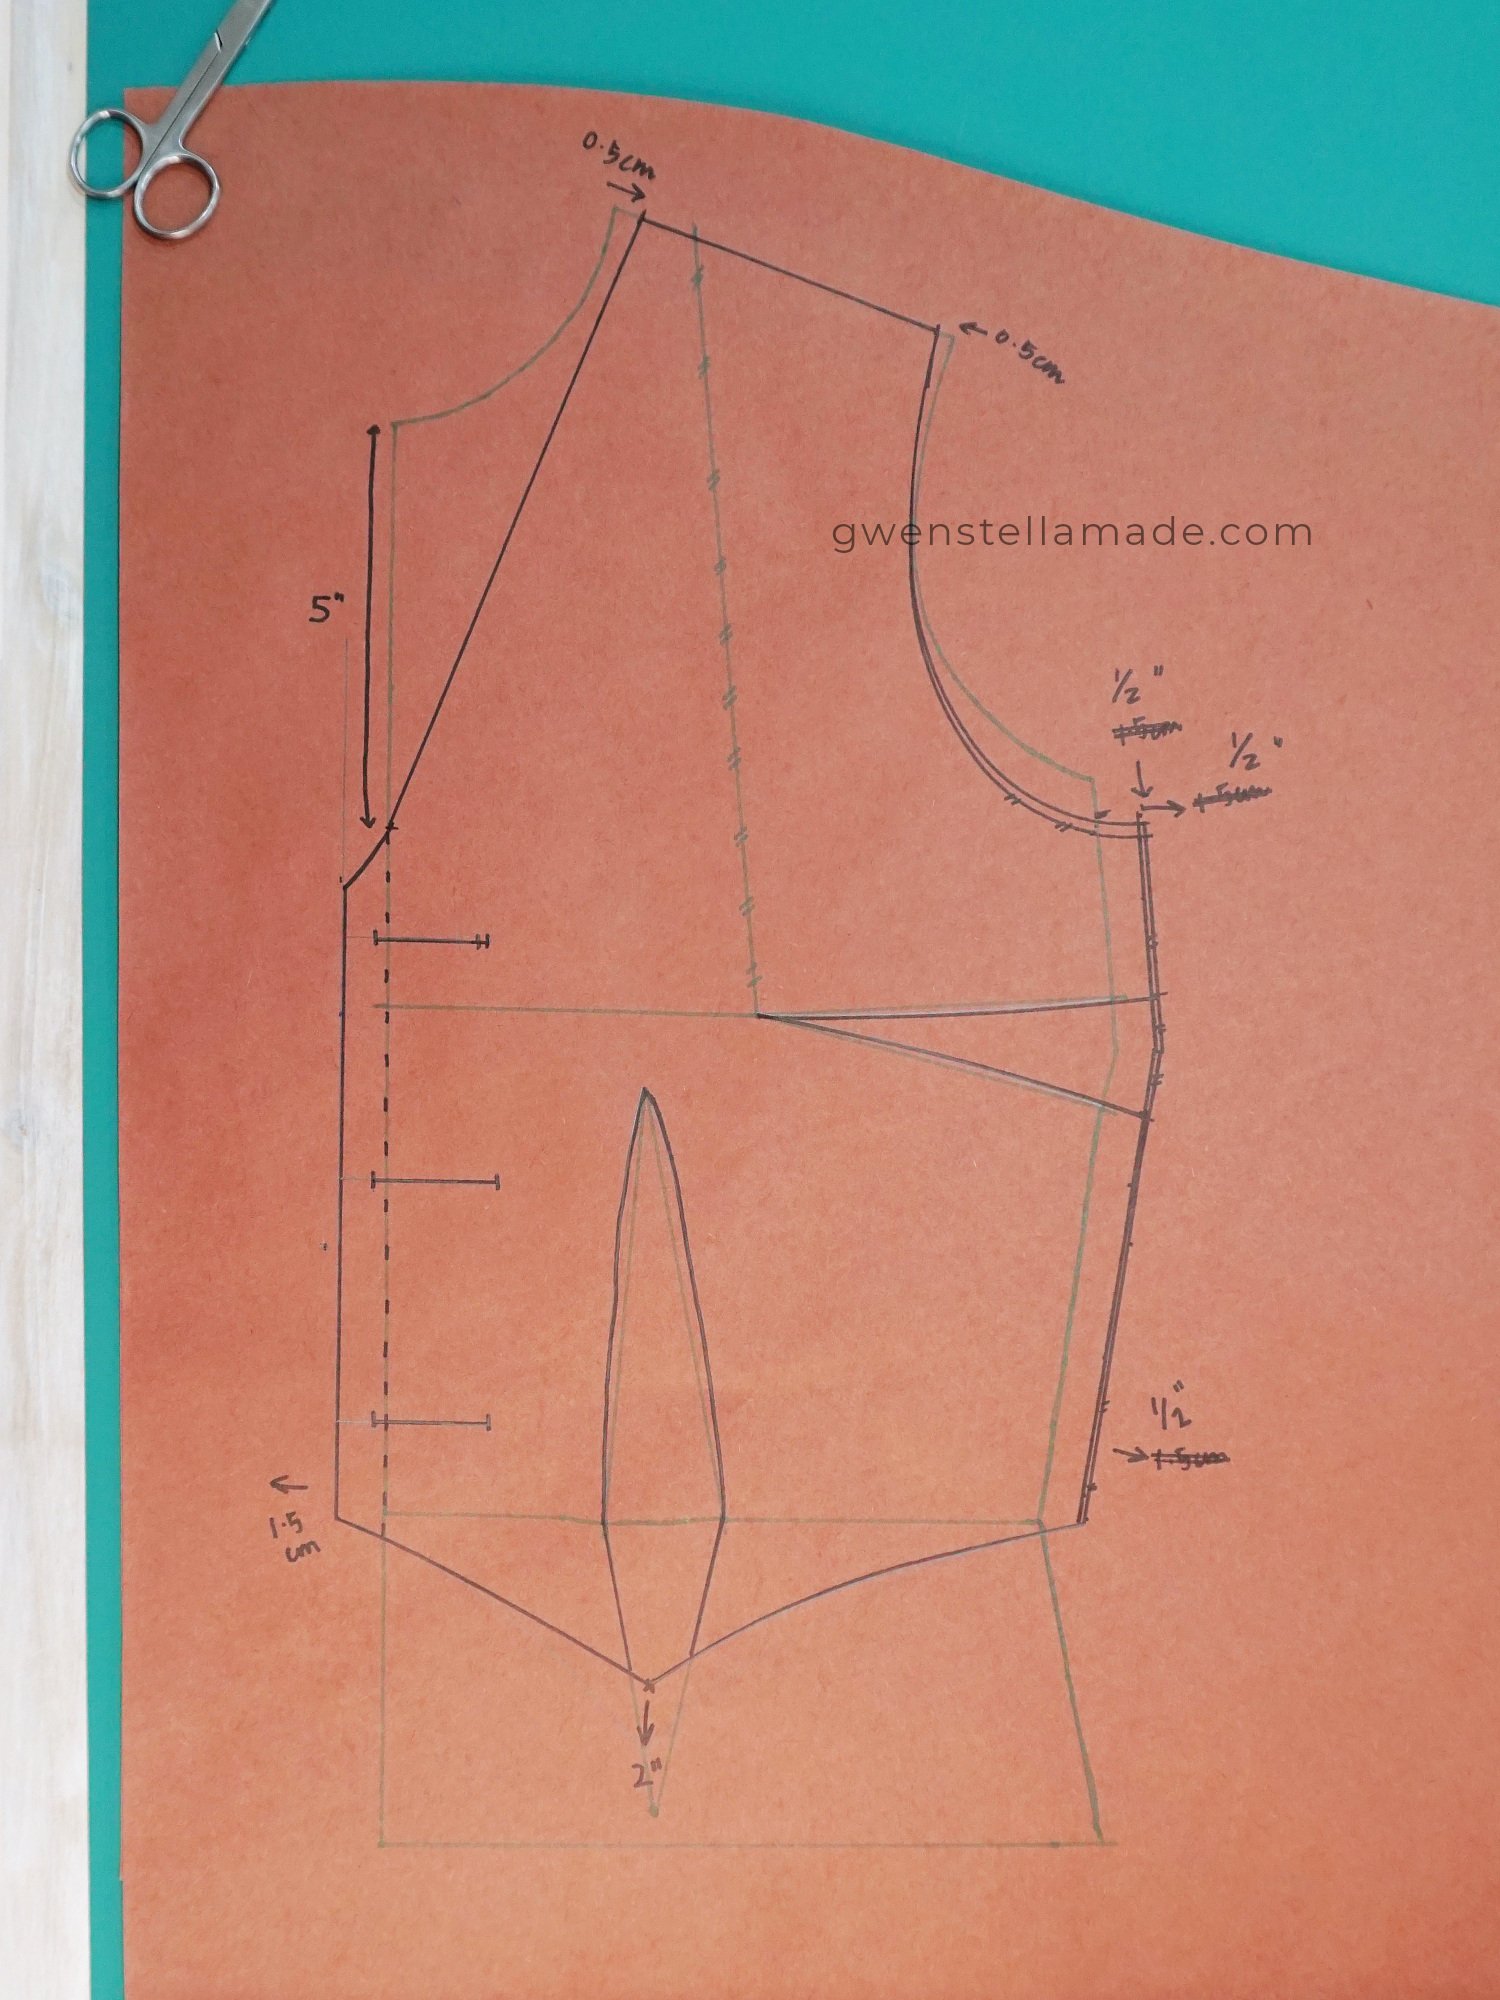
how to draft a vest with lining - FRONT piece

how to draft a vest with lining - BACK piece
Specifically, the V-neckline is about 5" deep from the collar and the tips on the front are 2" from the waistline. To watch my process, check out 02:23 of my video.
How to sew a lined vest
Cutting the fabric
To make 1 lined vest, cut the following:
front piece: cut 2 (left and right) with MAIN fabric; cut 2 (left and right) with LINING fabric

how to sew a vest with lining - cut 4 for FRONT
back piece: cut 1 on the fold with MAIN fabric; cut 1 on the fold with LINING fabric

how to sew a vest with lining - cut 2 on fold for BACK
For my vest with lining, I am using the same fabric for the main and the lining layer. Remember that we will have 2 pieces of the left and 2 pieces of the right front vest, so make sure you don't end up cutting 4 of the same front vest pattern!
Sewing the lined vest
Sew the darts
Start by sewing all the darts on the front and back vest pieces. To reduce bulk, trim and press darts open.


Sew along shoulders
Next, sew the front vest and back vest pieces together along shoulder seams, right sides together. Press seams open.

sewing the shoulder seams
Attach main and lining layers together
Pin the MAIN and LINING layers right sides together. It is helpful to start by aligning the layers along the shoulder seams first.
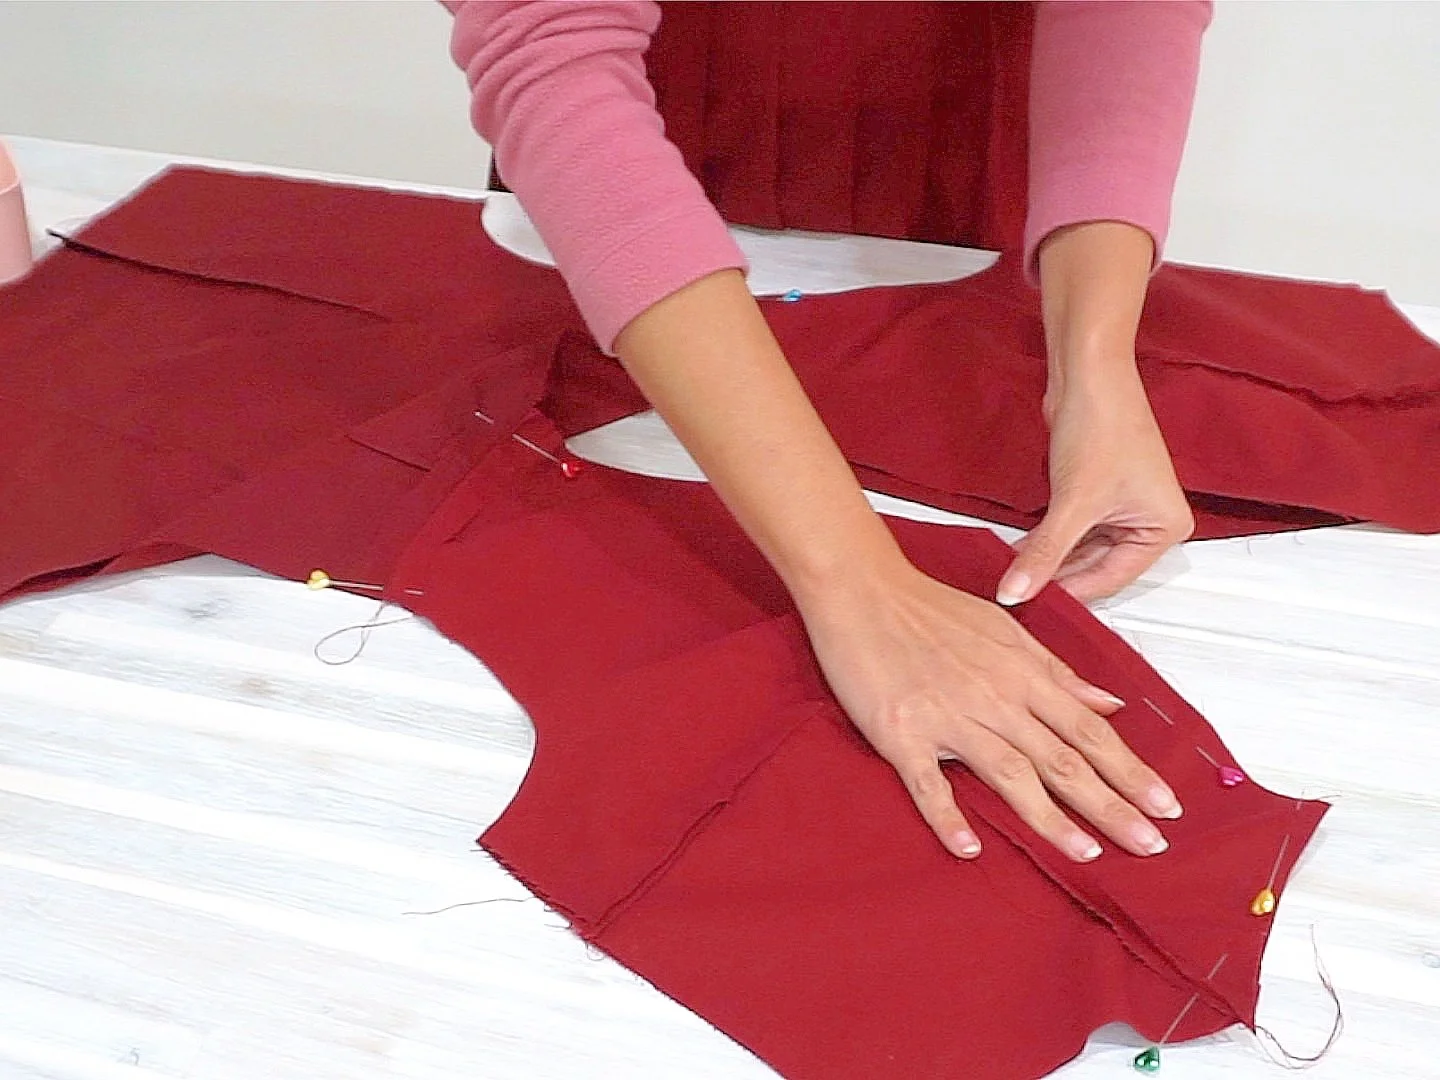
Next, sew along the edges of the vest except for the side seams. This means that we will only sew the armholes, the front edge + back neckline and the back waistline. See photo below for illustration.

leave the side seam open
Turn vest inside out
Before turning the vest inside out, clip all curved seams and trim all sharp corners. You should also reduce bulk on the ends of the shoulder seams by cutting a layer of the seam allowance off.


I forgot to add the interfacing right at the start, so I did it around this step. Apply interfacing to the LINING layer of the FRONT RIGHT vest where the buttonholes will go. This helps to add stability to your work.

To turn the vest inside out, place your hand into the side seam opening and reach for a layer of the vest. Grab that layer of the vest and pull it out of the same side seam opening. Work slowly until you have the entire vest inside out.

You may find that you have to turn the vest WRONG SIDE OUT again to trim more seam allowance to get all the seams laying flat and smooth. Any puckering along the seams = seam allowance not trimmed enough!
Sew side seam of vest
Place your vest laying flat with the MAIN side (i.e. RIGHT SIDE) facing up. See photo below for illustration.

Spot the faint "x" on the side seams
Next, mark a cross on the FRONT RIGHT and BACK RIGHT side seams of the LINING side of the vest. Lay the LEFT side seams right sides together. At this stage, the crosses should be facing each other.

Using your hand, reach into the BACK LEFT side seam of the vest. Move your hand through the back of the vest and grab the RIGHT side seams of the LINING layers of the vest.

how to sew a vest with lining - sewing the side seams close
Pull the LEFT side seam through the back of the vest, and out of the RIGHT side seam. You should have the LEFT side seams inside out in a circle.


Sew along the circle and pull the vest RIGHT SIDE out again and you should have a complete LEFT side seam.
Sew the other side seam of vest
This part is a little tricky, so feel free to check out the video at 16:07 if you need to.
With the LINING side facing up, pin the RIGHT side seams of the MAIN side together. Pin about 0.5" - 1" below the underarm seam.

Sew the 2 layers right sides together, from the pin to the underarm seam, and continue in the same direction until you can't move the fabric to seam anymore.

There will be a gap along the side seam of the LINING. This gap can be stitched together by hand or with the machine from the right side of the lining.
Topstitch along edges
Add topstitching along all the edges of the vest: armholes, back neckline, front neckline, centrefront, front waist, back waist.

Add buttonholes and buttons
Using your preferred method, add your buttonholes and buttons to the vest. I sewed my buttonholes on the right and my buttons on the left.


And that's it, you're done!
Thinking about sewing a second vest!
This vest is not a perfect make but I had so much fun making it and learnt a lot! It also feels so good to finally use my vintage Singer buttonholer (watch 18:03 of my video to see it in action).
I know turning the lined vest inside out is a little mind-boggling, so I hope the video is helpful when you try to figure out how to sew a lined vest like this one.
So, it's less than a week since I finished this vest and I am already thinking about making a second one using the remnant from sewing my half circle skirt and pinafore dress bib. I have the new pattern drafted out and I can't wait to sew it up.
Only 2 more projects until I finish my A/W capsule sewing project!!!
