

How to sew bound buttonholes

Bound buttonholes are a great way to add a clean, professional finish to your sewing projects. They are commonly used in coats and jackets, and can also add a nice touch to tailored garments such as the corduroy jumper I made a couple of weeks back. In this step-by-step sewing tutorial, I will be going through everything you need to know to sew perfect bound buttonholes for your sewing project.


Watch the video tutorial on how to sew perfect bound buttonholes
How to sew bound buttonholes
Mark the buttonholes
Summary:
Start by drawing the buttonhole placement lines
The end should be 1/8" to the left of the centrefront line (i.e. closer to the centre raw edge of the pattern piece)
Draw the length of the buttonhole
Length = button width + 1/4"
Details:
If you are sewing using a sewing pattern, you should be able to transfer the suggested buttonhole placement markings onto your fabric easily. However, if you are using a button in a different size from the one suggested by the sewing pattern, you may have to re-draw the positions of your buttonholes.
To do this, place your choice of button below the stitch line along the top edge of your fabric. This top edge is usually the corner of the collar or the neckline of the garment. The first buttonhole should ideally be placed right under the button.

When drawing buttonholes, make sure that the end of each buttonhole is 1/8" from the centre-front line (towards the centre raw edge of the fabric). Refer to illustration below.

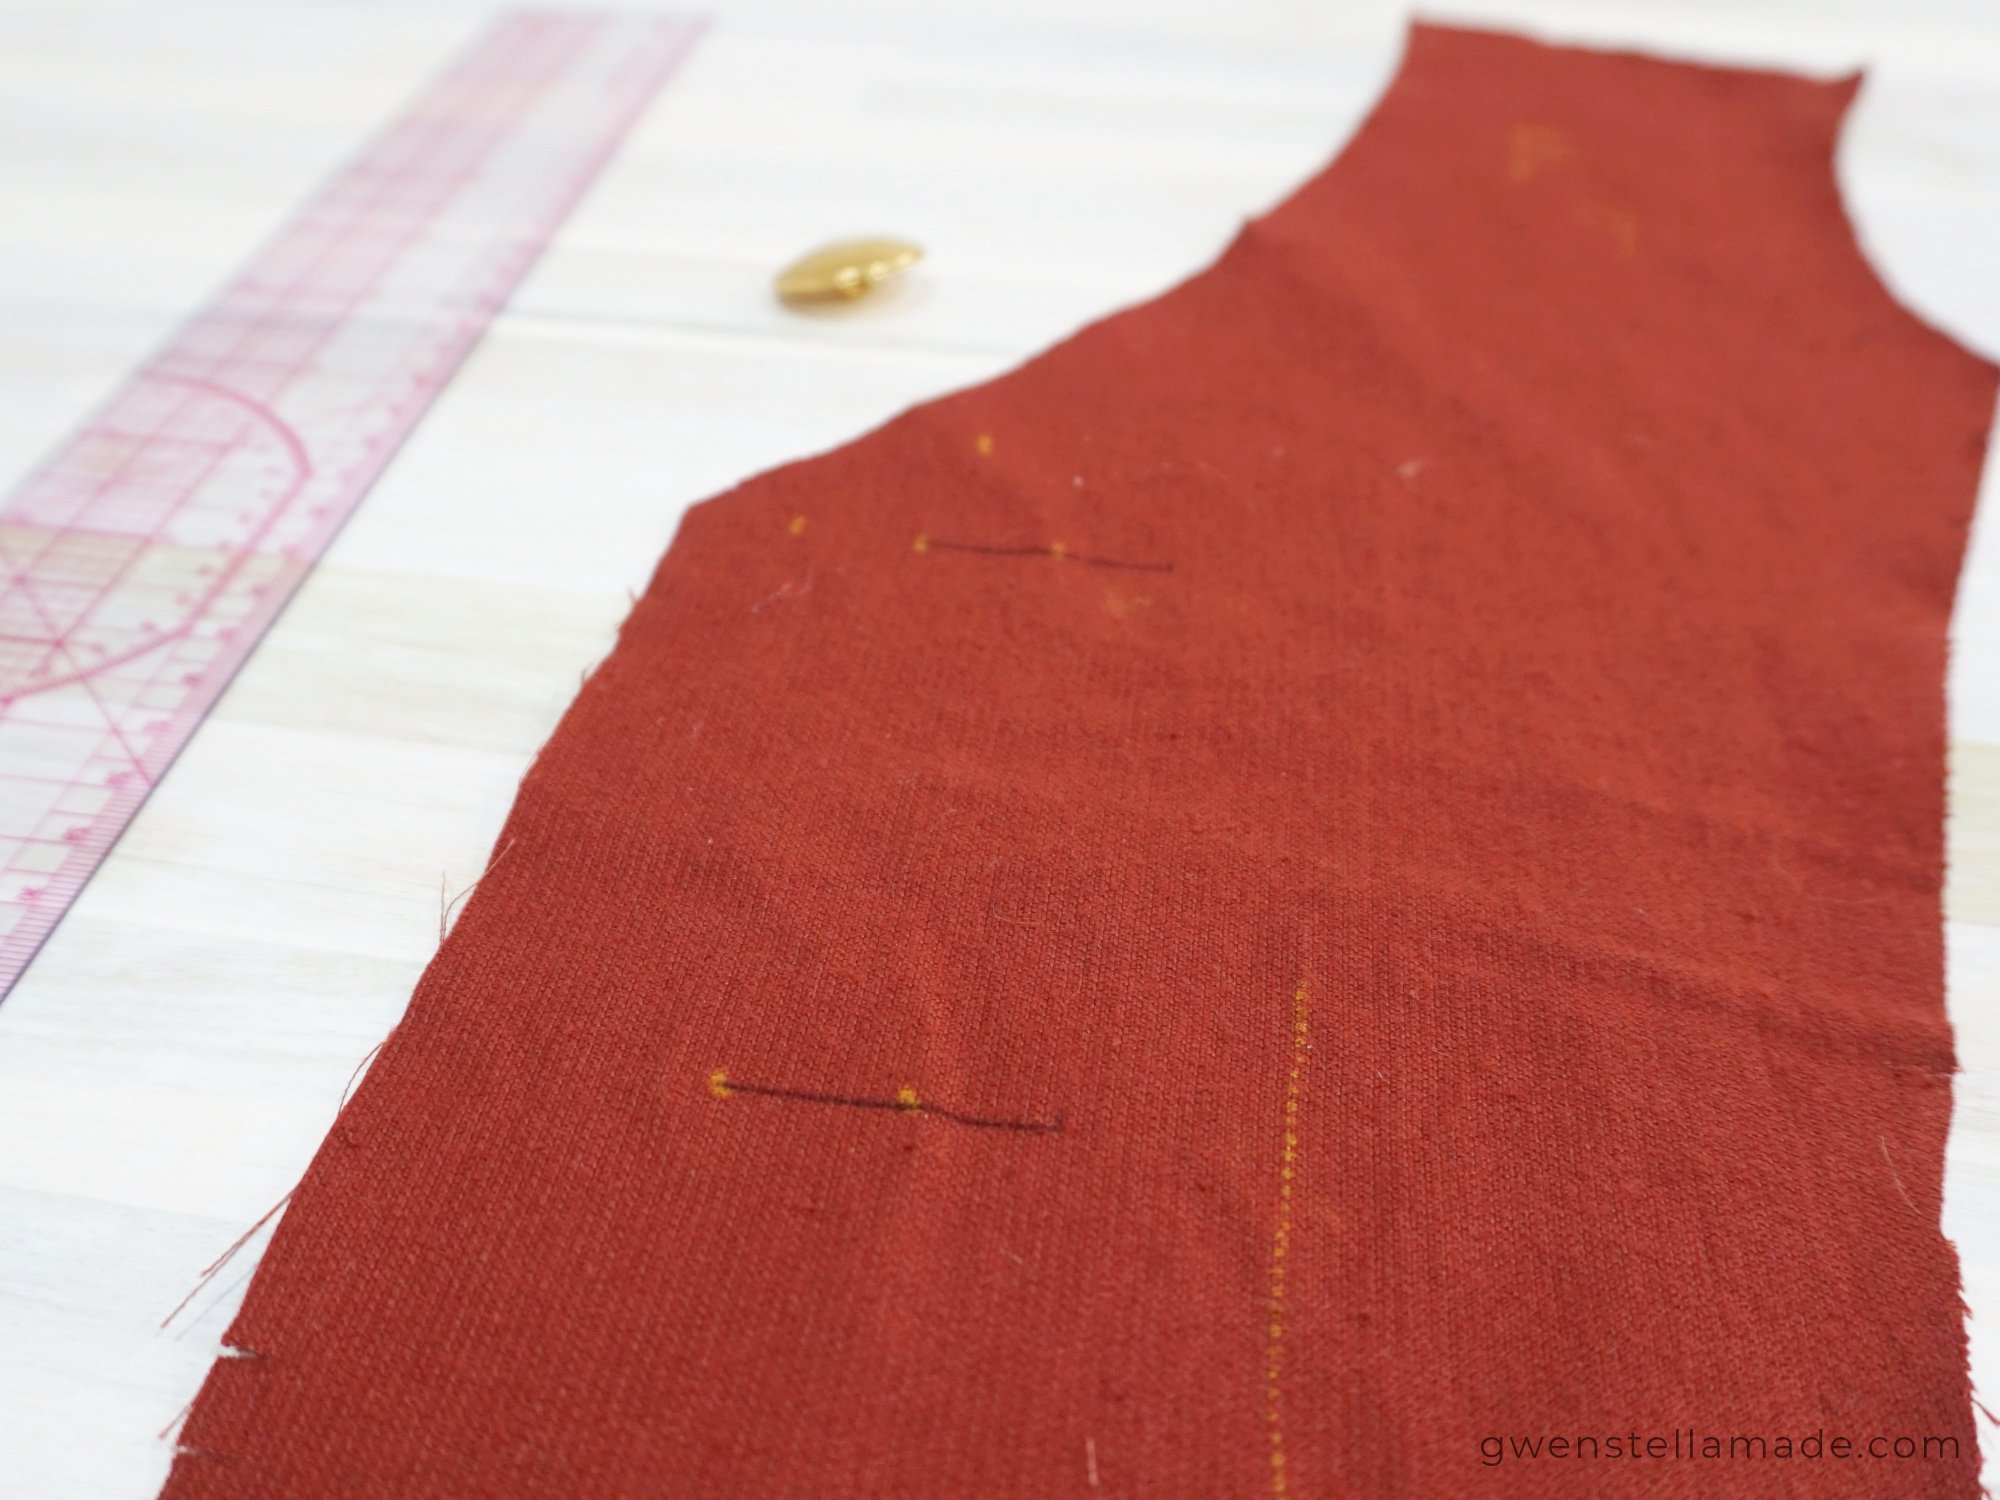
After finding your first buttonhole, decide the placement of the rest of the buttonholes. As a guide, buttonholes are usually 2" - 3.5" apart. For my corduroy dress and 1 1/8" buttons, I ended up with a 4" gap between each buttonhole.
The length of each buttonhole line should be the button width + 1/4" for ease. However, an ease of 3/8" may be more suitable for thicker buttons and/or bulkier fabrics.

Draw the bound buttonholes
Summary:
Draw a rectangle around the buttonhole line from the previous step
Width = 3/8" or 0.5cm
Length = button width + 1/4"
Details:
Draw a rectangle around each buttonhole line marked in the previous step. This rectangle marks the outline of the bound buttonhole.
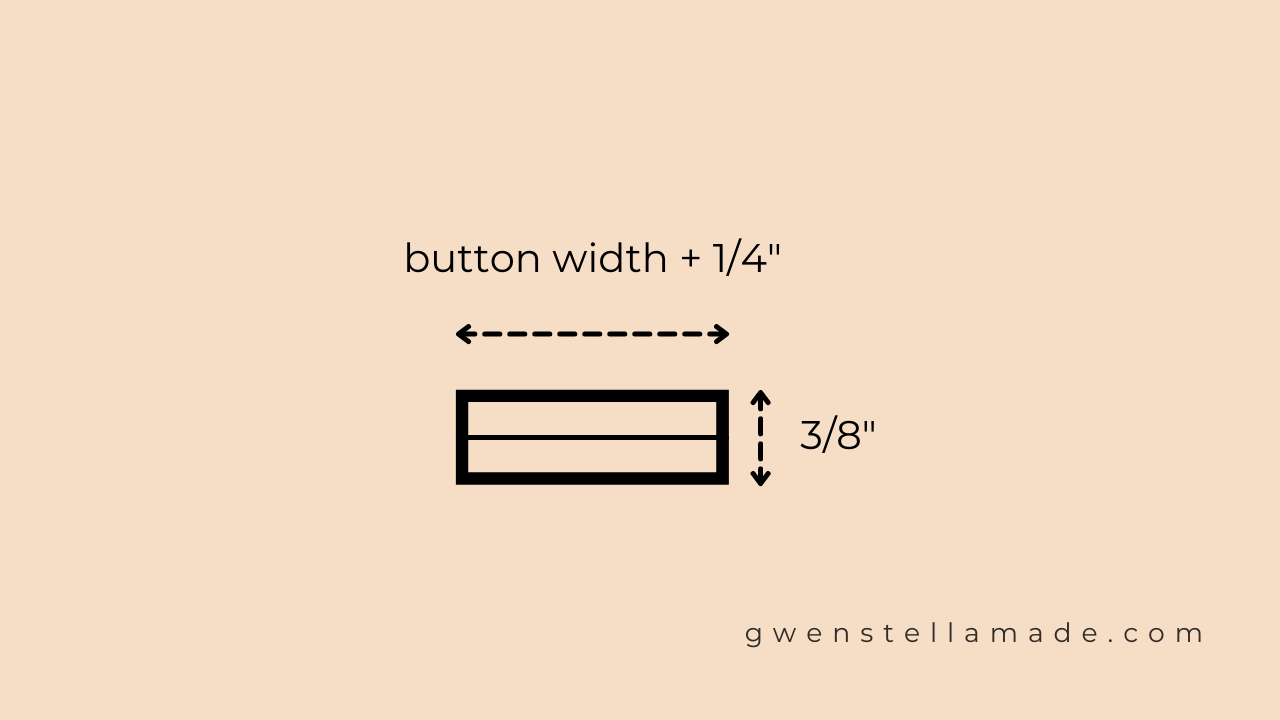
Use the dimensions above to make sure your rectangles are drawn in the right size.

Sew fabric squares on garment fabric
Summary:
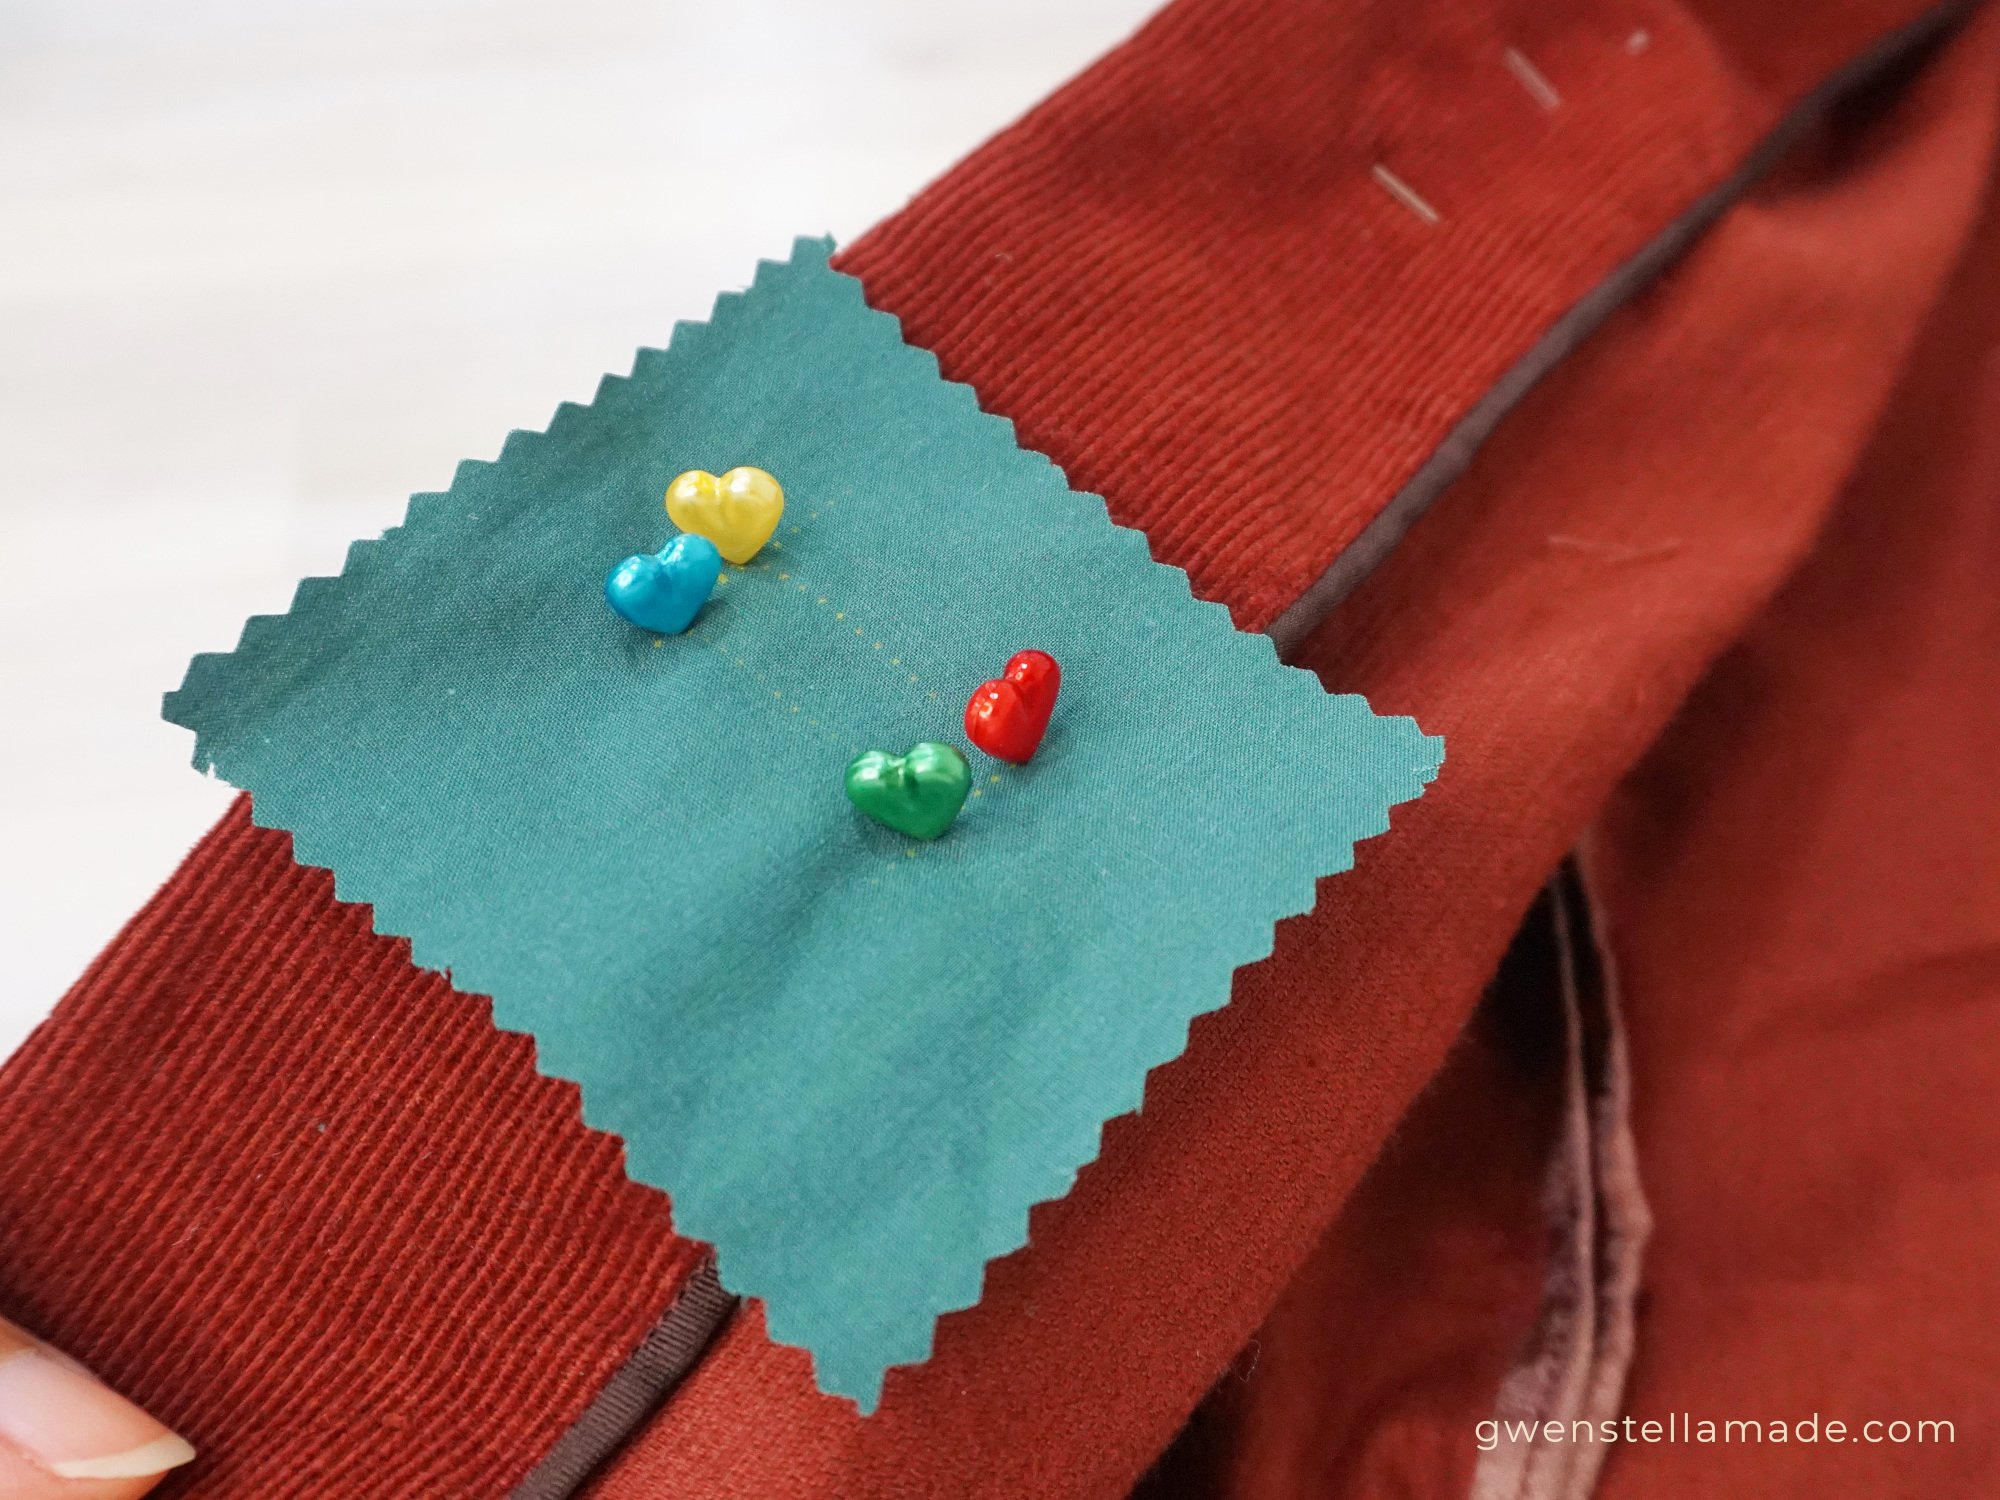
Cut fabric squares of 3" x 3"
Number of squares = number of buttonholes
Pin the fabric squares on the right side of the garment fabric (right sides together), over every buttonholes
Optional: Add interfacing to add structure to the lips of the buttonholes
Details:
Cut 3" x 3" fabric squares by using the same fabric used for sewing your garment. If you are working with a lightweight garment, consider applying interfacing to each fabric patch. This helps to add structure to the lips of the bound buttonholes. In this example, I am using a medium-weight corduroy, so no interfacing was added.
This fabric patch will be trimmed to a small size once the bound buttonholes are sewn. If you find the 3" x 3" patch too small to work with, try using a 4" x 4" square. From my personal experience, a 3" x 3" square is sufficient for sewing bound buttonholes for the 1 1/8" wide buttons used in this project. Since everyone's experience is different, I strongly recommend doing a test buttonhole before committing!

Once all the fabric patches are cut and prepared, pin them to the buttonholes. Make sure that each fabric patch fully covers each rectangle (i.e. boundary of the bound buttonhole).
Using a sewing machine and with the right side of the garment fabric facing up, sew the outline of the rectangles. I recommend starting somewhere in the middle of the rectangle, going around and then overlapping several stitch from the beginning of the round. This eliminates the need to backstitch. Also, don't forget to pivot at every corner of the rectangle!

Cut the buttonholes
Summary:
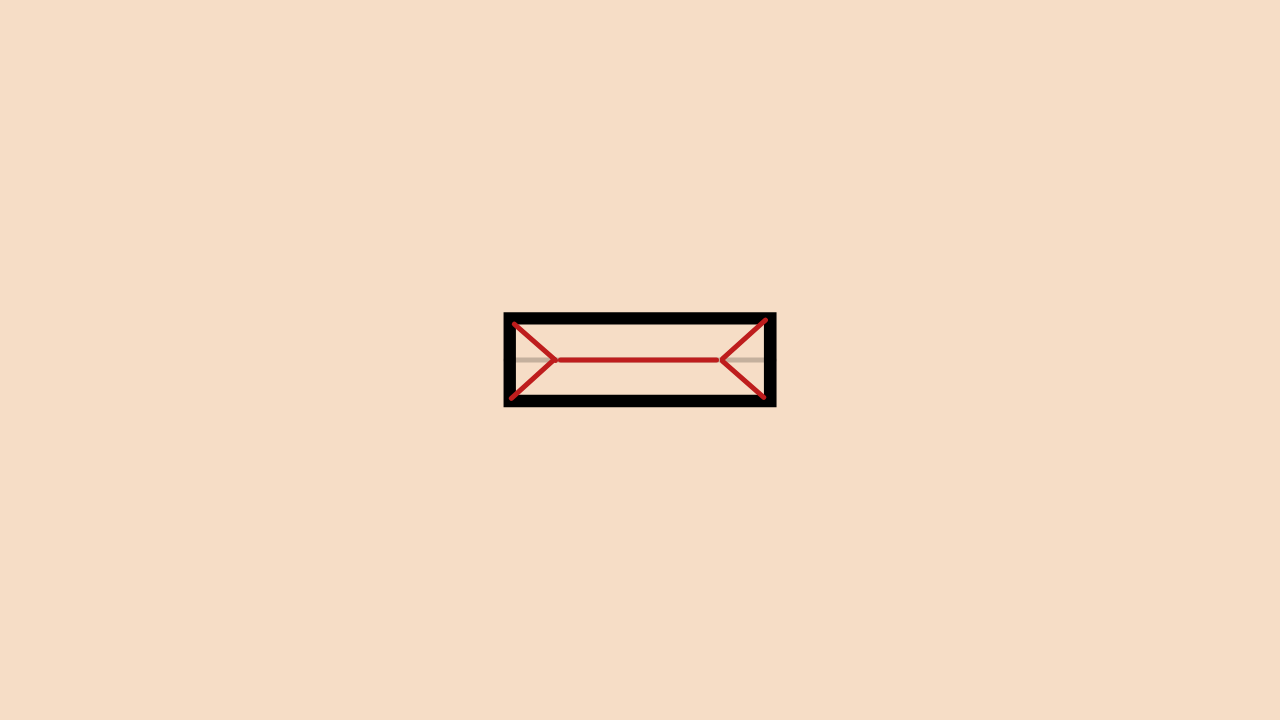
Draw triangles on each end of the rectangle
Cut out the pattern like a reverse arrowhead on each end
Snip all the way to the corners of each rectangle, as much as possible without cutting the stitches
Flip the fabric patch to the wrong side
Details:
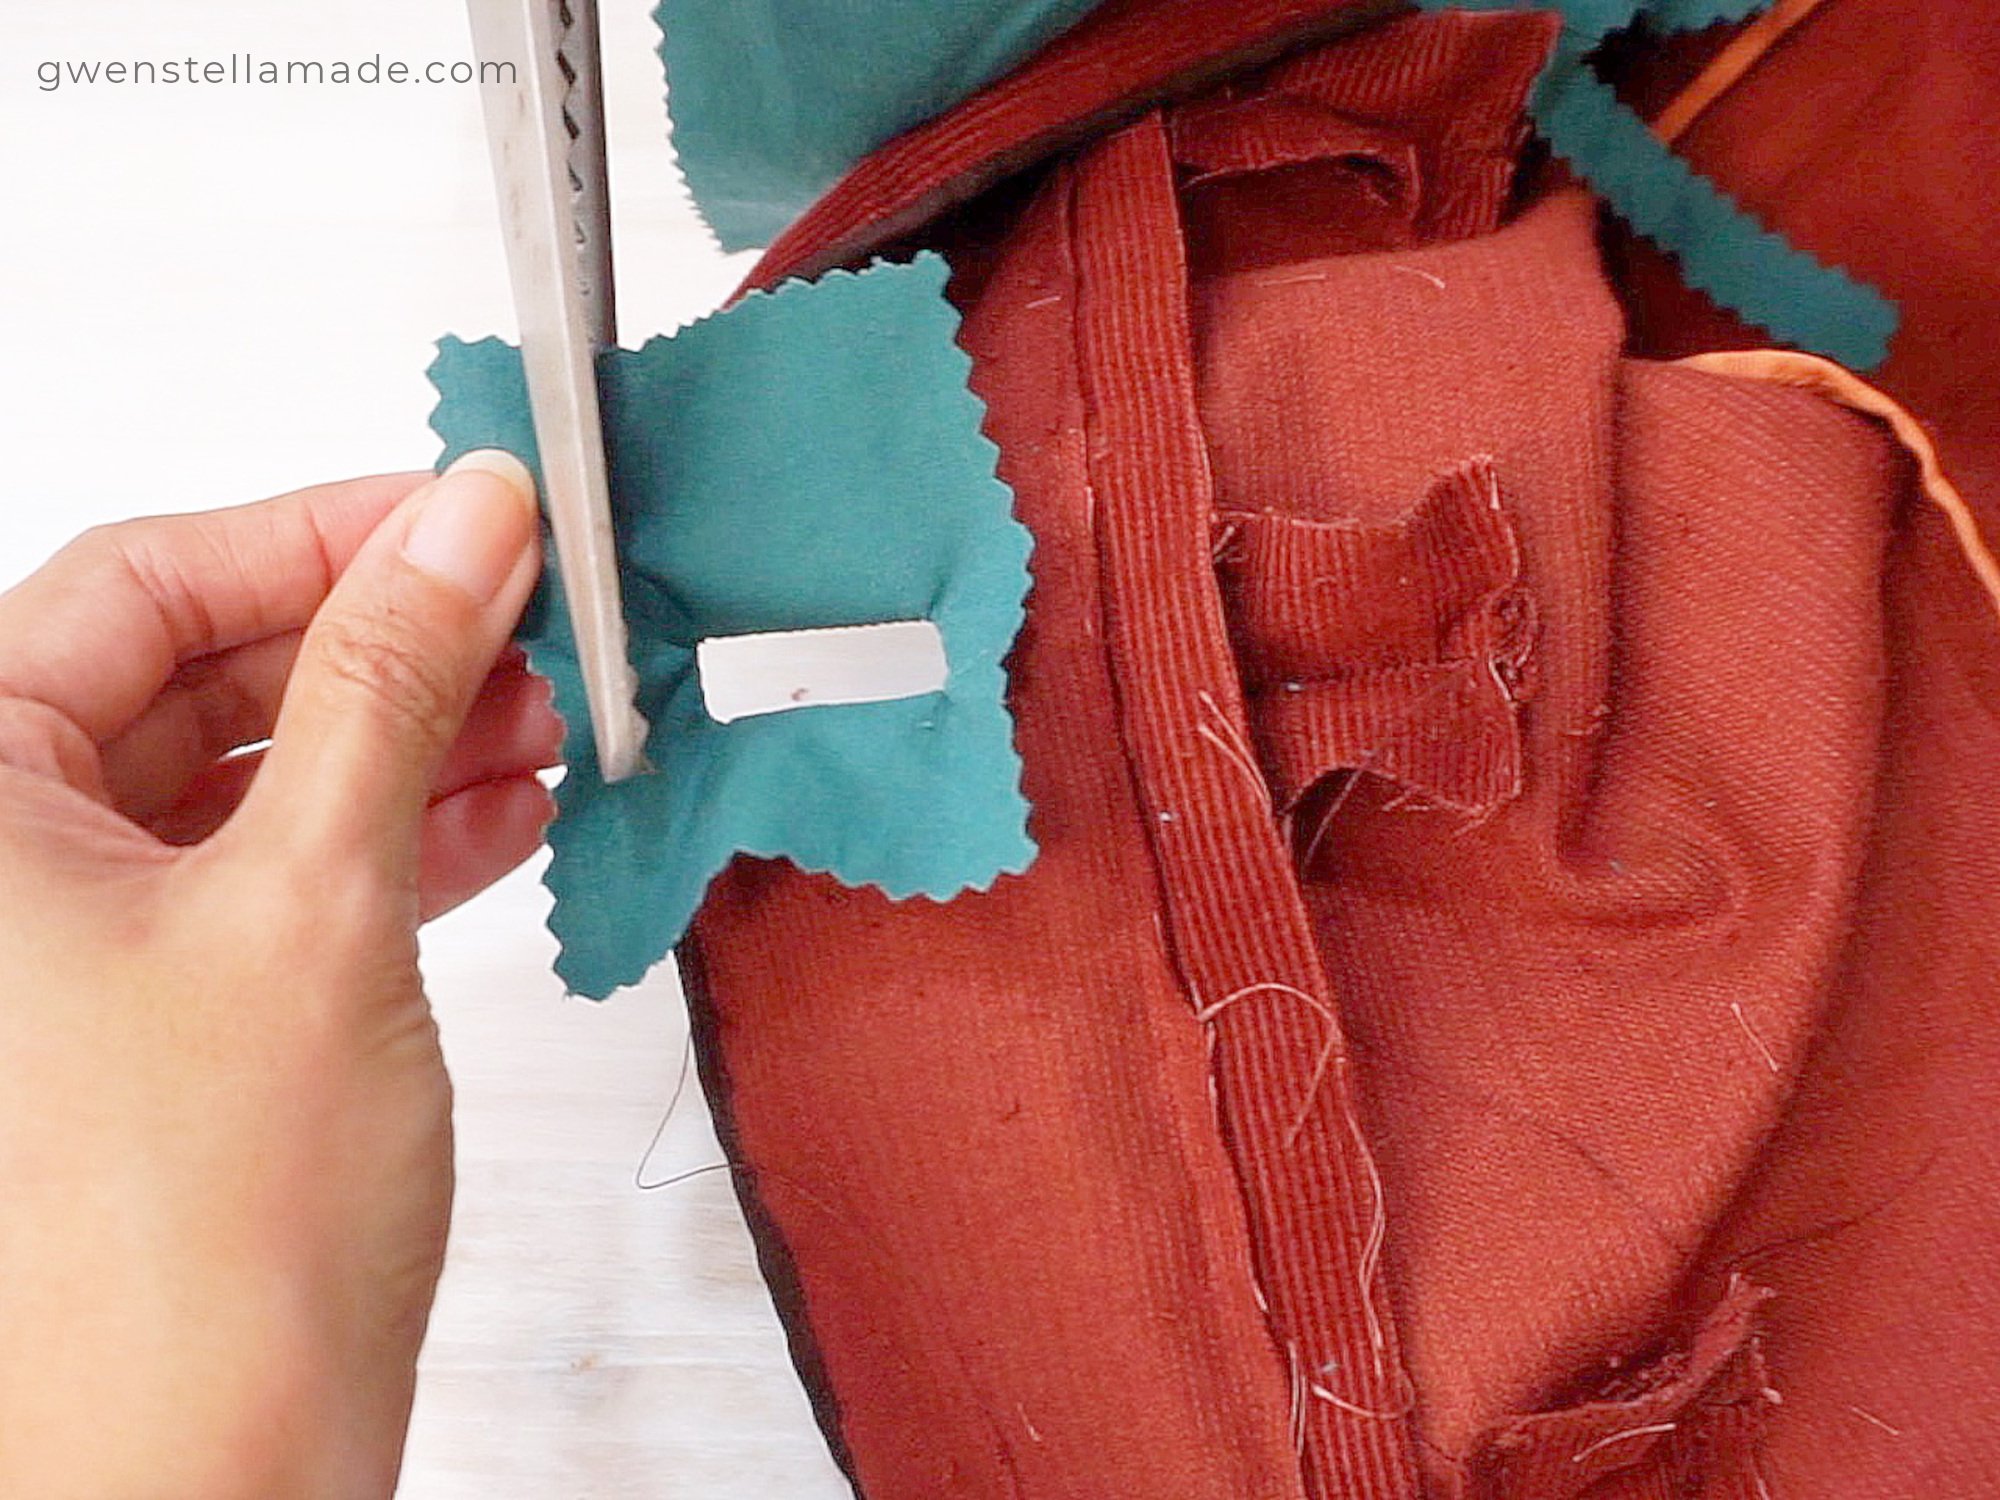
Things are starting to get interesting here! Before cutting the bound buttonholes, draw triangles on each end of the rectangle. Mark out a point on the buttonhole placement line, about 3/16" (0.5cm) from the short edge of the rectangle. Using that point, draw diagonal lines towards the corners of the original rectangle. This creates a triangle on each end of the rectangle.


Using sharp scissors, cut out the bound buttonhole following the outline that looks like a double reverse arrowhead (or a greeting card envelope). Work very slowly and carefully, and avoid cutting the stitches! See outline in red.

After that, flip the fabric square to the wrong side of the garment. At this stage, you should see a beautiful rectangular window that is the boundary of your bound buttonhole!

If you see some puckering on the short ends of the rectangles, it is likely that you need to snip away more of the corners of the rectangle.
Sew the lips of the bound buttonholes
Summary:
Fold the fabric patch to make the lips of the bound buttonholes
Hand-baste the lips close
Sew the sides of the lips, catching the little triangle with your stitches
Details:
Now we need both thumbs and index fingers to get to work! Fold the top and bottom flaps of the fabric patch so they meet in the middle of the bound buttonhole. Pin the flaps in place, and check your work from the right side of the garment. Make sure that both top and bottom lips are fairly equal in width and touching. We don't want our bound buttonhole to be a mouth-breather. If the lips are not kissing, adjust accordingly.

You may also choose to work directly from the right side of the garment so you can see how the lips comes together as you fold the flap. I prefer this latter method of folding.
Once you are satisfied with the position of the lips, baste the lips close with a contrasting thread. Some tutorials suggest sewing the sides of the bound buttonhole with the pins in place and then basting the lips close last. Personally, I like to know that the lips are closed and in the exact position I want them to be before sewing. Sewing with pins (without basting stitches) can also be a bit finnicky in my experience. Those loose lips like to move, sing, and dance with the sewing machine!

After basting the lips together, flip the garment fabric over to find the little triangles on the sides of the bound buttonholes. Remember them? These are the triangles we cut out earlier.
To secure the sides of the bound buttonholes, sew the triangle to the side flaps of the fabric patch. Sew very close to the bottom of the triangle (i.e. the short edge of the rectangle). See photos below for illustration.

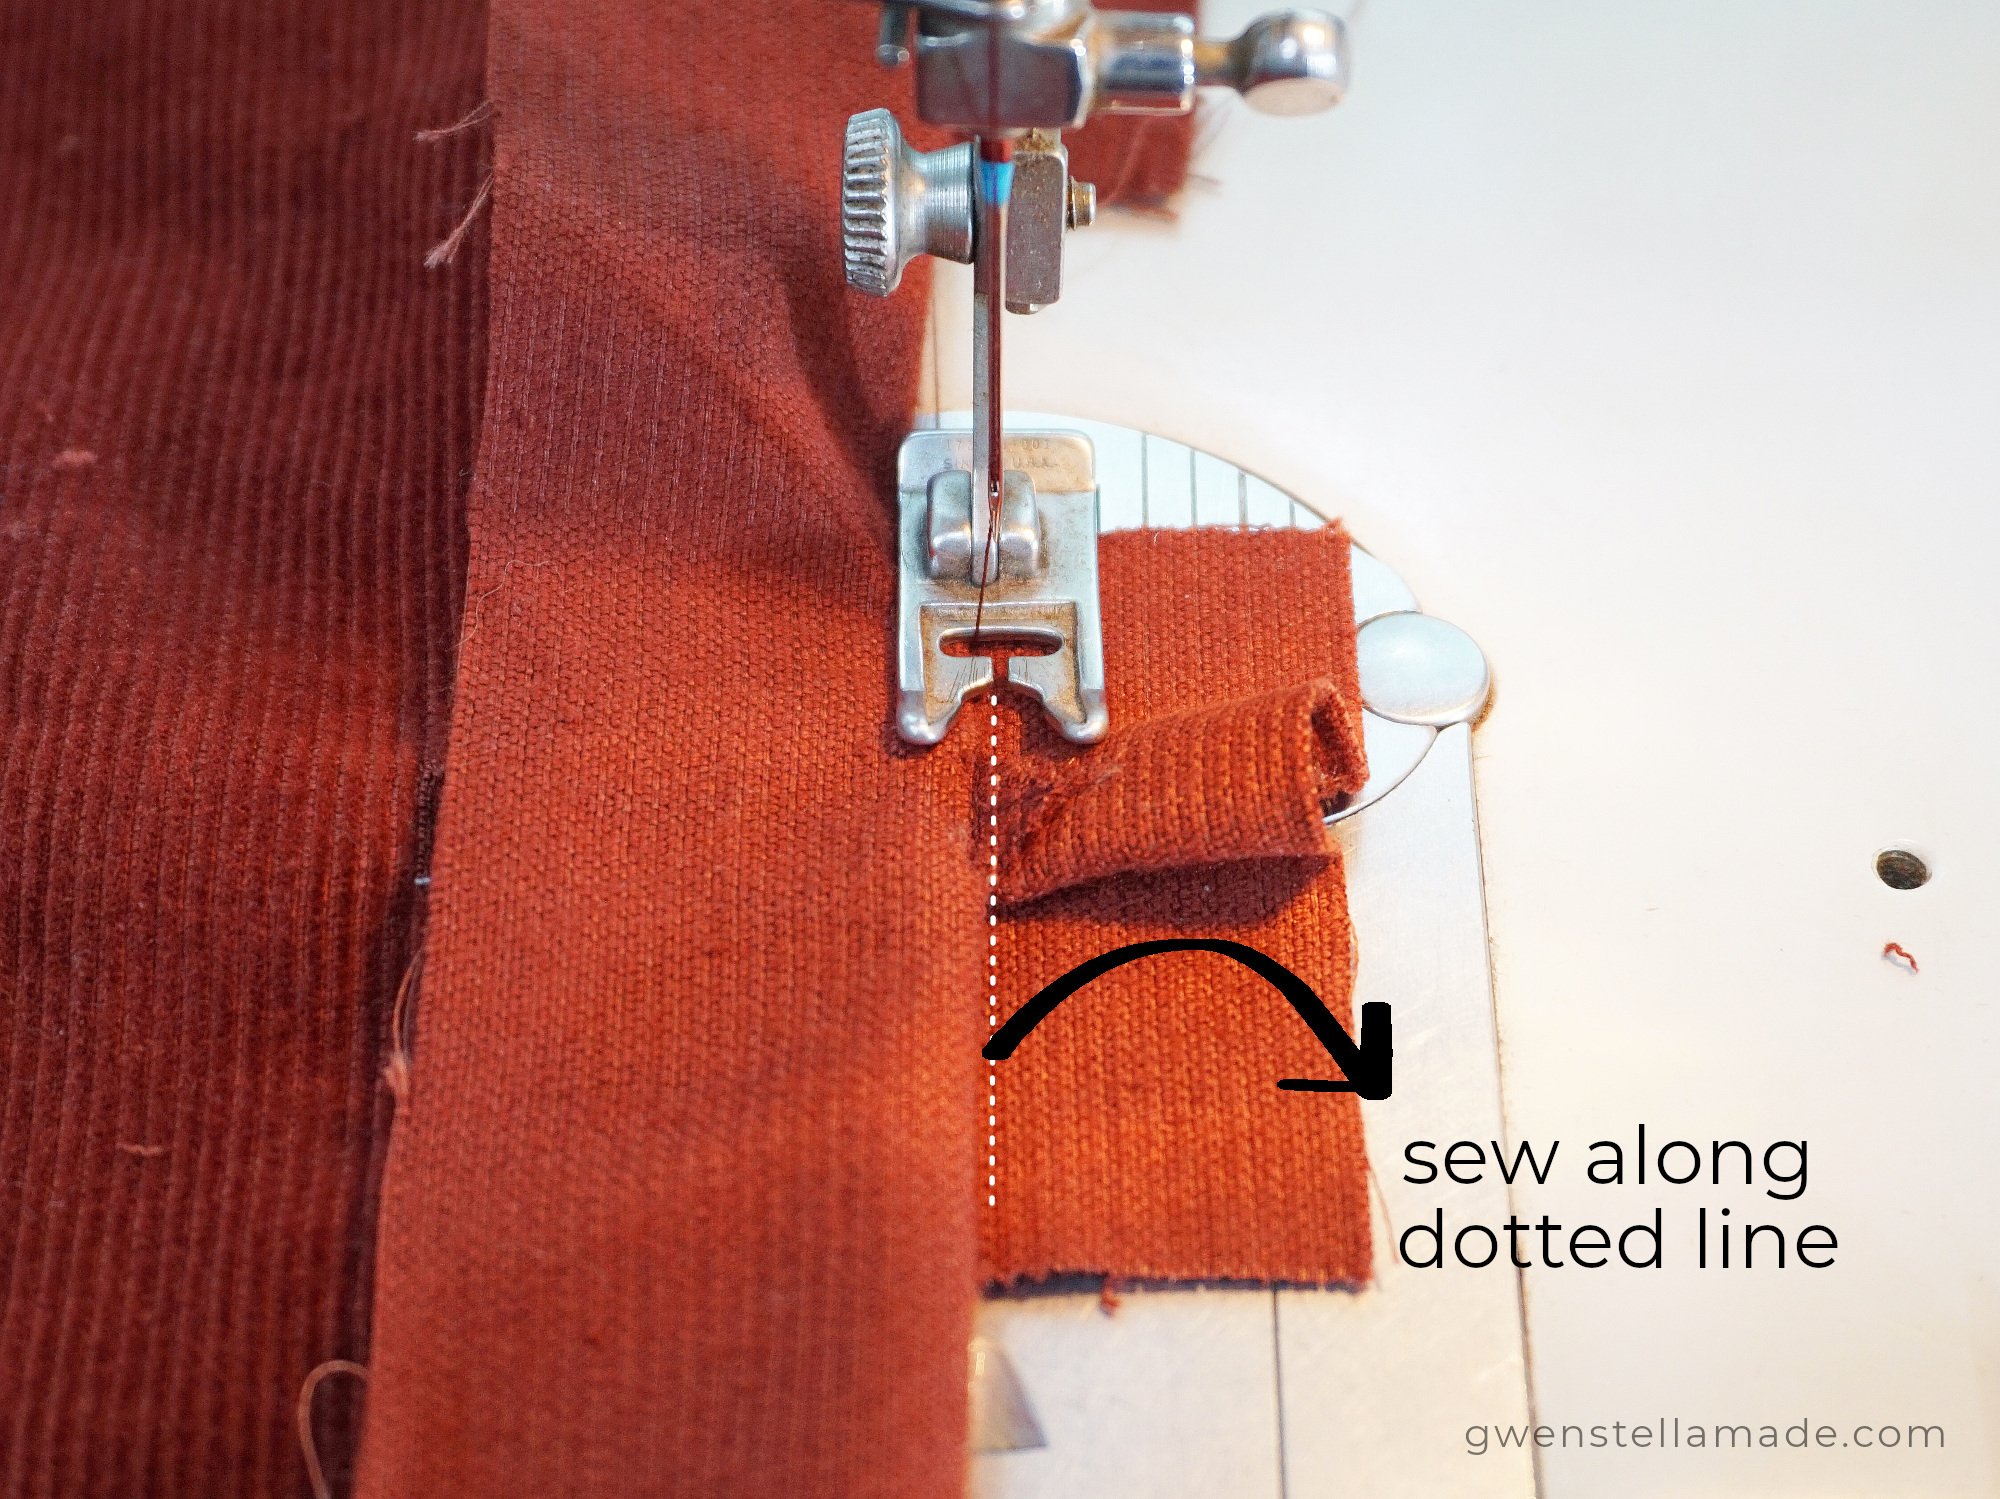
Do this for both ends of each bound buttonhole, and of course, for all the bound buttonholes of your garment!
Create the bound buttonholes for the facing
Summary:
Cut more 3" x 3" fabric squares, but this time in a light-weight fabric
Number of fabric squares = number of buttonholes
Mark out bound buttonhole rectangles on the light-weight fabric squares
Pin fabric squares on facing, making sure that the 4 corners of the buttonhole rectangle on the fabric square and the right side of garment align
Sew bound buttonholes (without the lips) on the facing
Details:
Up until this point, we have only been working on the bound buttonholes on the right side of the garment. Guess what, we need to make buttonholes on the facing of the garment as well! If you are questioning your decision to make bound buttonholes at this stage, please don't. We are almost at the end and I believe in you!
The bound buttonholes for the facing should only be sewn after the facing is sewn to the right side of the garment. By doing this, we can be 99.99% sure that we are sewing the bound buttonholes in the facing in the right position. The procedure on sewing bound buttonholes on the facing layer of the garment is similar to the steps above.
Cut the same number of 3" x 3" fabric squares as before, but this time in a light-weight fabric so that the garment doesn't become too bulky with all the layers of fabric. It doesn't really matter if it's in a coordinating colour because this fabric square won't be showing too much after sewing.
Mark out the buttonhole rectangle in the same dimensions as above on the fabric squares. Drawing the rectangle on a paper and then tracing it onto the fabric with a tracing wheel and tracing paper helps to speed up the process.

Following that, pin the fabric squares on the facing of the garment. Use sewing pins to align the 4 corners of the rectangle on the fabric square and the right side of the garment.

right side
facing side
After that, sew the fabric squares to the facing layer of the garment only by sewing along the outline of the rectangle. Then, draw the triangles in the rectangle and cut the same reverse double arrowhead outline out, and turn the fabric square behind the facing.

Sew the buttonholes on the right side of the garment and facing together
Summary:
Trim fabric squares
Sew buttonholes on right side and facing side together
Details:
Trim all fabric squares as needed.
Finally, sew the buttonholes on the right side of the garment and the facing together by hand. The stitches on the facing side can be visible. The stitches on the right side should be hidden along the outline of the buttonhole rectangle.

facing side of the buttonhole

right side of the buttonhole
Did you sew the perfect bound buttonhole?
Well, nothing is perfect but I hope that this tutorial has helped you to have a better idea on how to sew bound buttonholes. They are really not too difficult, just time-consuming!
Good luck with sewing your bound buttonholes!
