

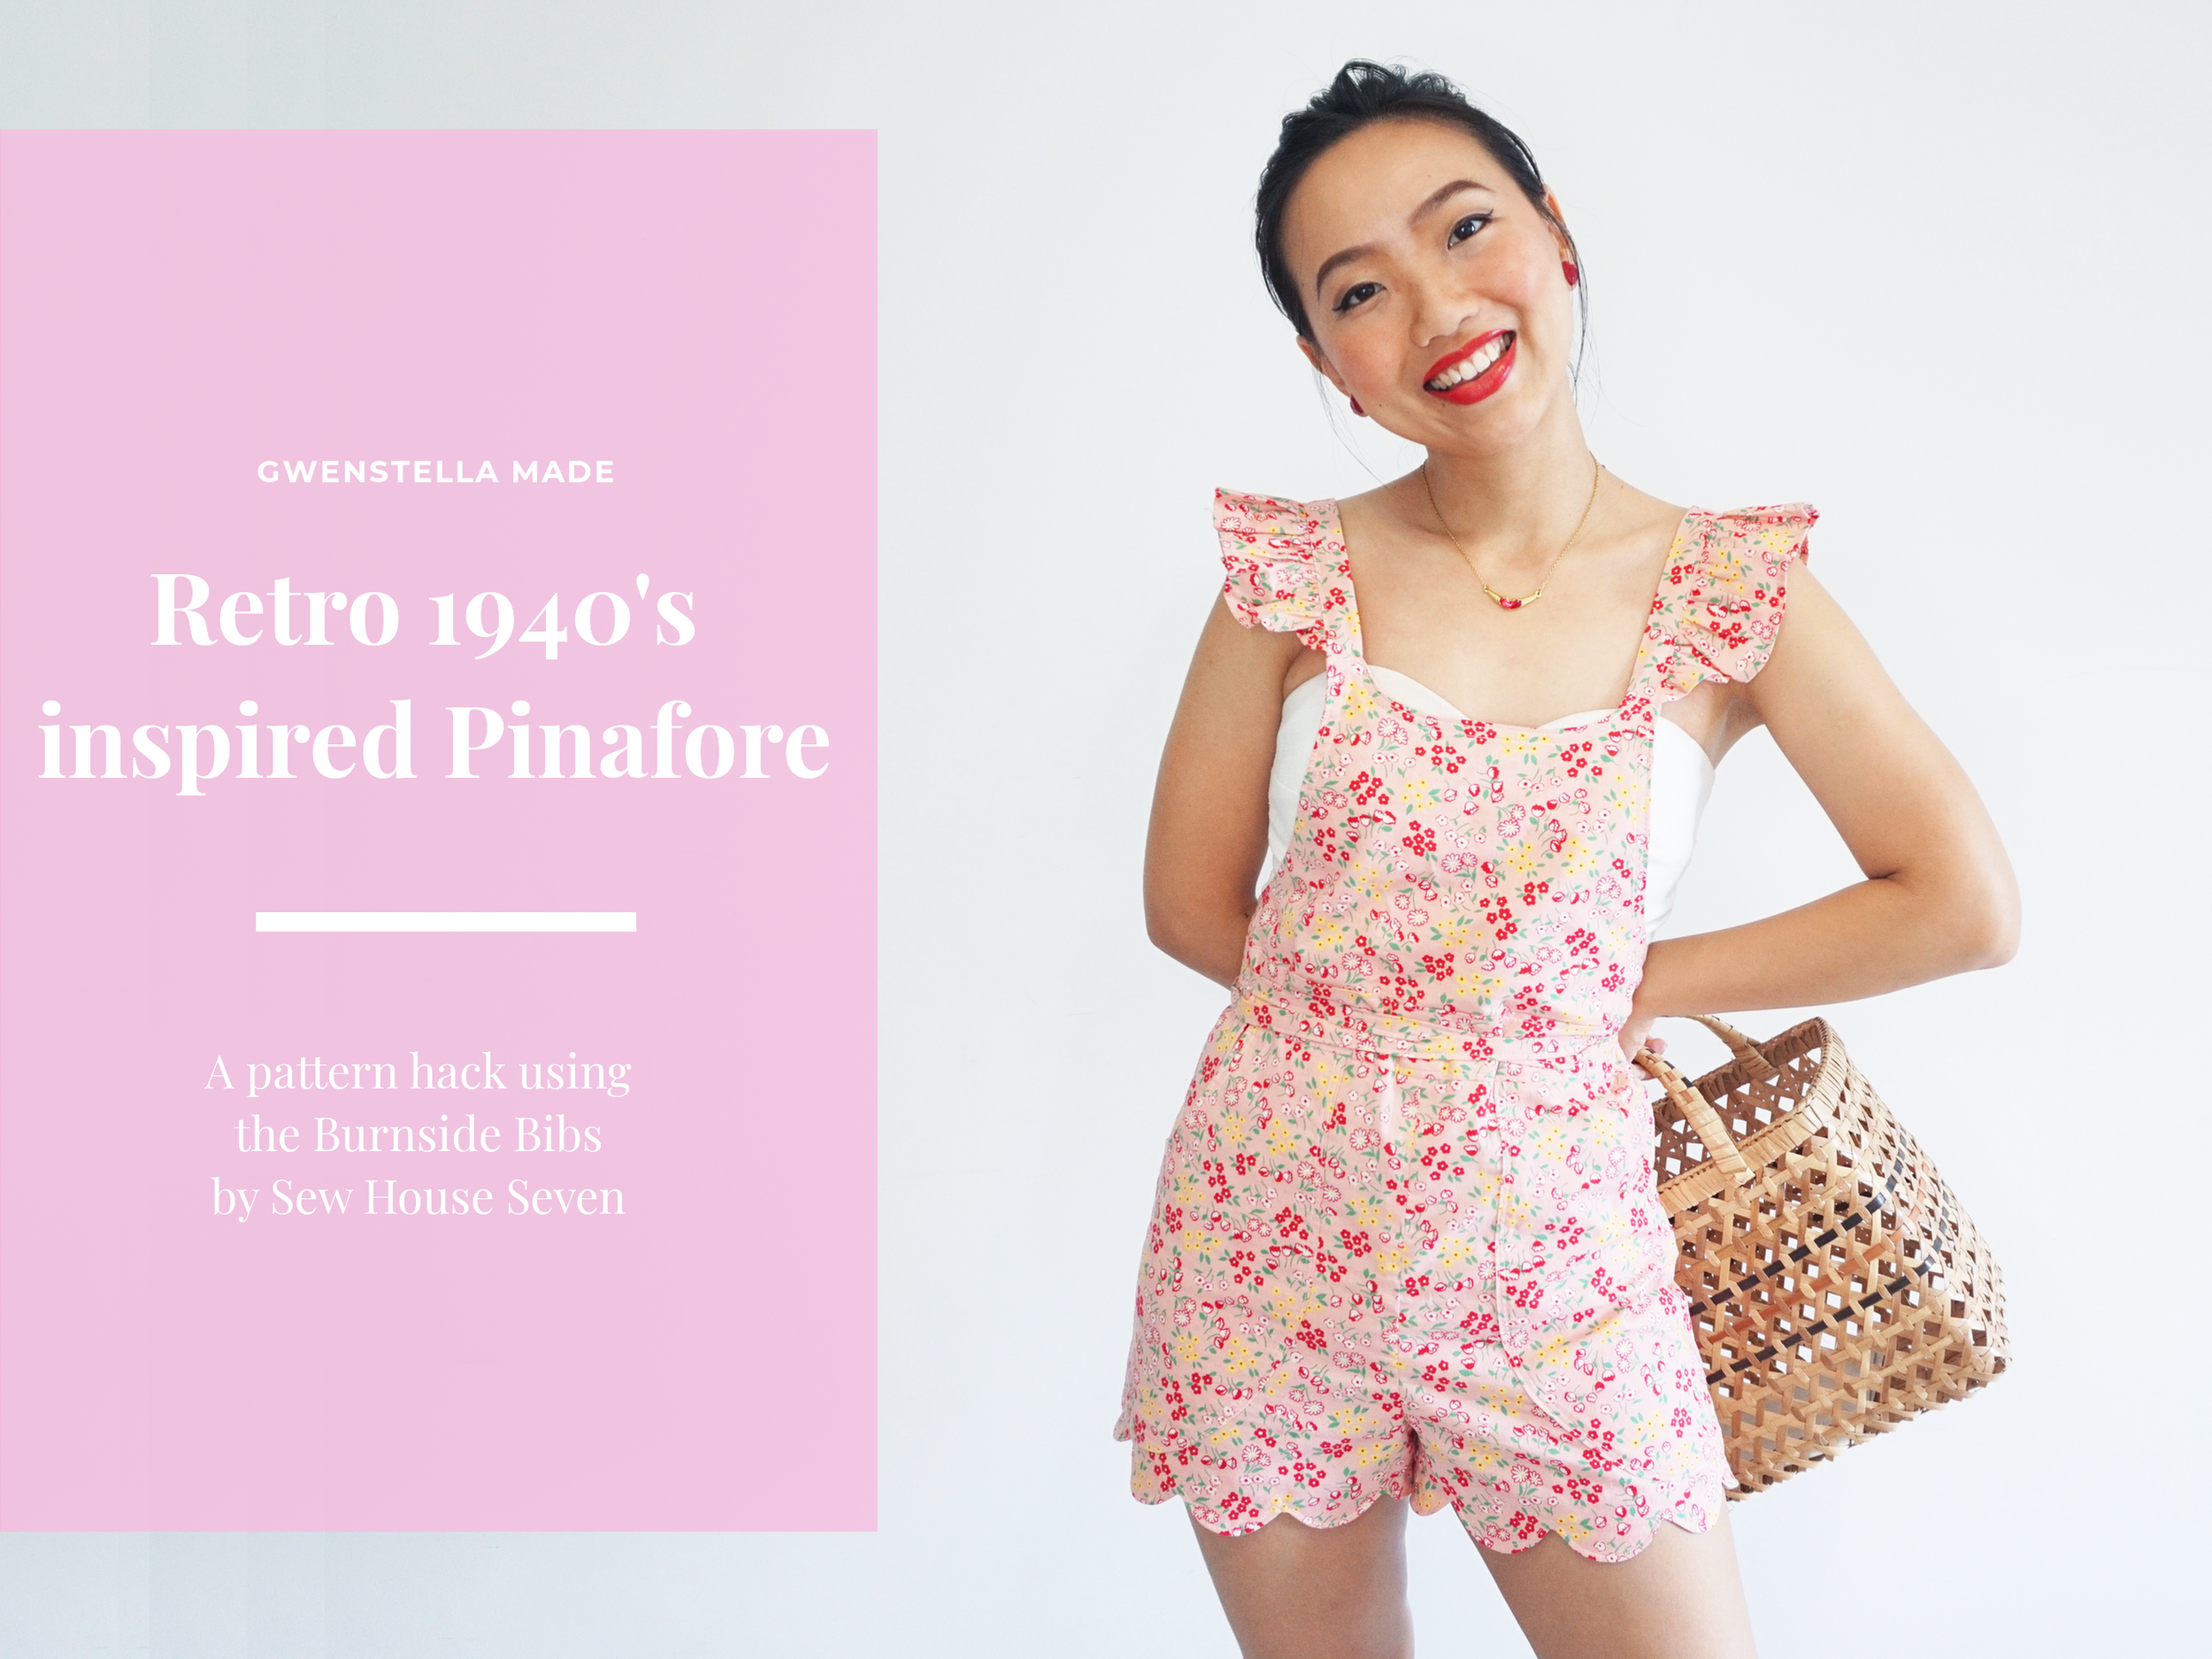
Vintage 1940's Inspired Pinafore (Burnside Bibs Hack)

 My personal mantra for the year 2020 is: use what you have. I am trying to apply this to my sewing projects as well. This means using my fabric stash and doing more pattern hacking. The Burnside Bibs is a pattern that I am hacking repeatedly this year. After making my first monochrome Burnside Bibs (pattern by Sew House Seven) in 2019 as an exclusive work-wear attire, I immediately made plans to make more versions of this pattern.
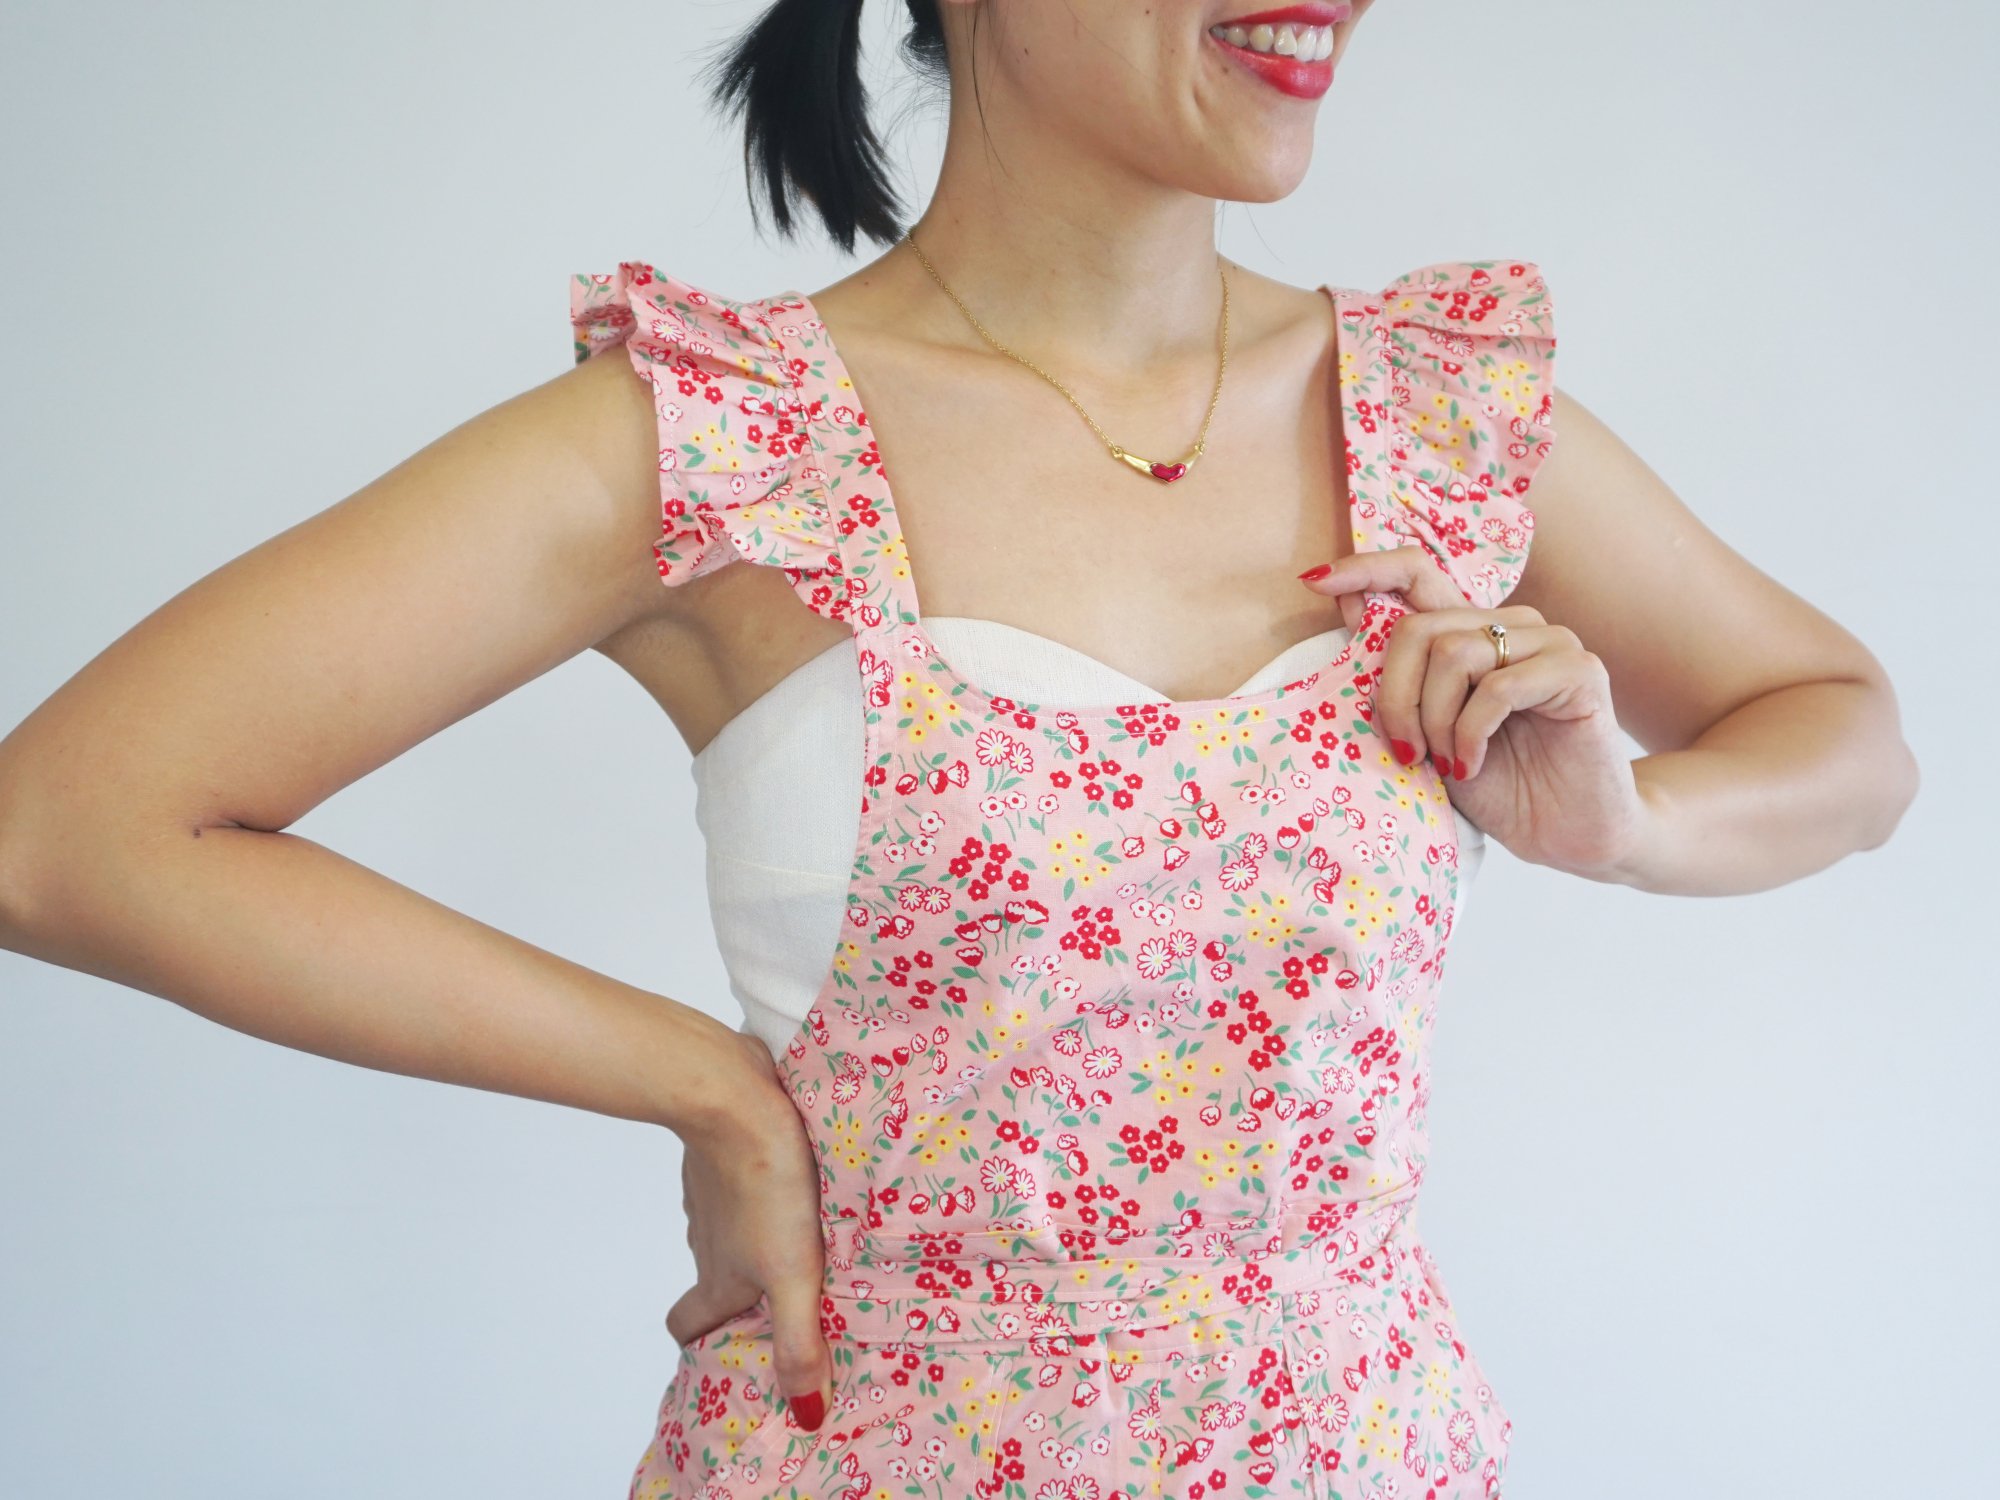 I had bought this LECIEN floral fabric (on impulse, oops) when it was on sale because I knew I wanted to make a summer, weekend version of these bibs. Considering that my weekend wardrobe is usually vintage-inspired, it's no surprise that I decided to take a retro spin on this version of the Burnside Bibs!My inspiration for adding the ruffles came from the numerous vintage sewing pattern envelopes illustrations from the 1940s. Vintage sewing pattern envelopes are basically my version of the Sears catalog - they are such a great resource for studying vintage trends and fashion!
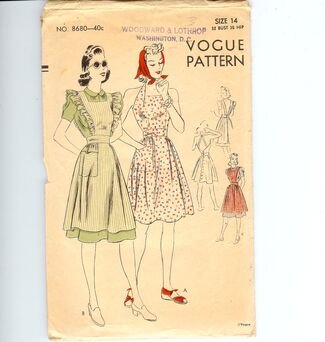
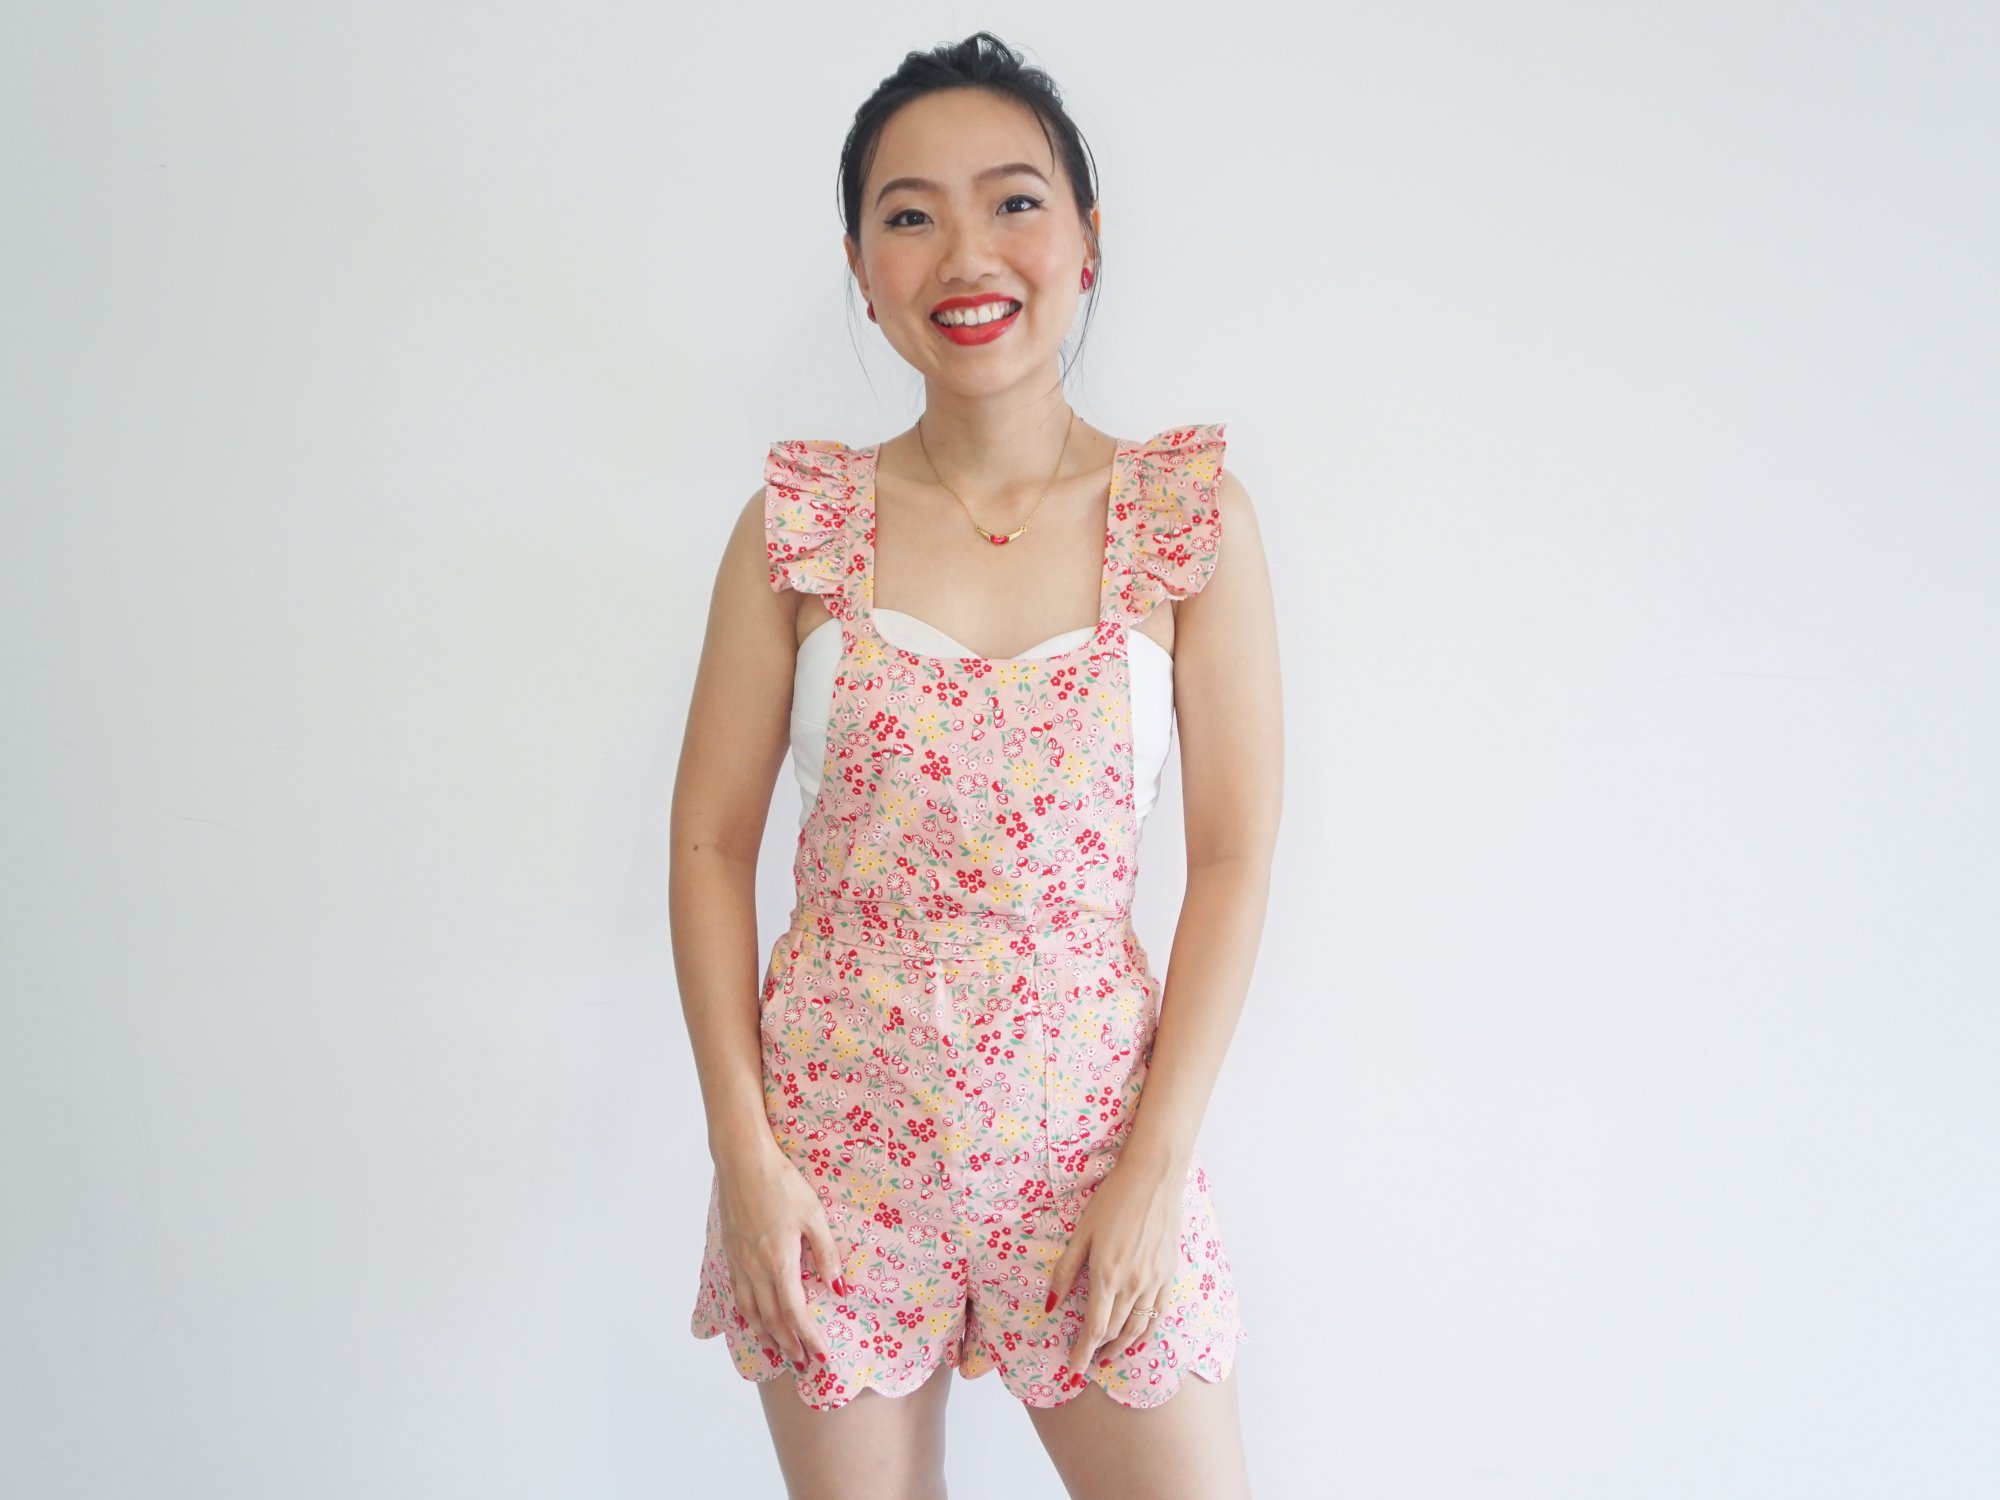
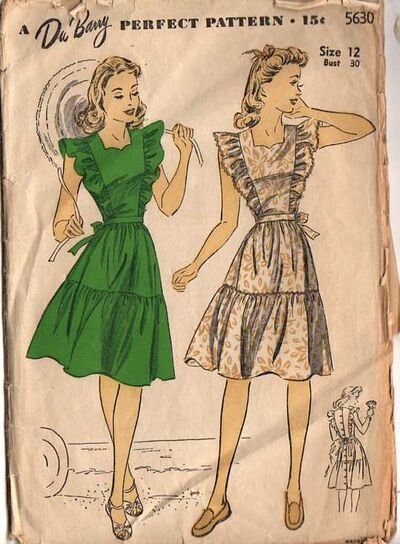 I found that pinafores and overalls seem to be very popular in the 1940s. Wait, are they the same thing? Anyway, many designs feature ruffles over the shoulders. I love the fun, feminine look they give, so I decided to give that a go.Finalback7Whilst I was quick to decide on adding ruffles to the shoulder straps, deciding on whether to add the scalloped hem took a lot longer. I was afraid that the scalloped hem would make the entire look too cute-sy. At the end of the day, I said to myself, "heck, go big or go home". And so, I added the scalloped hem as well. The verdict? I LOVE IT.In summary, here are the changes I made for this retro floral version:
- Crotch length increased by 1” (as I previously talked about in the first version)
- Shorts with finished measurement of 3” inseam
- Ruffles on straps
- Scalloped hem
And here's how you can hack the Burnside Bibs by Sew House Seven too!
- Increasing the crotch length
- Cut the front and back pants pattern pieces by following the horizontal crotch marking on the original paper pattern
- Spread the pattern pieces by 1” to increase the crotch length
- Making the short length
- Mark 5” inseam length for both front and back pants pattern pieces
- Cut fabric with the 5” inseam length
- Adding ruffles to shoulder strap
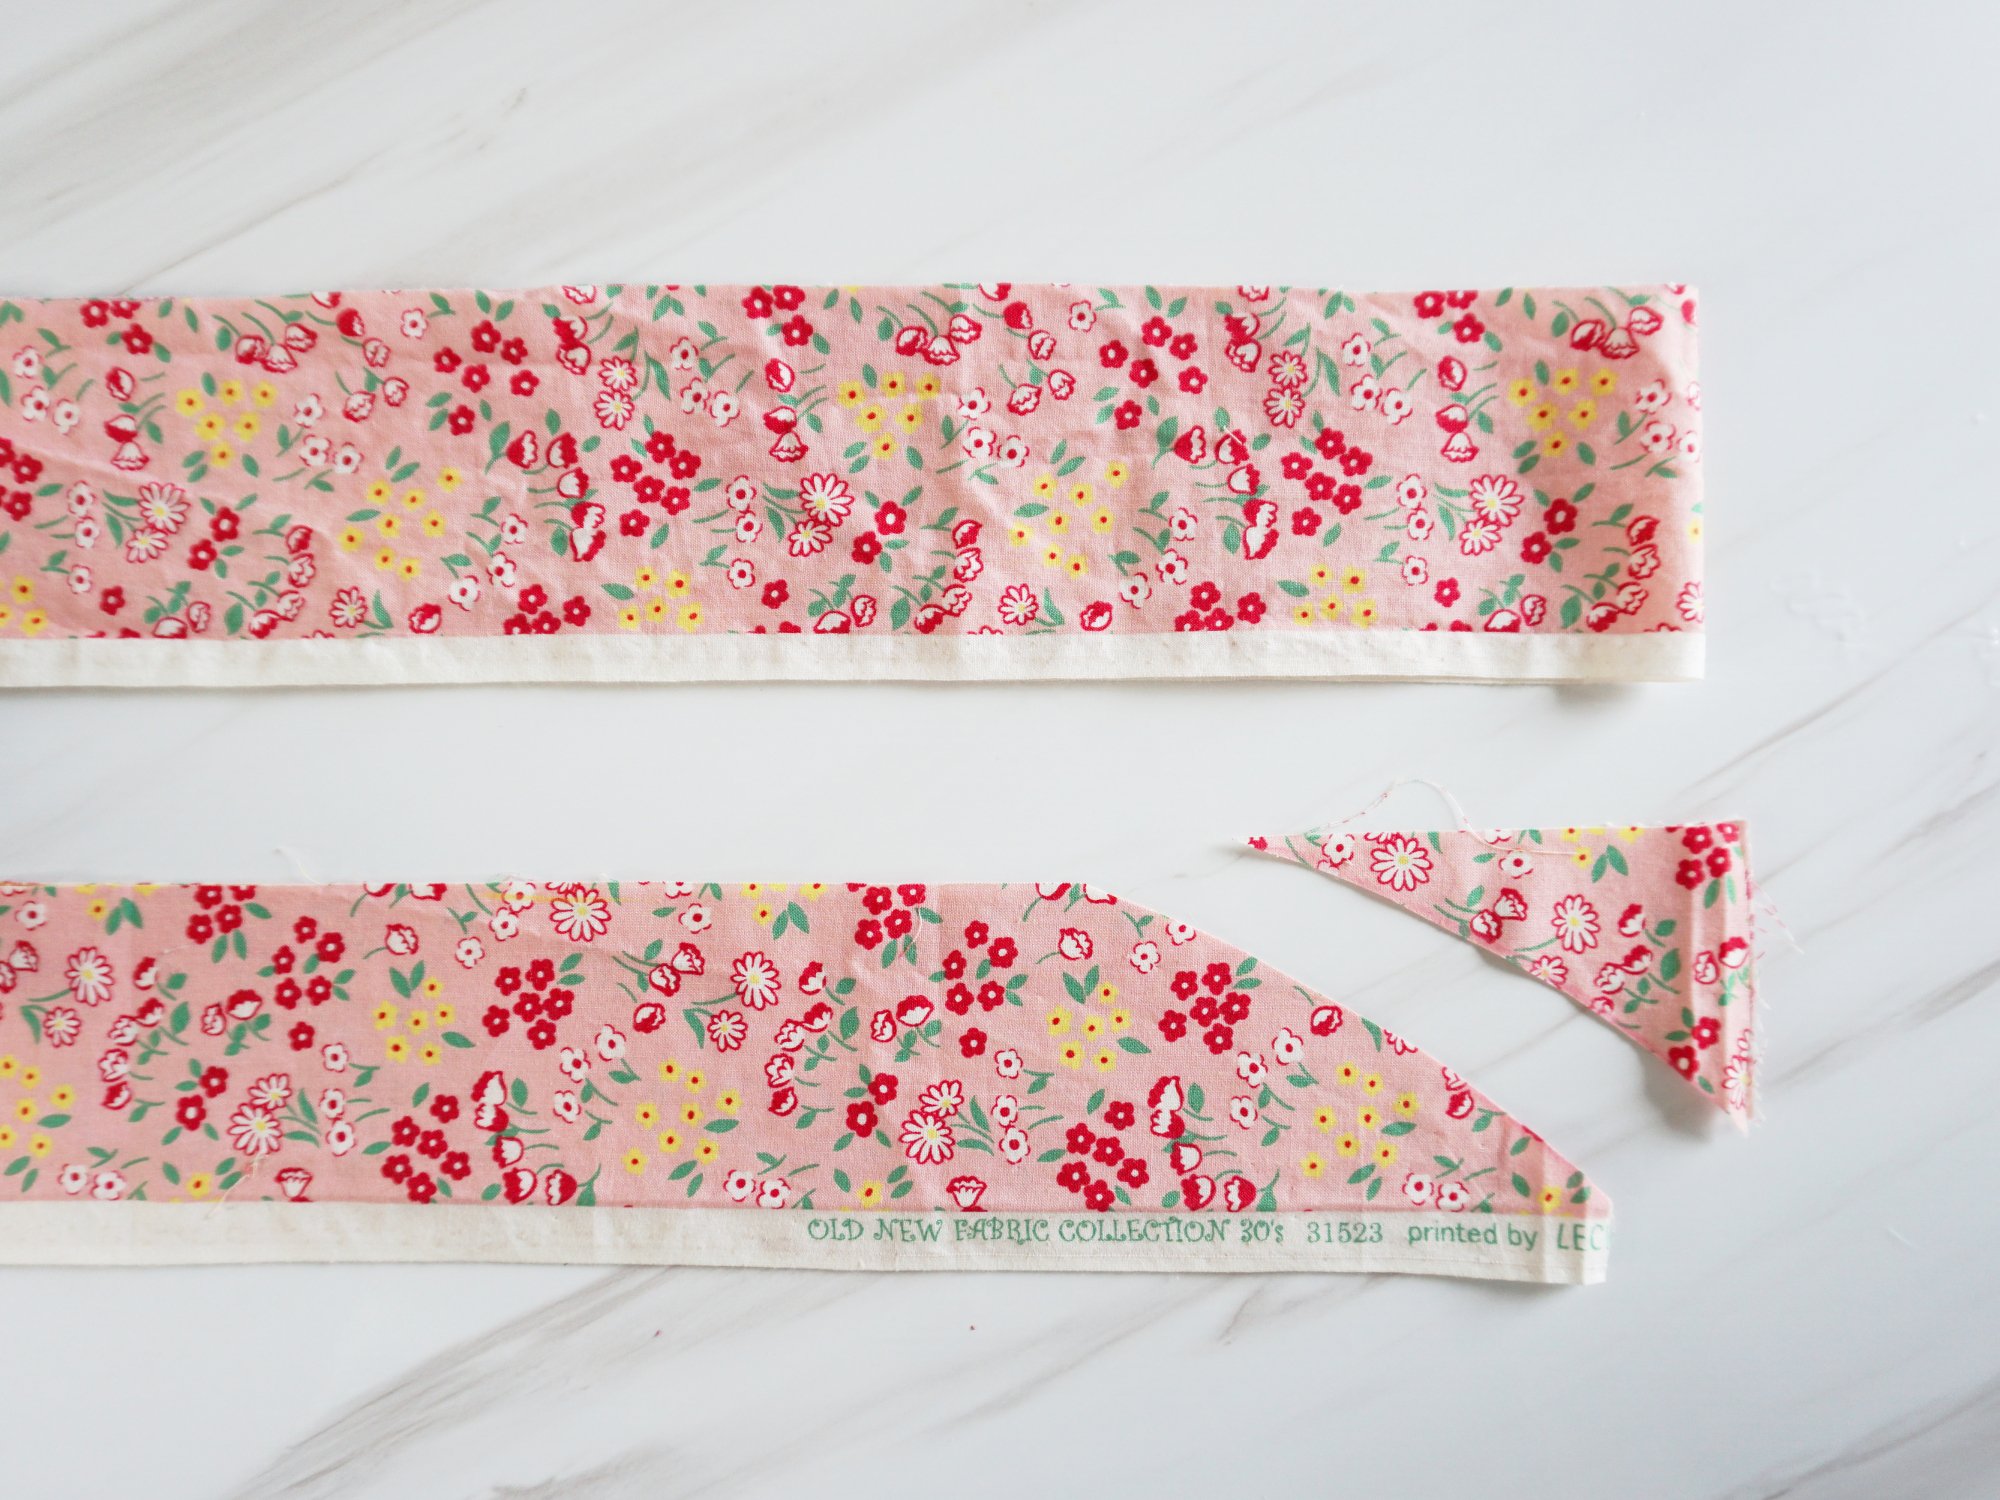
- Cut fabric for shoulder straps and ties according to original pattern
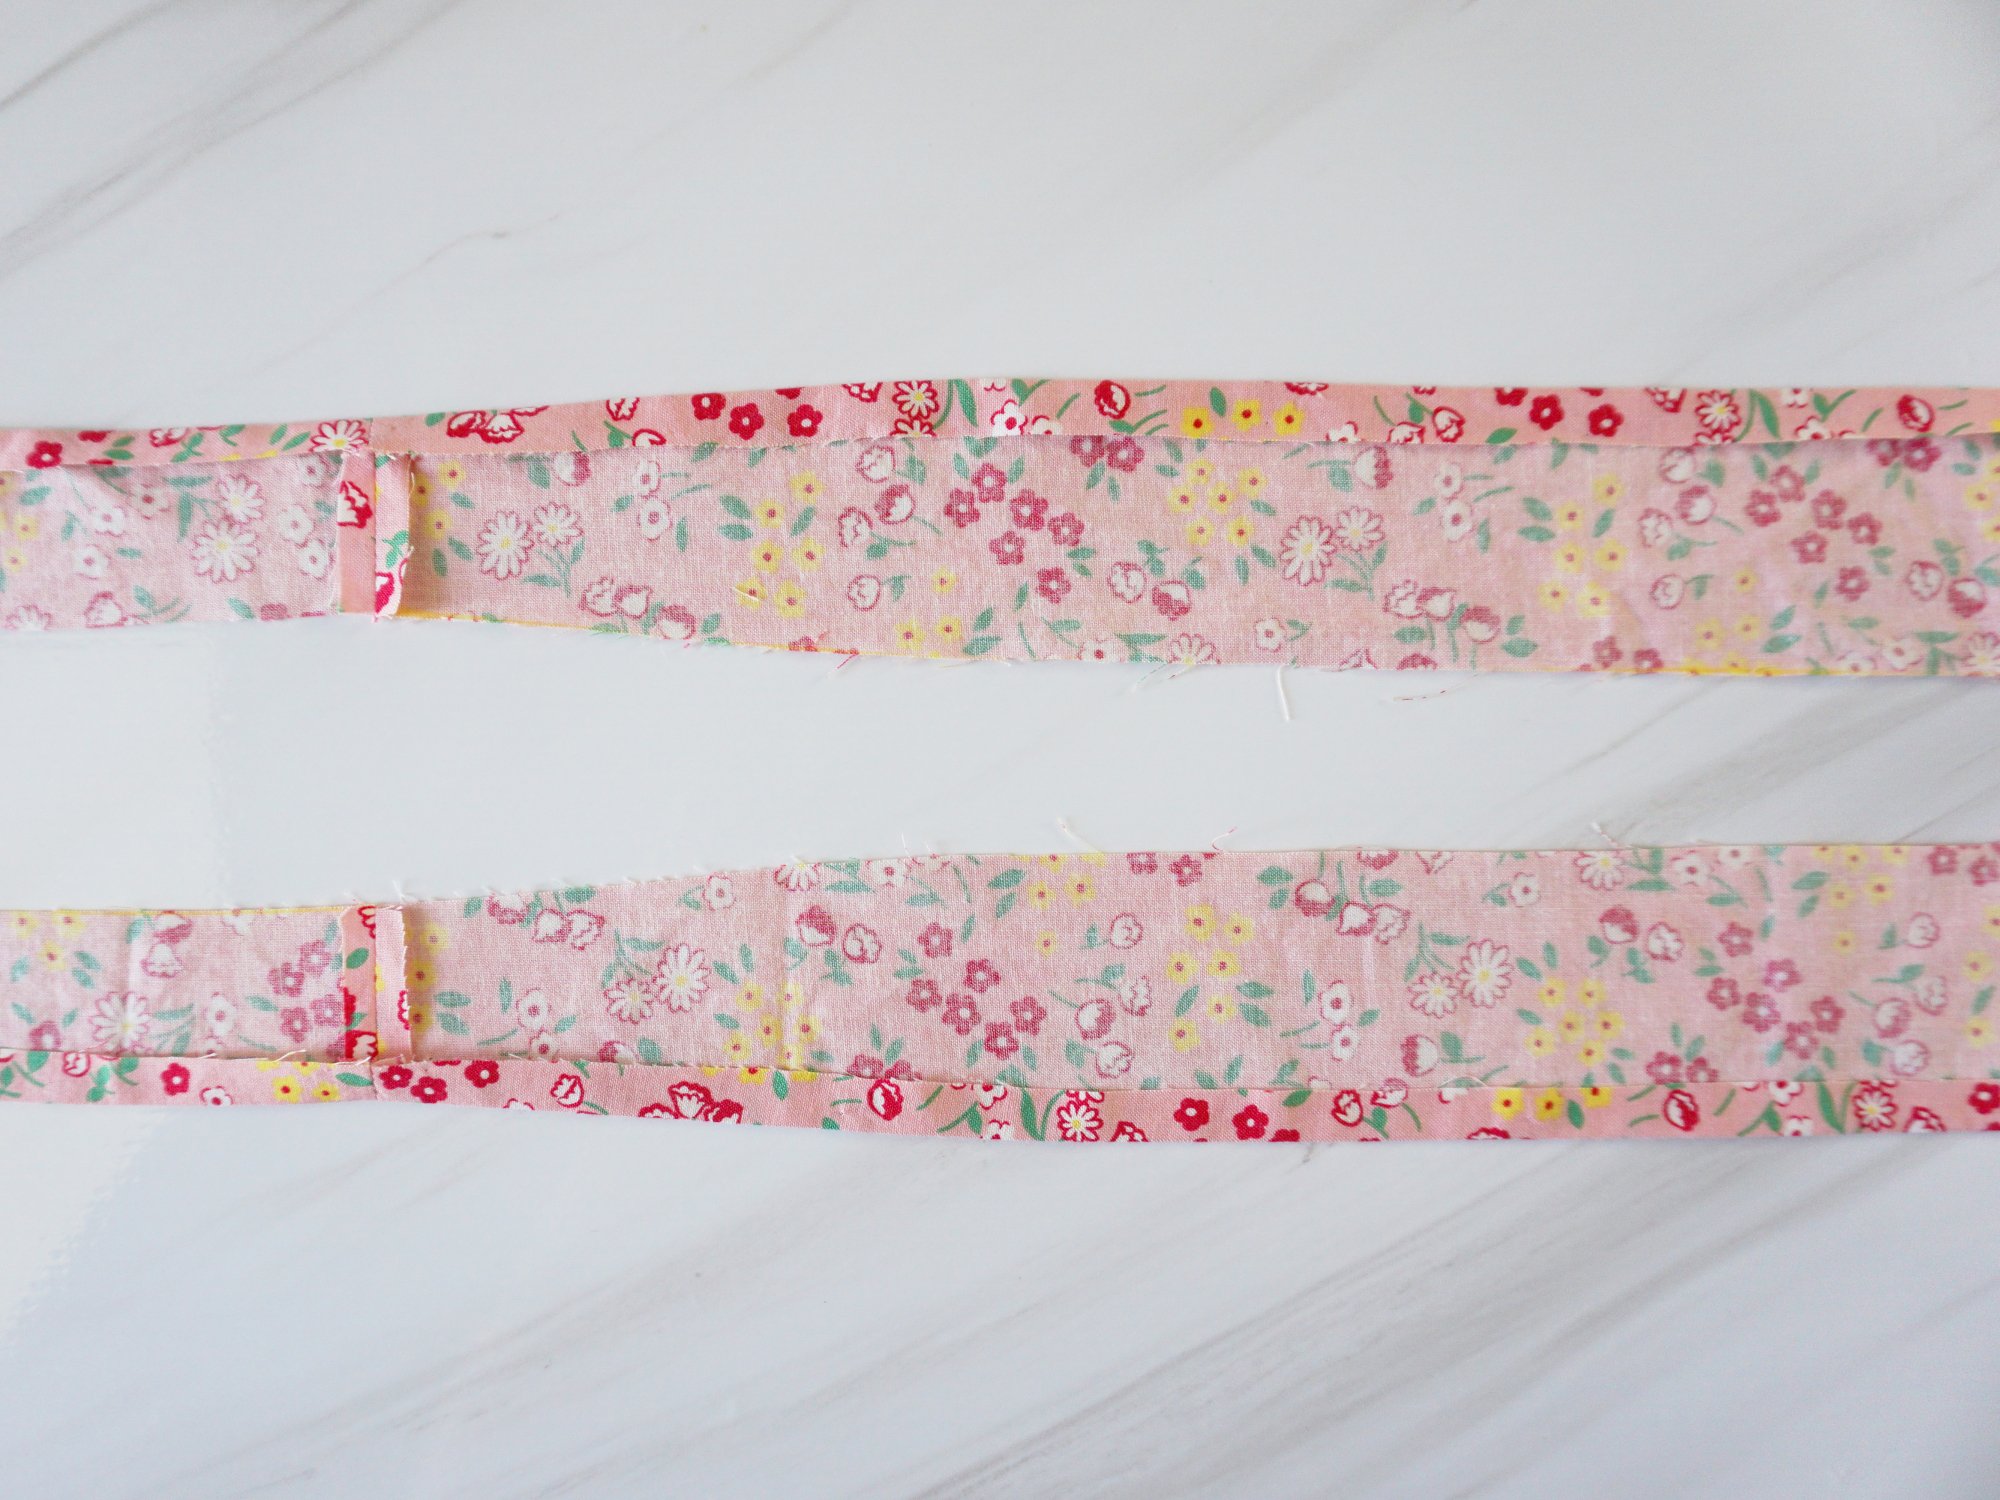
- Cut 2 pieces of rectangular strips measuring 3” by (~2 x the length of your should straps)”. I made the 00 size and the length of the shoulder straps for this size is ~24”. So, I cut 2 rectangular strips of fabric measuring 3” by 50”.
- Fold one of the strips in half, WS together. Using a tailor’s chalk, mark 5/8” from one of the corners. Then, using a pair of scissors, cut a gentle curve from the marked point to the long edge of the fabric strip. Repeat this for the other end of the fabric strip.
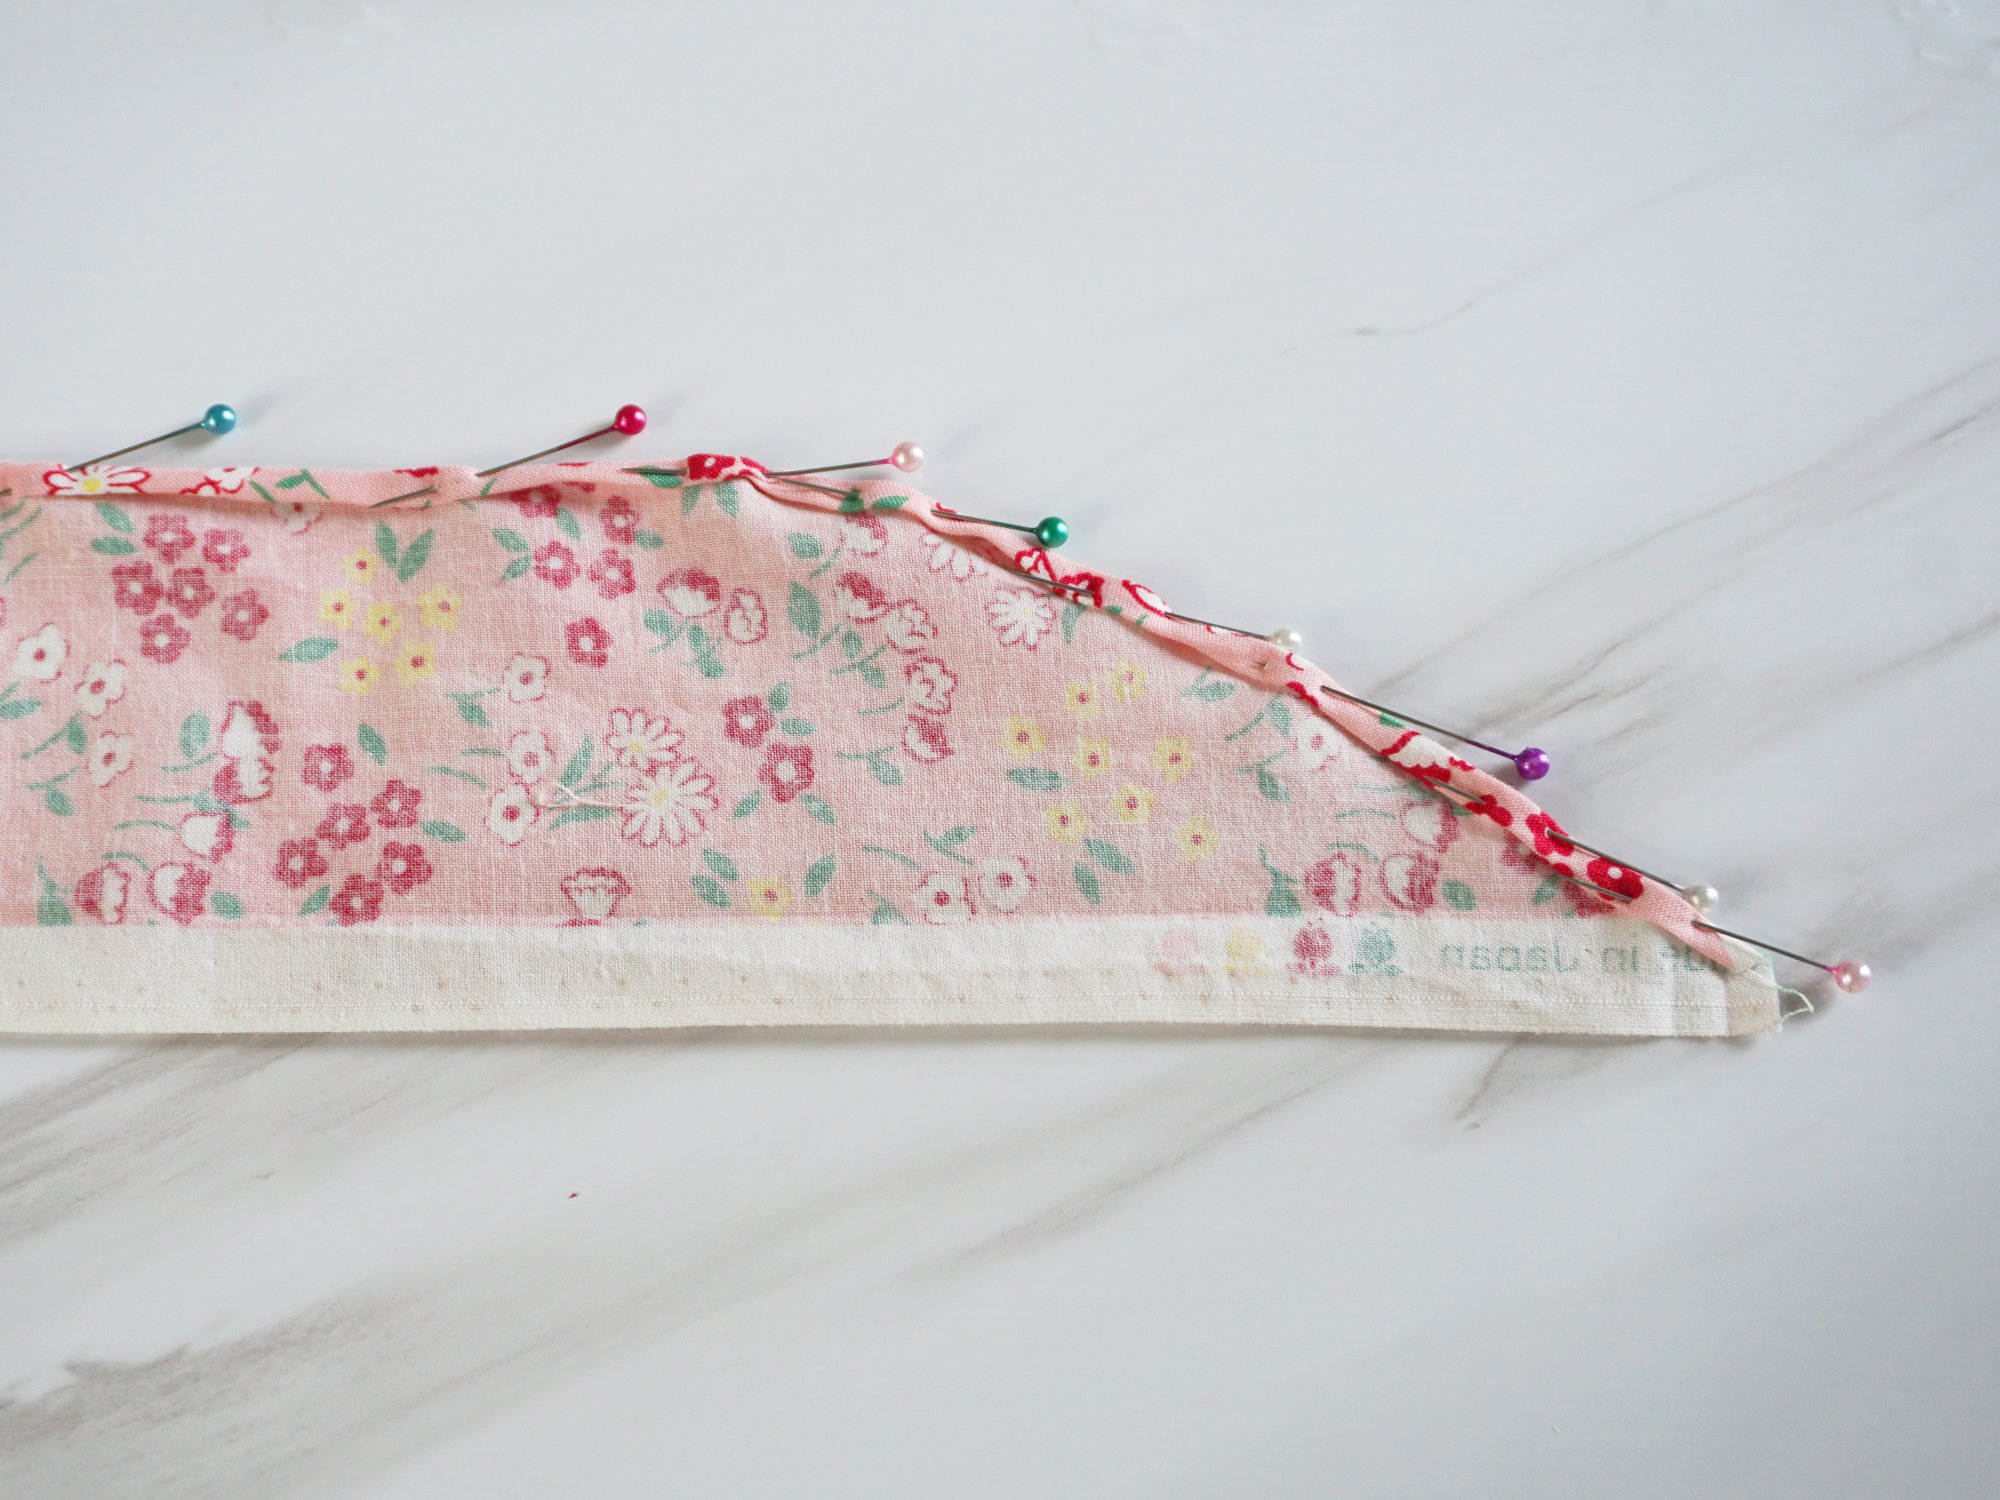
- With the help of an iron, fold and press 1/8” of the curved edge and long edge of the fabric. Then, fold and press 1/8” length again to create a double-fold edge. Pin the double-fold edge in place.
- Edgestitch the double-fold edge in place.

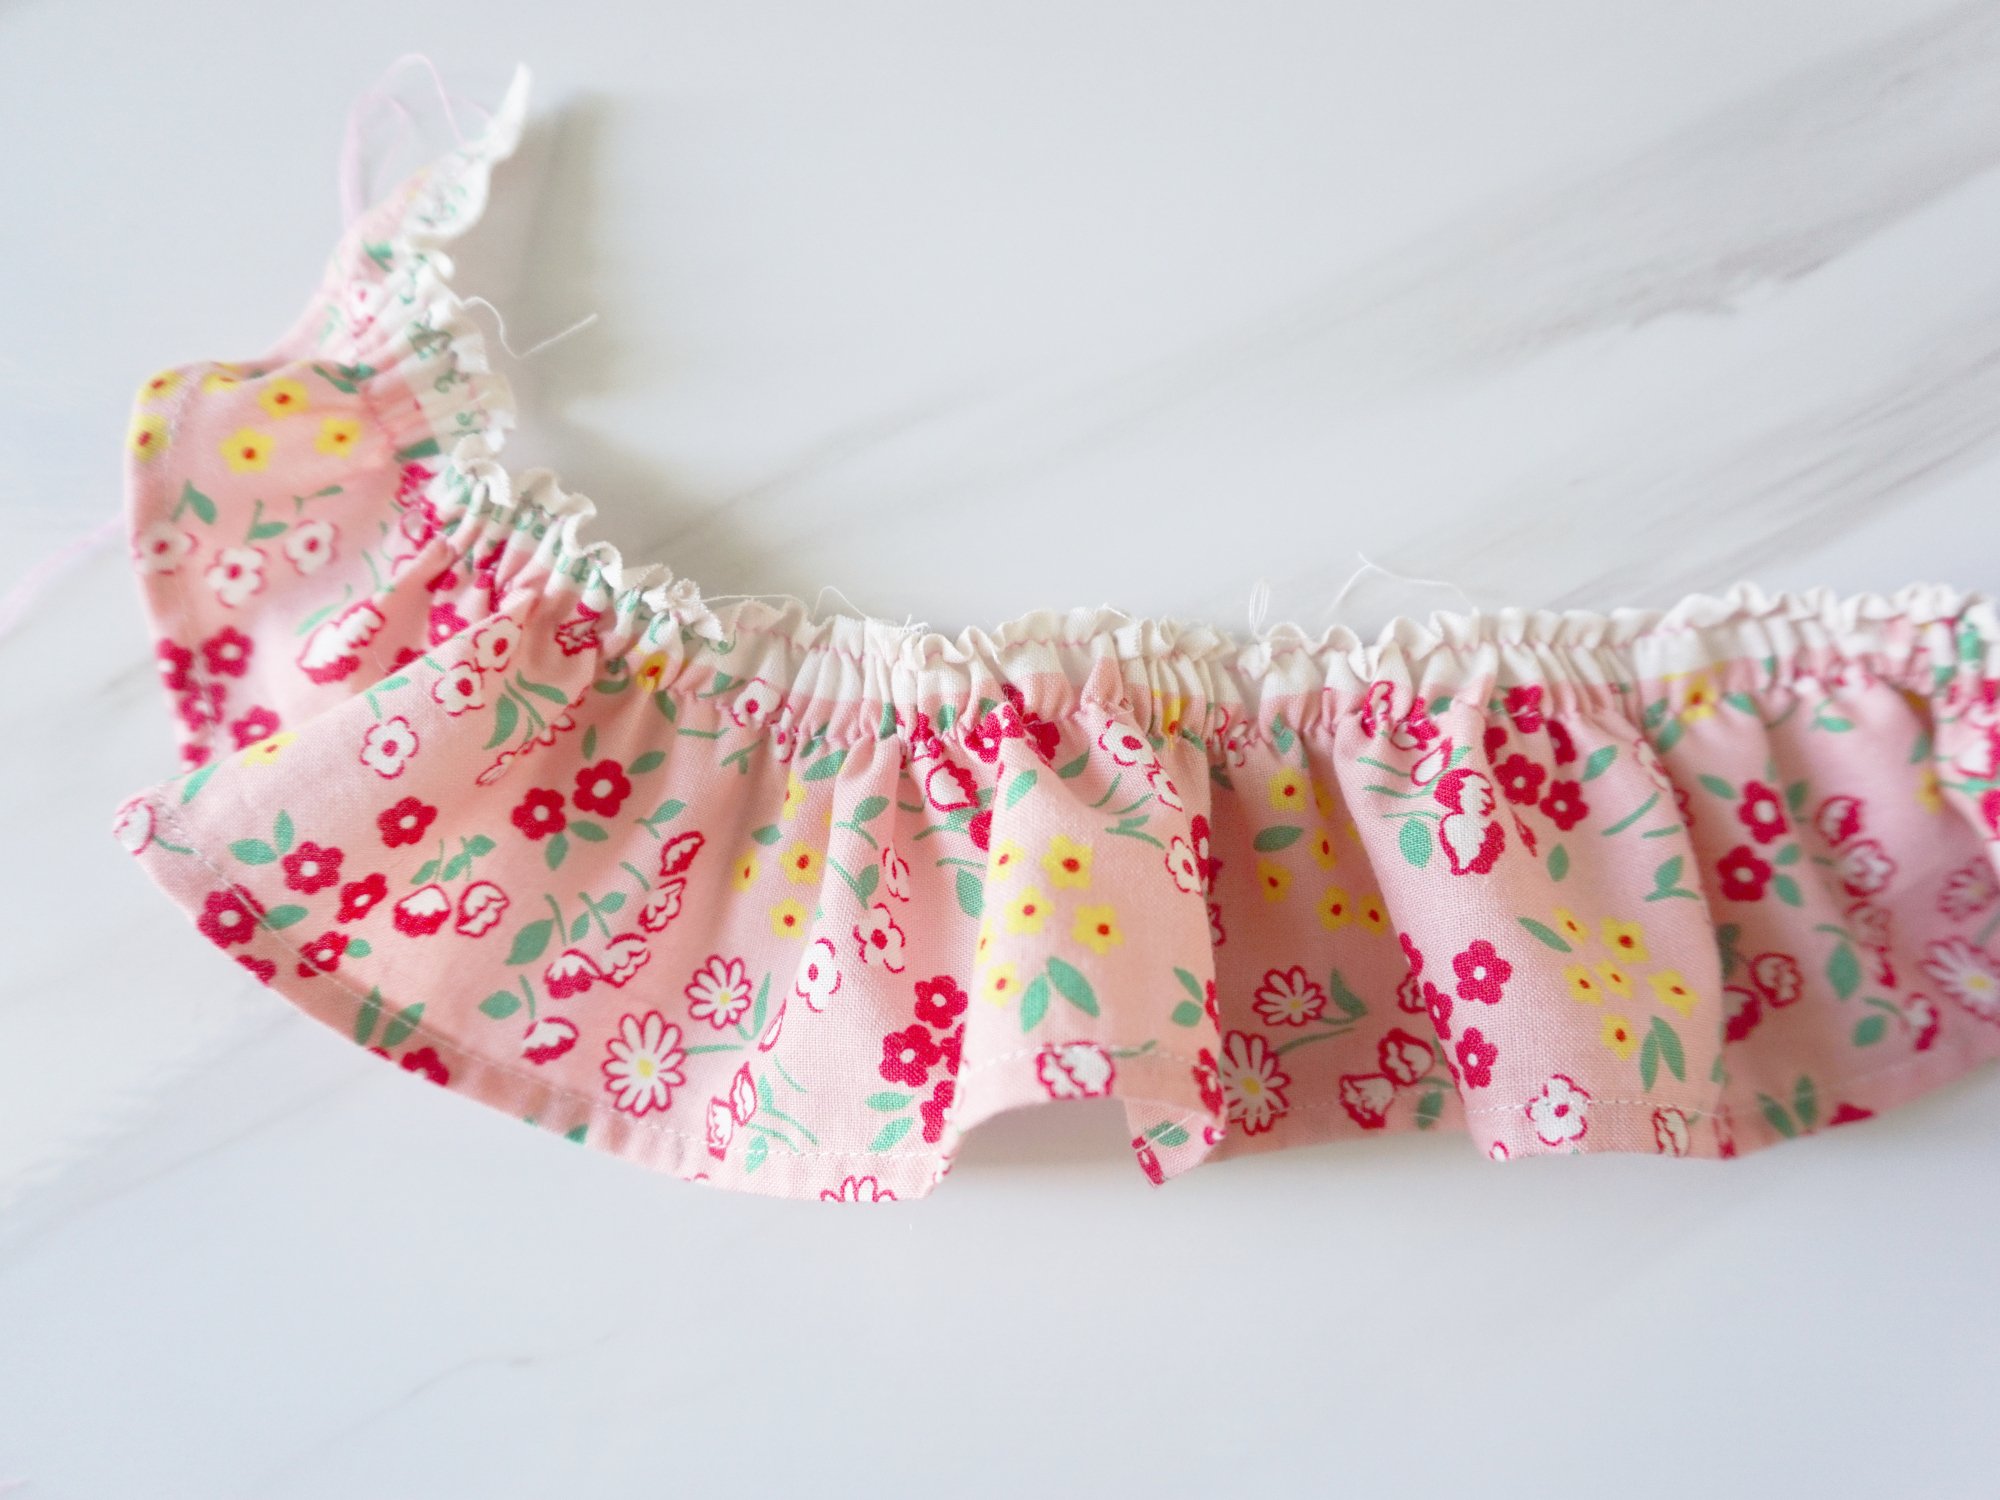
- Using the longest stitch on your sewing machine, sew basting stitches (i.e. a continuous length of straight stitches) on the fabric strips, 2/8” and 5/8” from the raw edge.
- Create ruffles by gently pulling only 1 thread from each row of basting stitches. The final length of the ruffles should measure no more than the finished length of the shoulder straps. (Note: My ruffles are the exact length of the shoulder straps. You may wish to make your ruffles shoulder shorter if you like. If I could do this again, I would probably make the ruffles shorter.)
- Prepare shoulder straps and tie according to instructions in the original pattern using the FOLD METHOD (i.e. fold and press 3/8" for one of the long edge of the shoulder strap + tie combination).
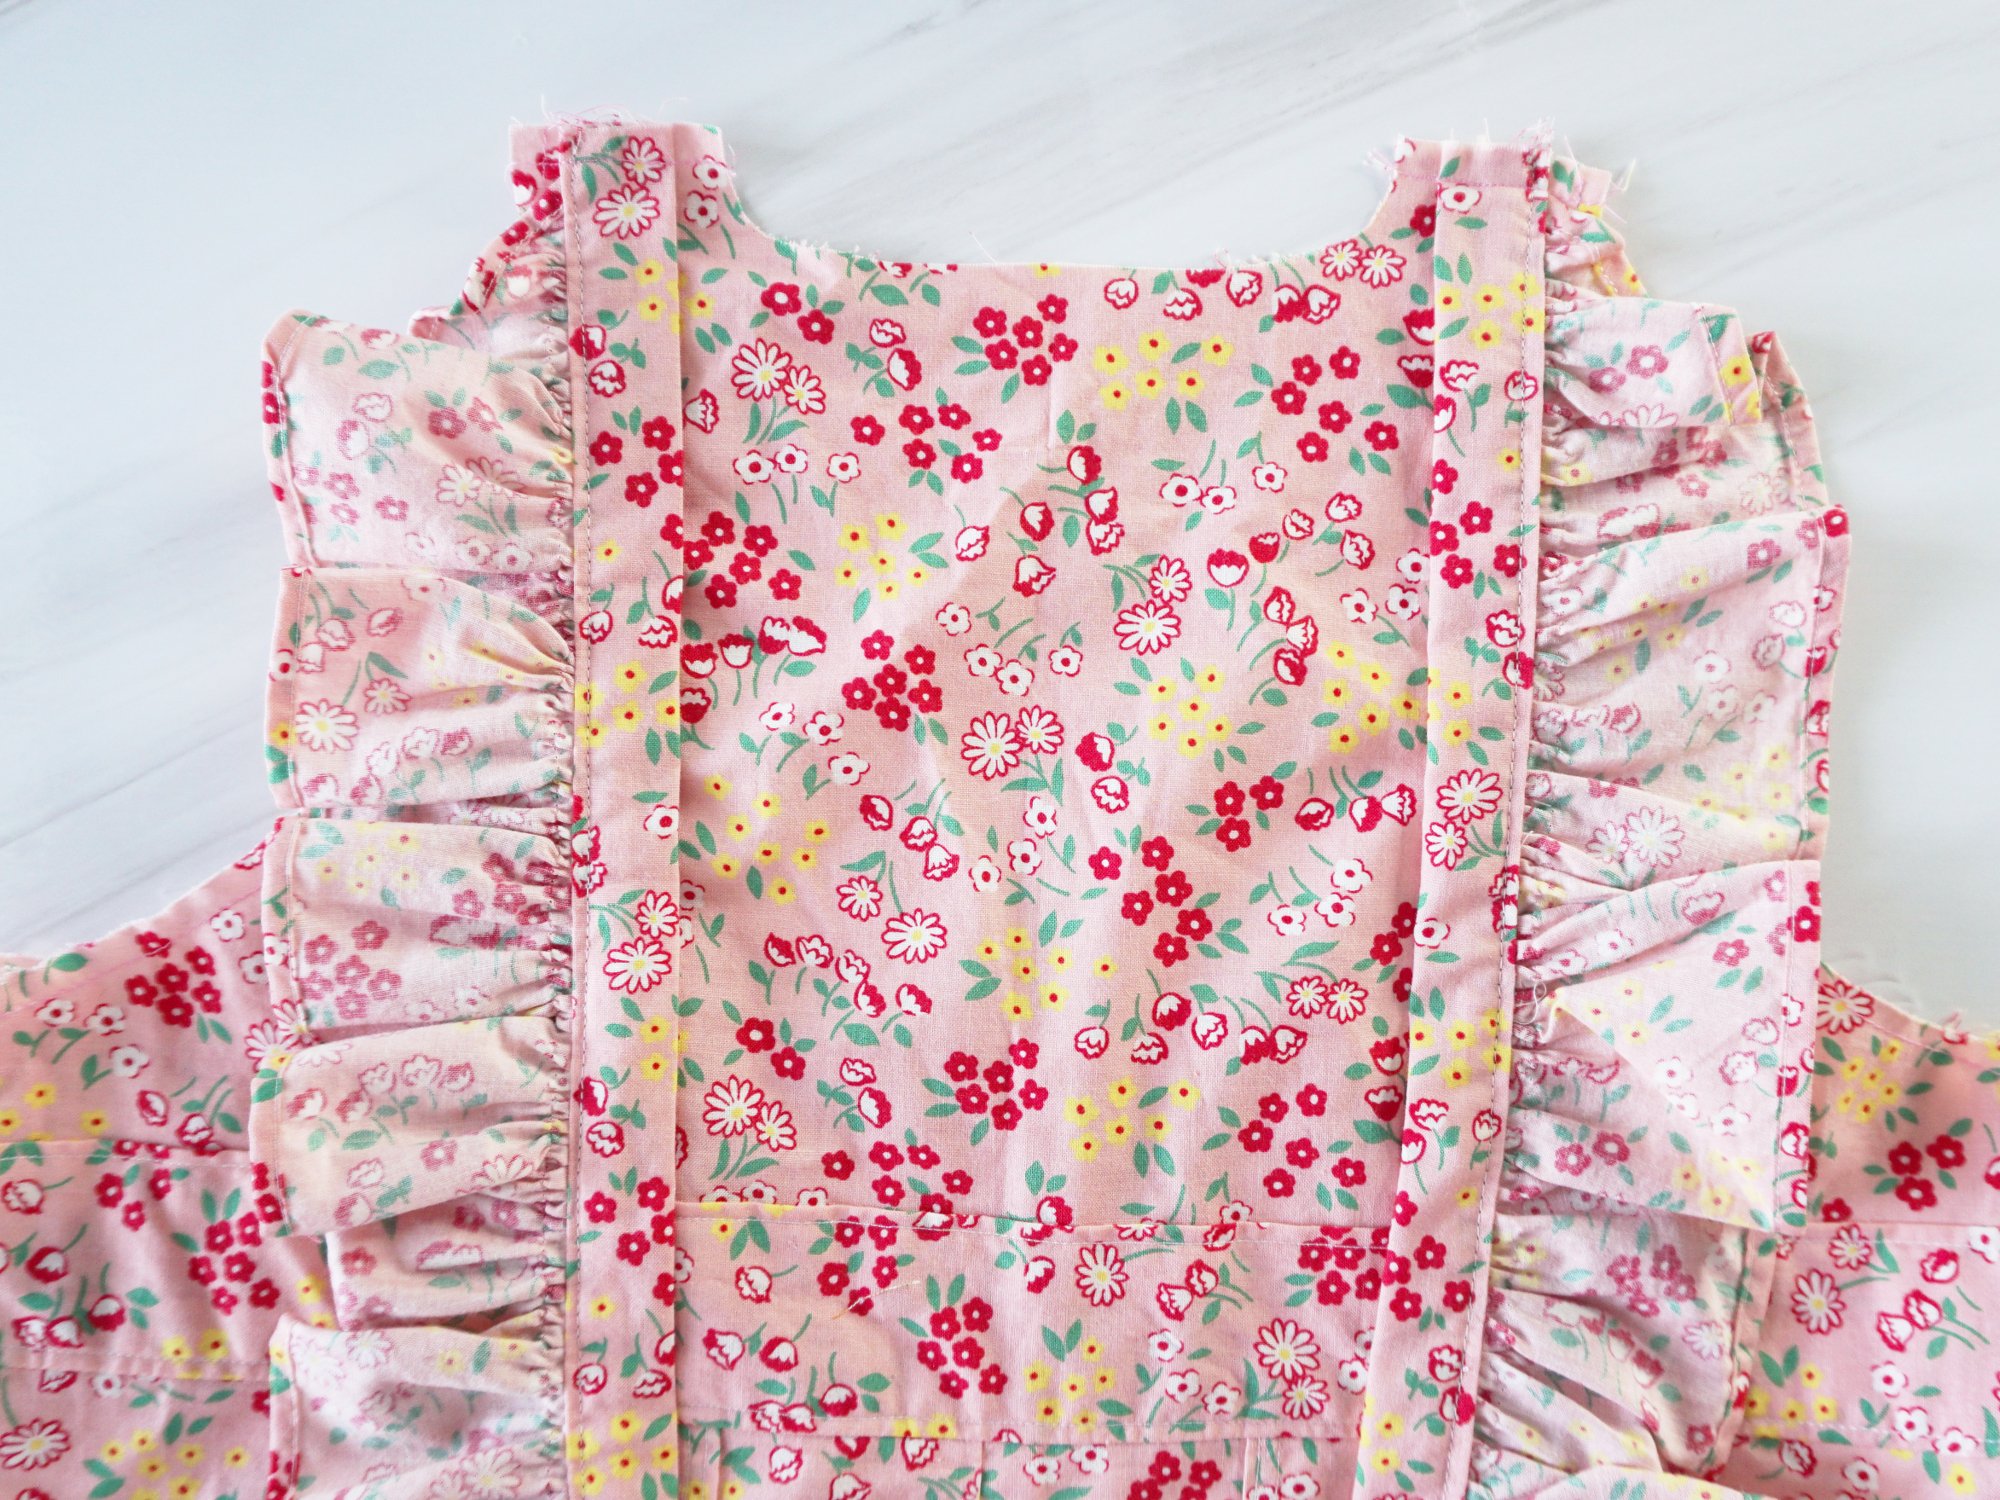
- With RS of the shoulder straps and RS of the ruffles together, pin the ruffles to the shoulder straps with the curved edge. Make sure to align one end of the ruffle to the start of the shoulder strap and the other end of the ruffle to seam between the shoulder strap and the tie (or shorter if you don’t want your ruffles to be too long).
- Sew the shoulder strap and ruffle together using a 3/8" allowance. You may want to press the ruffles flat before sewing to make sewing easier.

- Fold the shoulder strap and tie in half lengthwise and edgestitch in place as per original pattern.
- Attach the shoulder straps with ruffles to the bib as per original pattern. Make sure both ruffled straps are mirror image of one another!
- Don't forget to remove the basting stitches at the end as well.
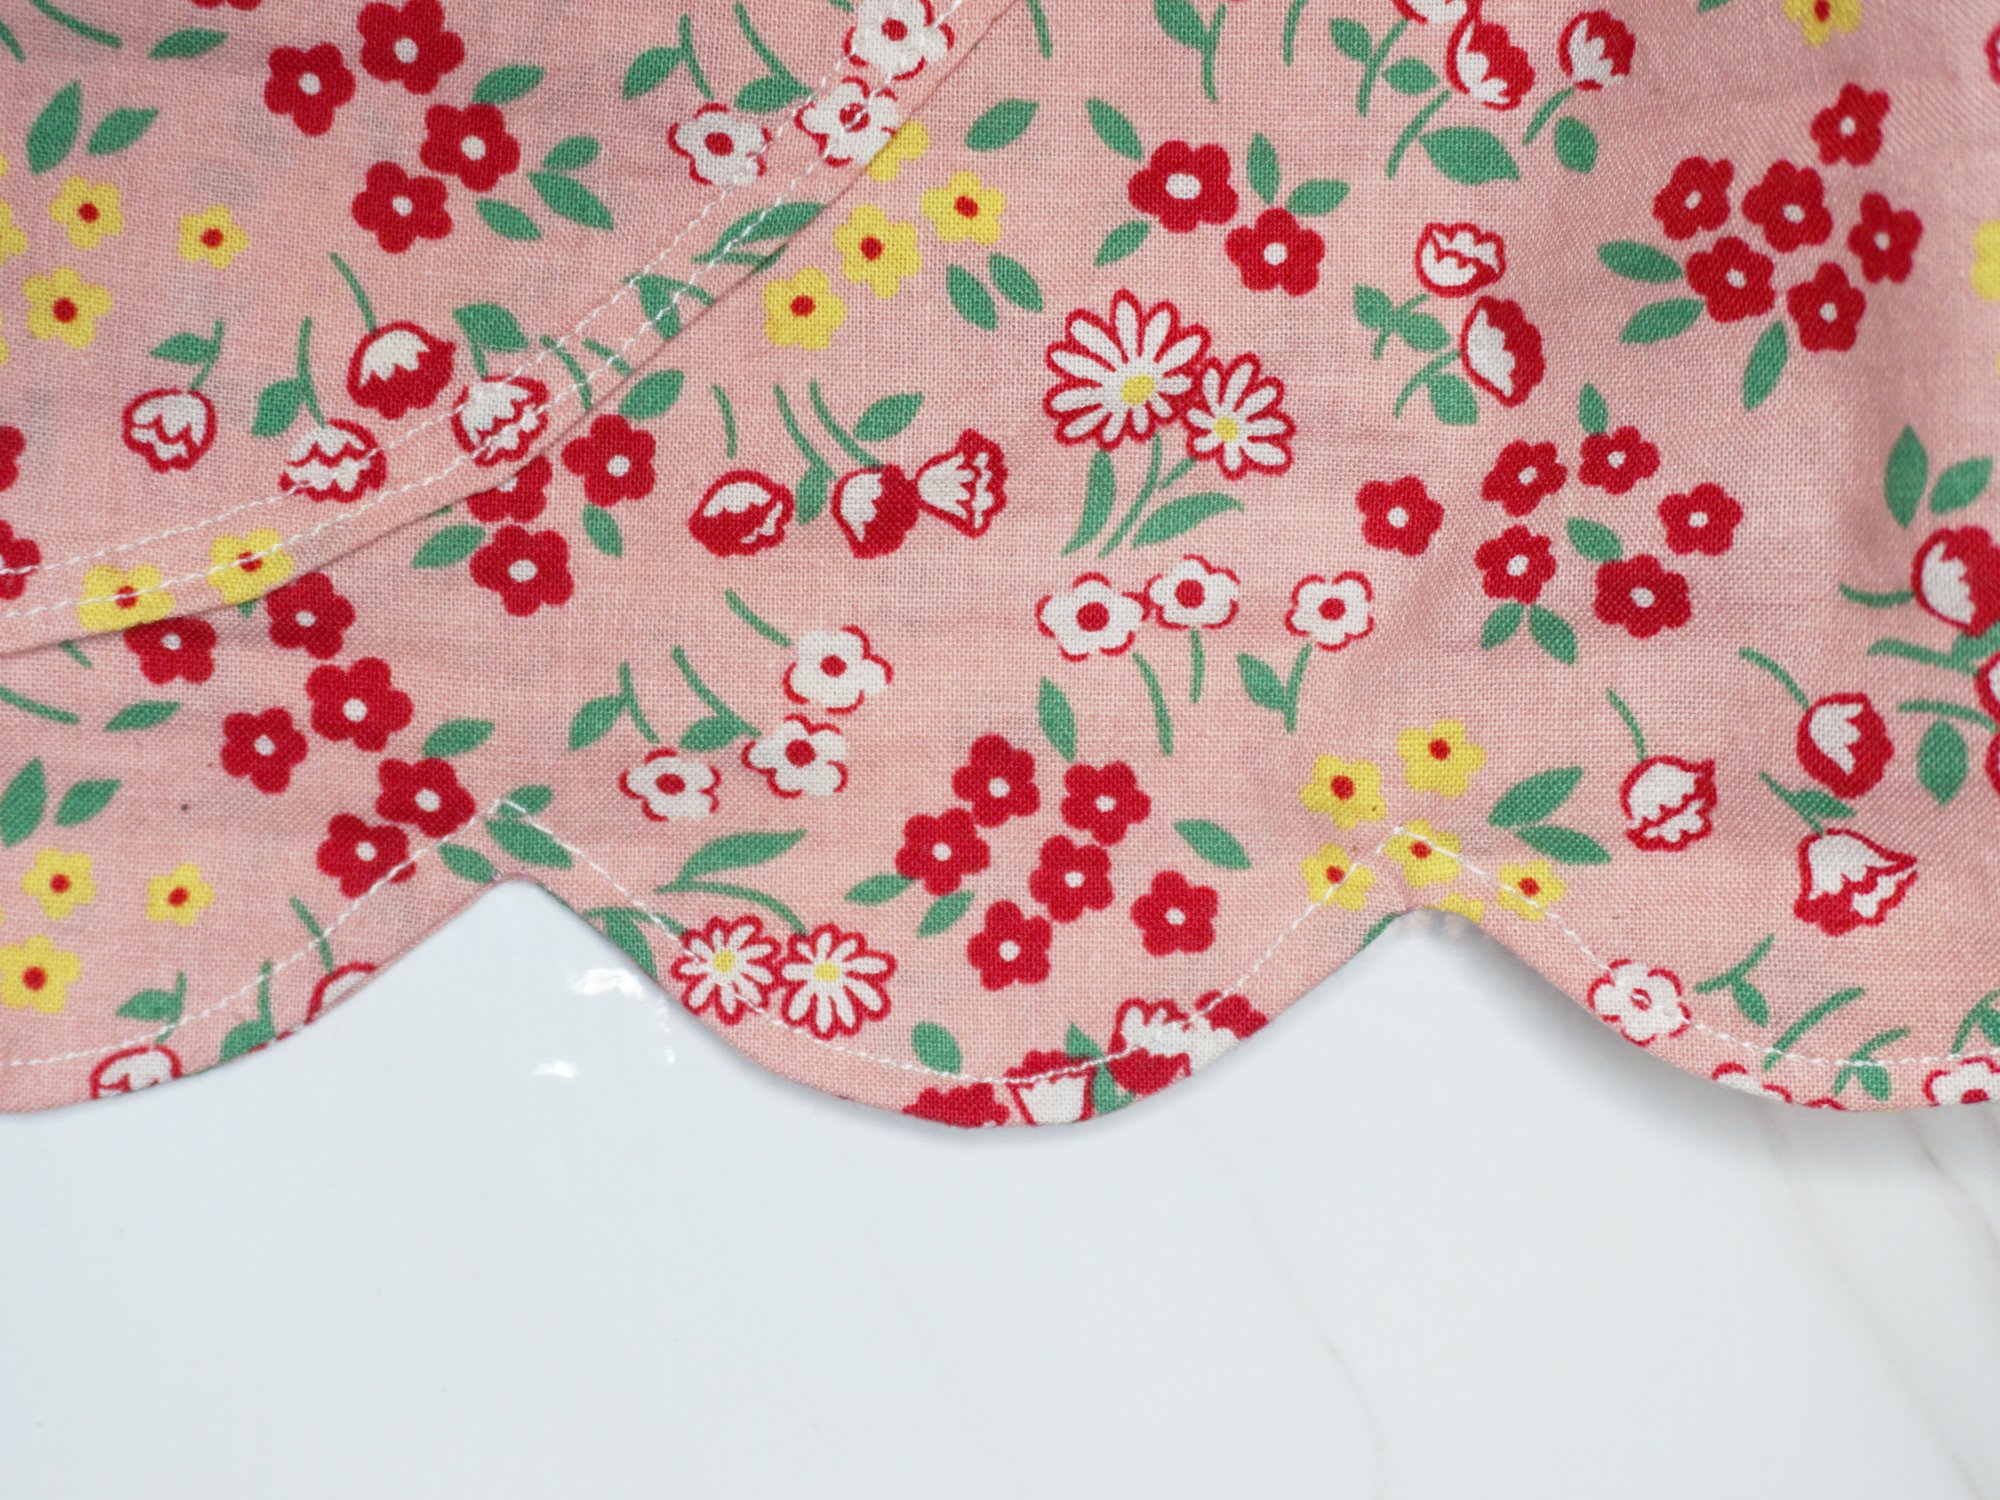
- Sewing the scallop-edge hem
- Using your sewing machine, sew zig-zag stitch all along the raw edge of the hem. You may also wish to use a serger if you have one.
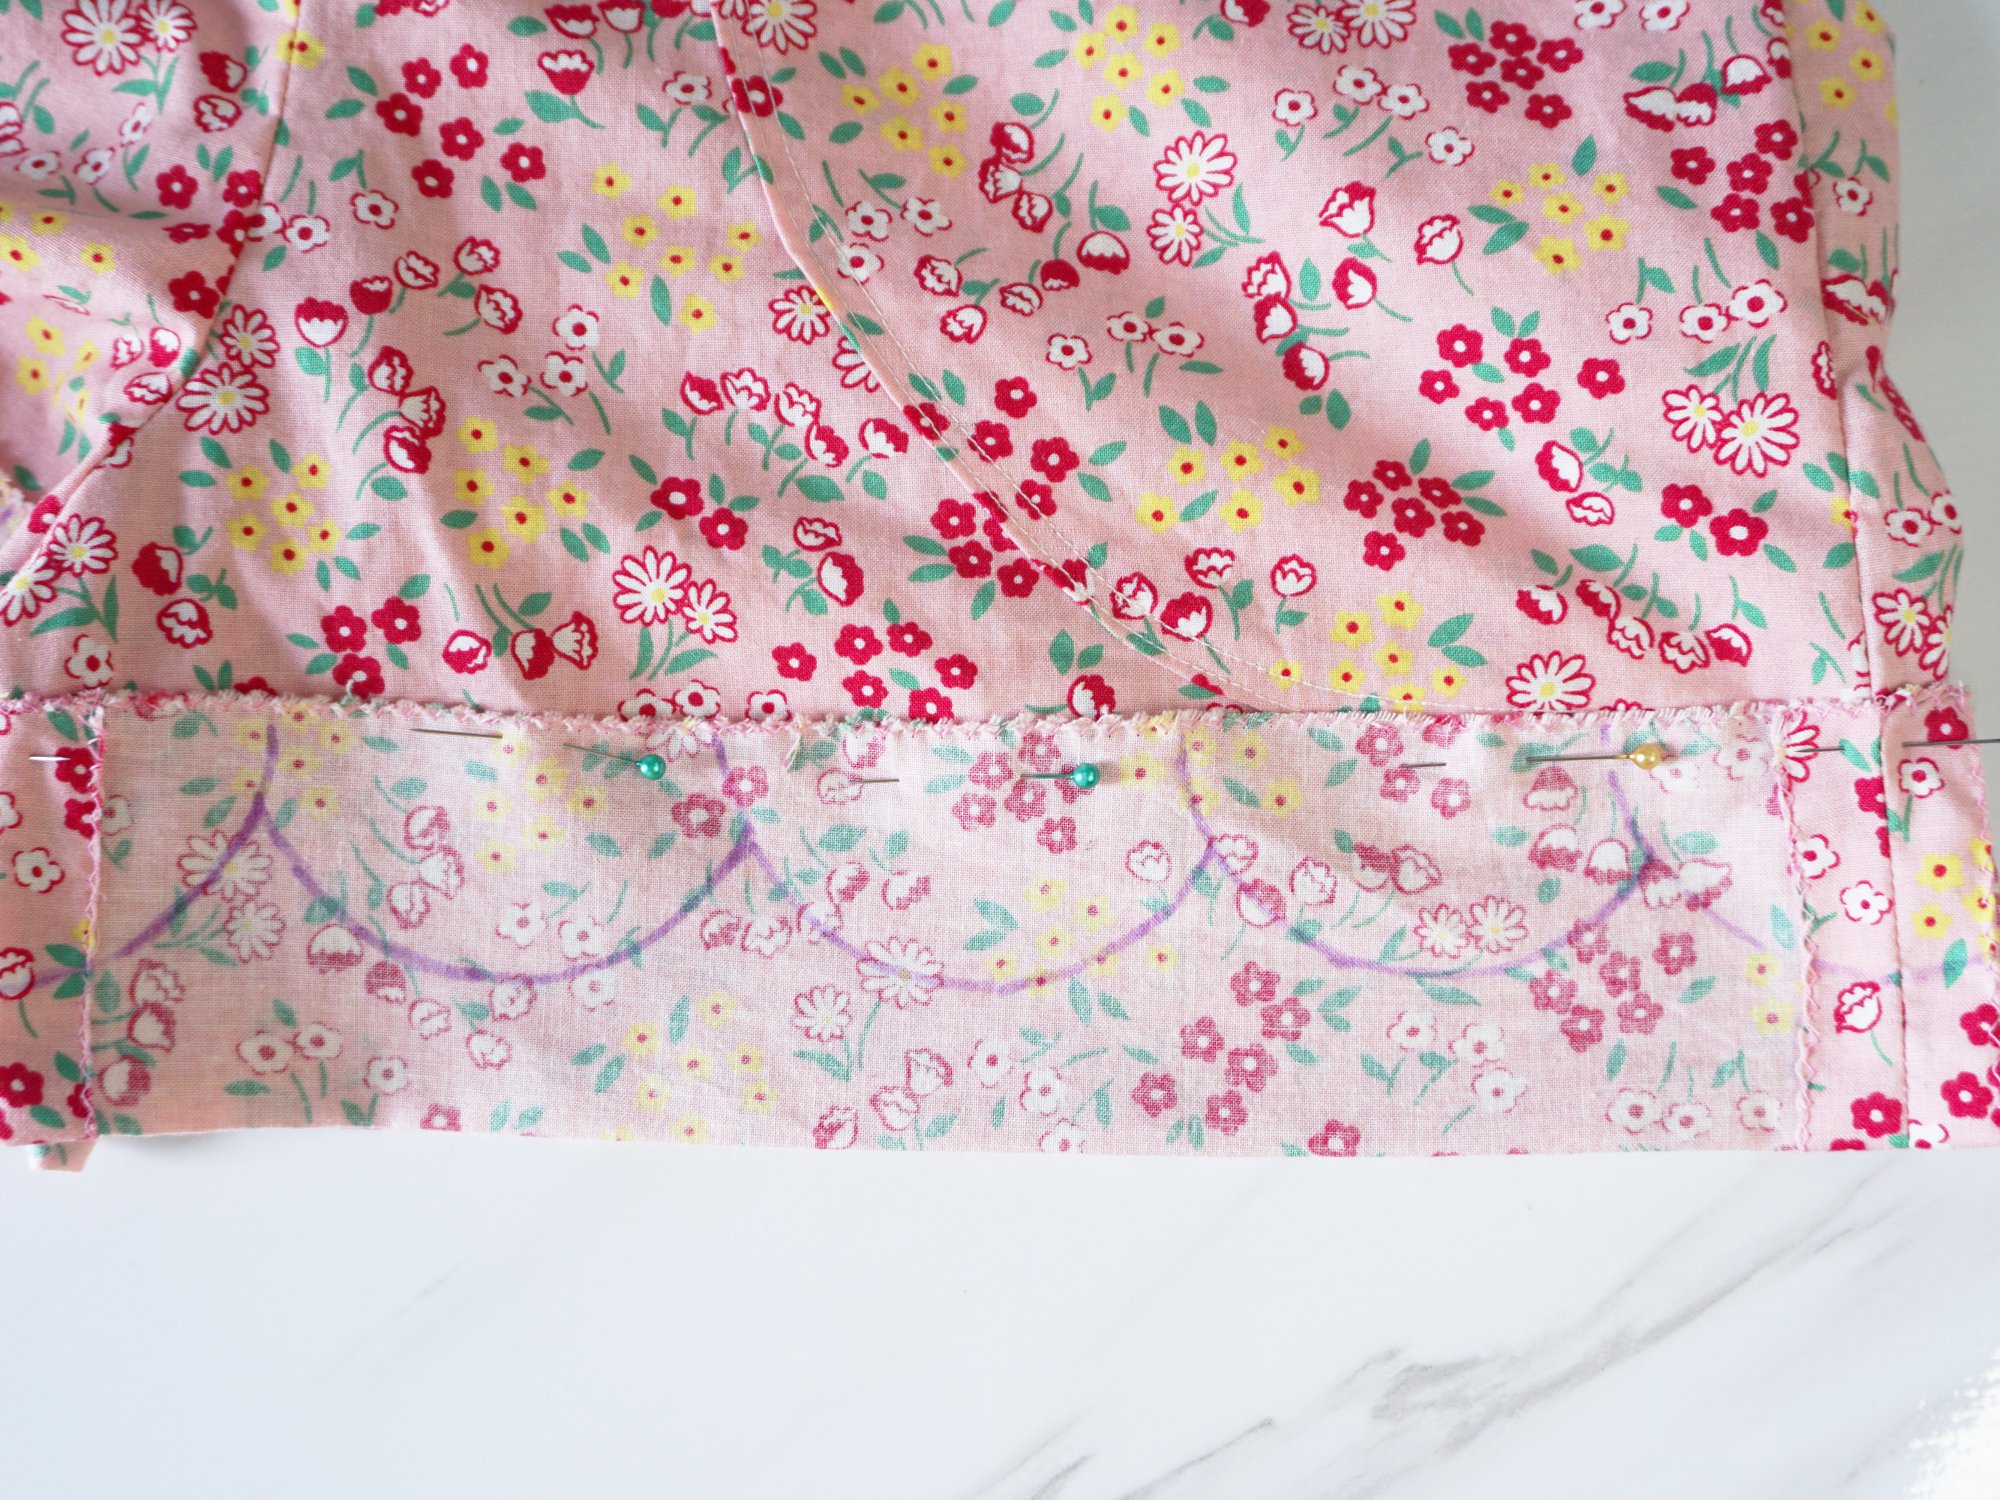
- Fold 2" of the hem outwards to make the WS together. Pin and press in place.
- Mark out the scallops of your desired width, making sure that the bottom edge of the scallop is 3/8" from the fold. If you wish to have scallops deeper than 1.5", you will need to include a longer hem allowance for your shorts.
- For reference, my scallops are 1.5" deep and 3" wide.
- Sew along the marking for the scallop pattern. To ensure that the sharp point where 2 scallops meet fold out nicely when you turn the scallops inside out, make sure that you sew a single horizontal stitch at the sharp point where 2 scallops meet.
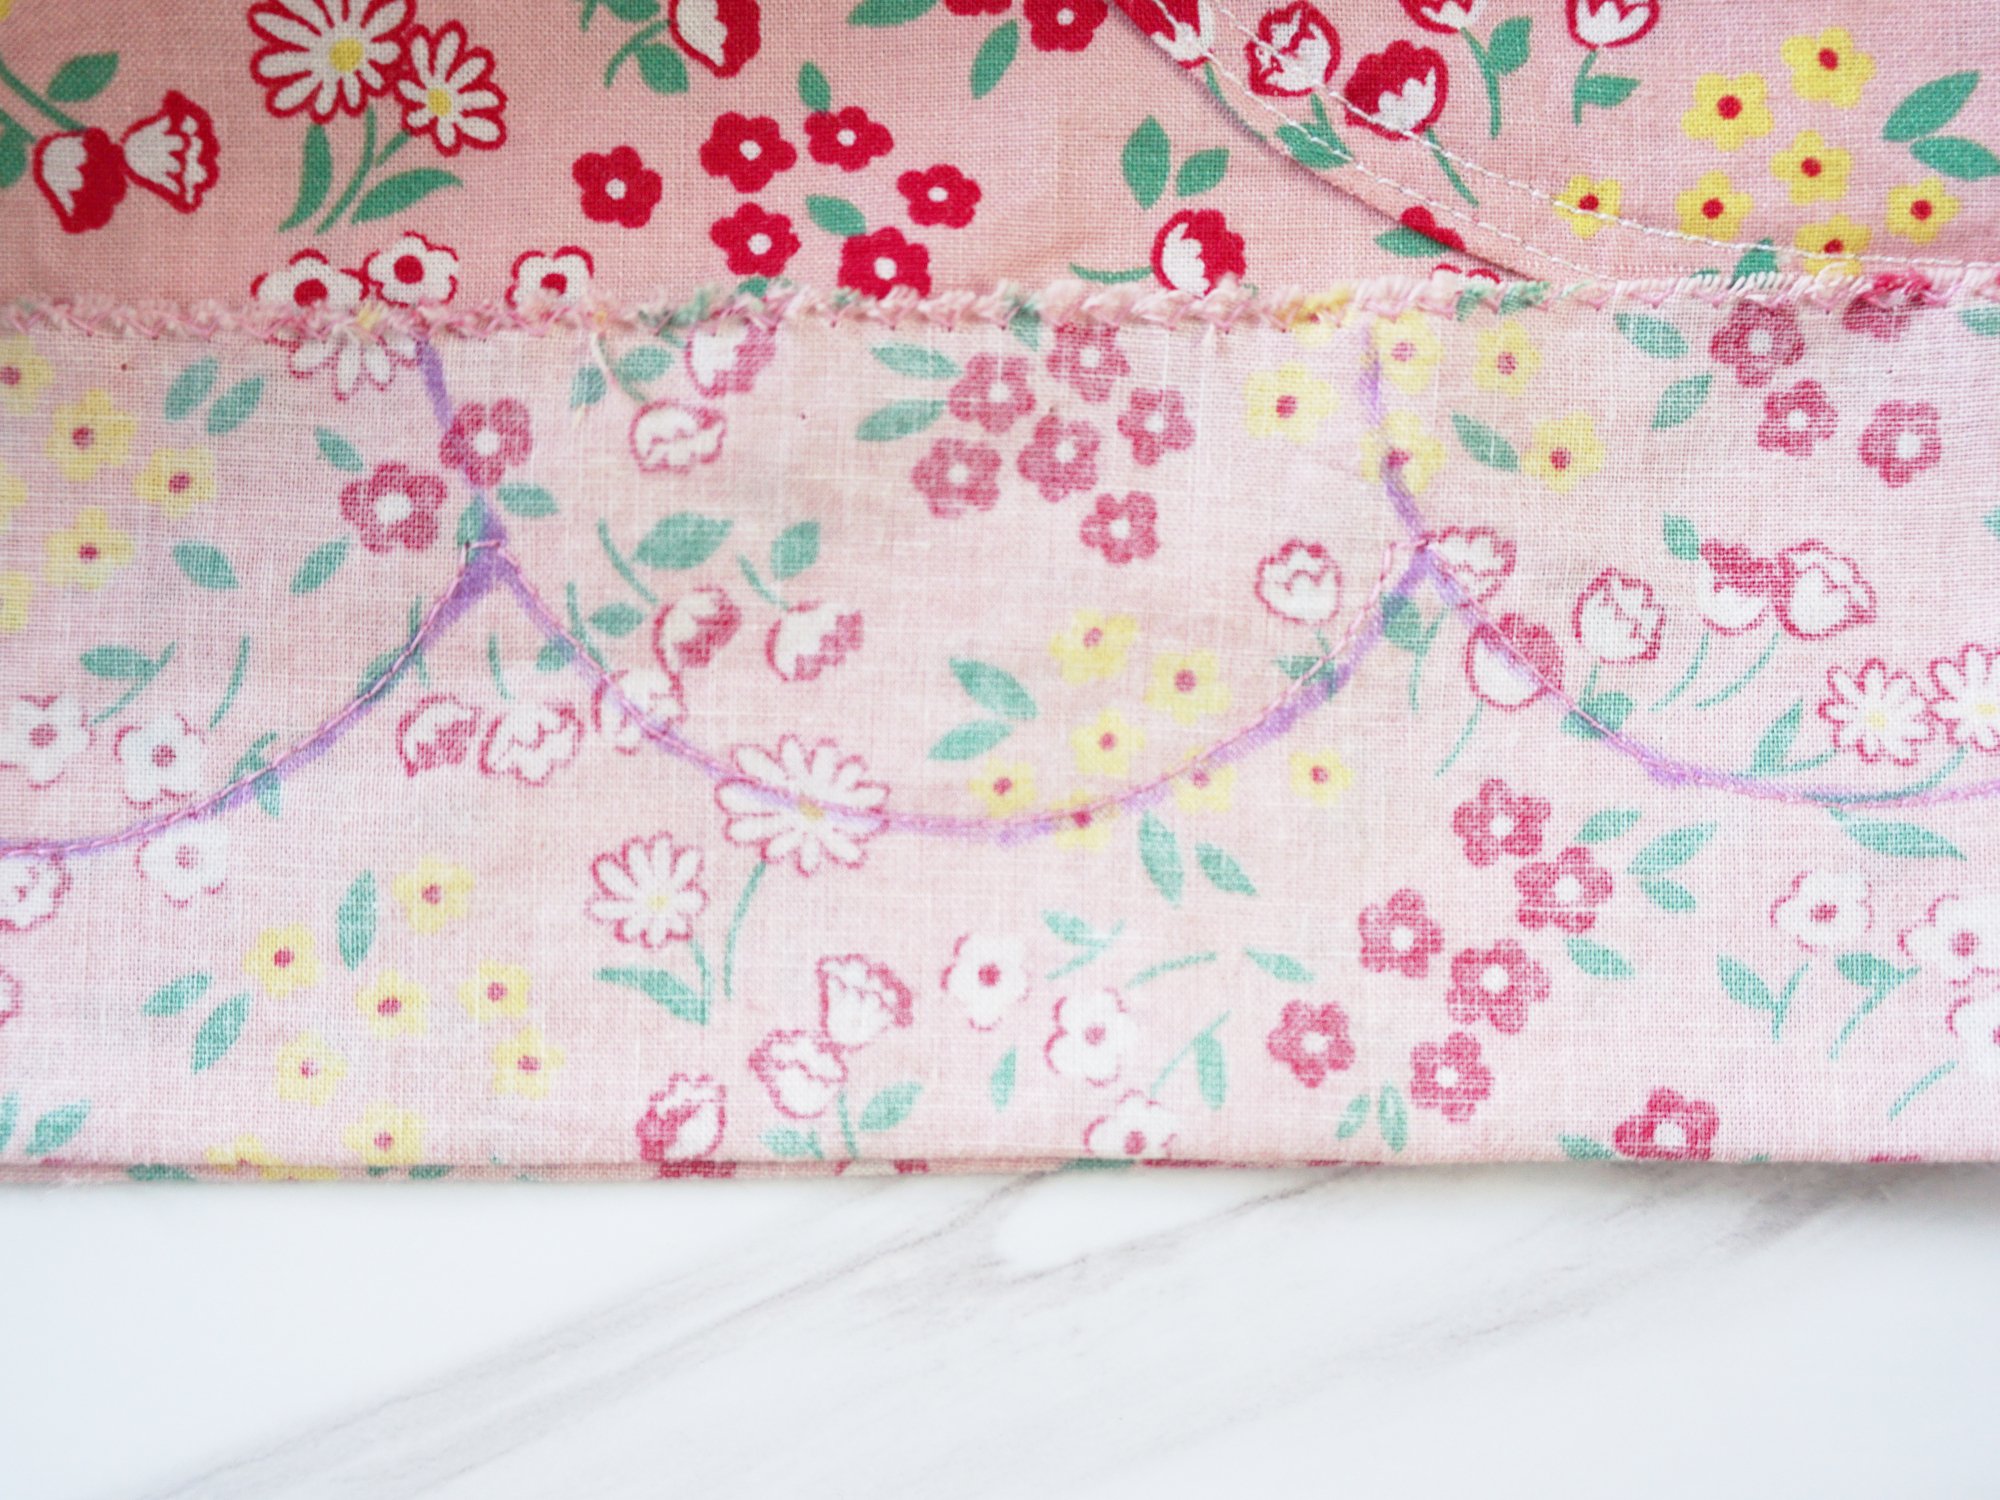
- Trim and cut the scallop, leaving ~1/8 to 2/8" from the stitches.
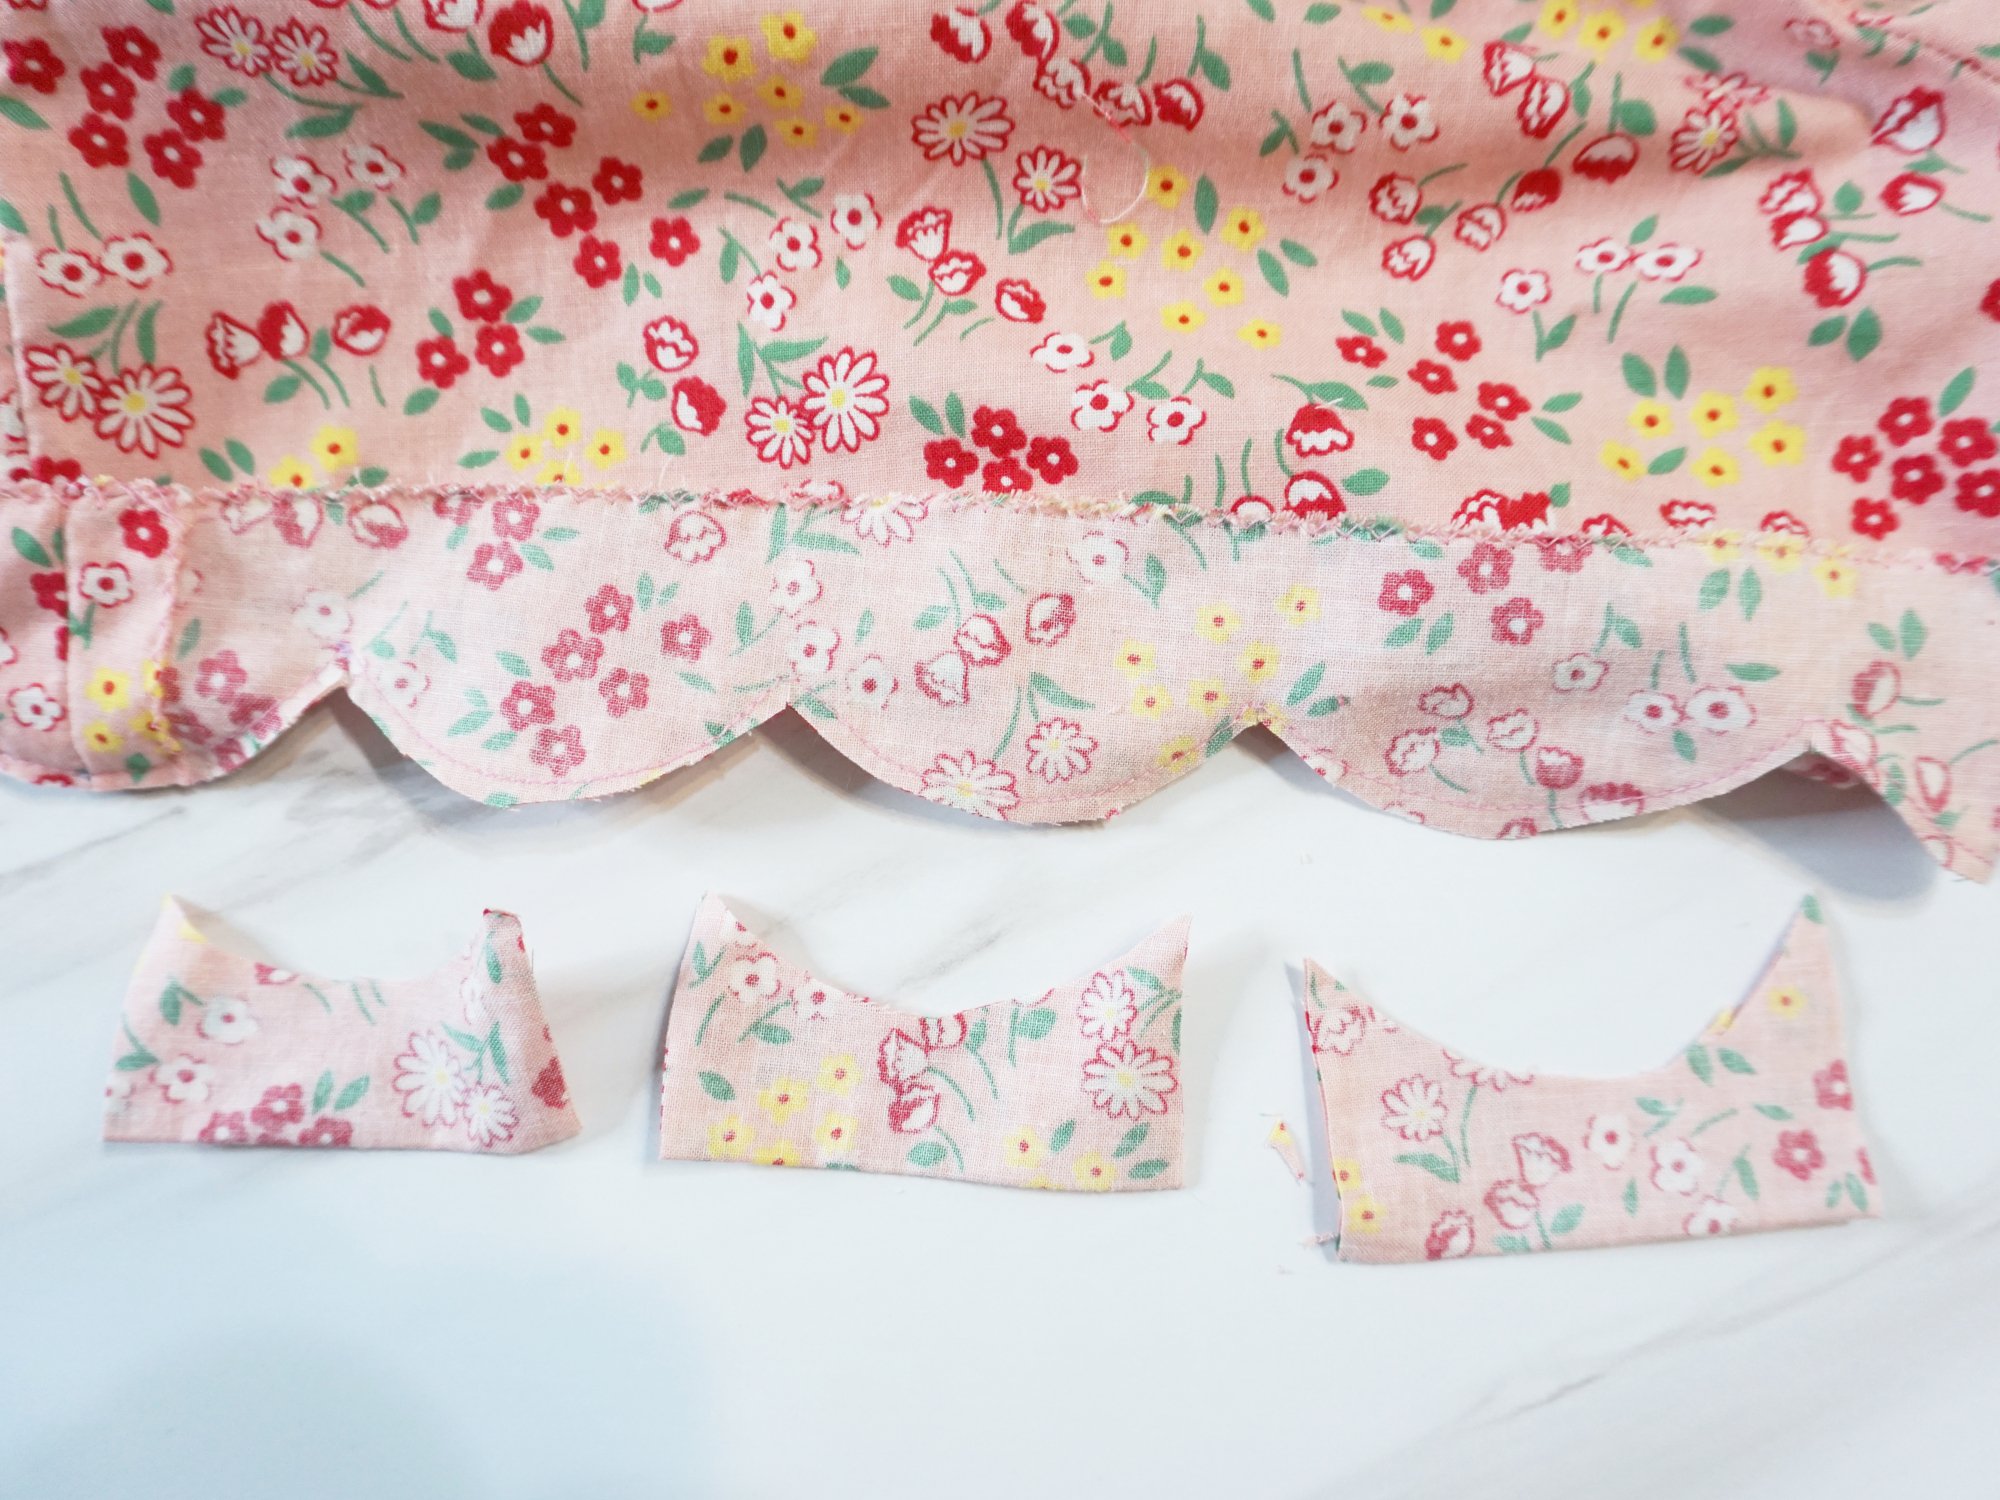
- Fold the scallop inside out, then edgestitch all around it.
And that's it! I hope you find this pattern hack tutorial easy to follow. Actually, these methods of adding ruffles and scalloped hem can be modified really easily. You can do this to any overalls/dress/shorts pattern you have!Hope you're staying safe and healthy wherever you are. xx Gwen
Images of vintage sewing pattern envelopes are from: https://vintagepatterns.fandom.com/