

How to Draft the Hybrid Face Mask Pattern
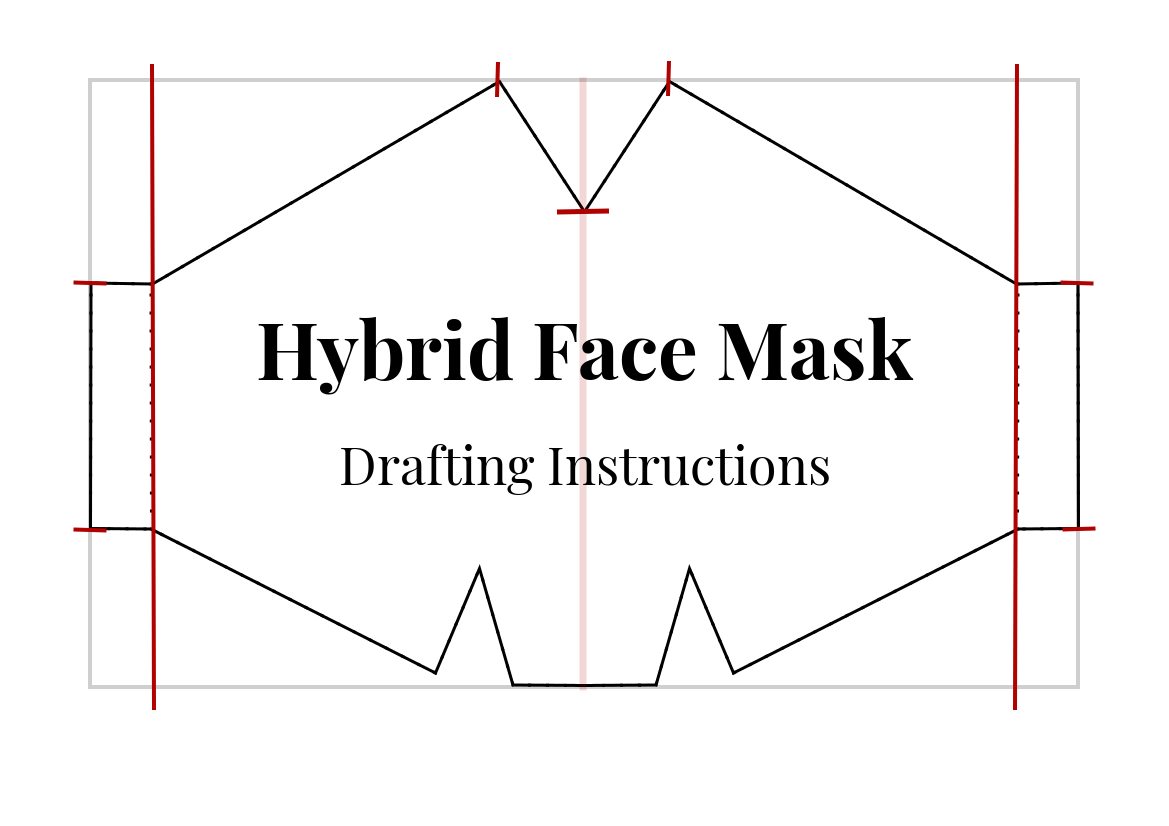
Hi everyone! It's been less than a week since I shared my free printable Hybrid Face Mask pattern and today, I am sharing the instructions to draft the Hybrid Face Mask yourself at home.
All the feedback for the Hybrid Face Mask have been really encouraging so far. I am really happy to hear that many of you like the fit and look of the face mask pattern as much as I do! 😊
As the shape of the Hybrid Face Mask pattern is not a typical one, there's a number of steps needed to draft the Hybrid Face Mask. I will be going through each step with an illustration so I hope that makes it easy enough to follow.
Watch the full video on how to sew the Hybrid Face Mask Pattern
Once you are done with drafting, you may read the step-by-step sewing tutorial or watch the sewing tutorial on Youtube to learn to sew this mask.
https://www.youtube.com/watch?v=CvGWXx0m-uI&t=185s
Materials
Here are the things you need to draft the Hybrid Face Mask pattern:
A4 paper or any rough paper in equivalent size
Pen or pencil
Straight ruler
A pair of scissors
Enough patience for 14 steps of measuring and drawing
Drawing Tips
It is important to start with a rectangle with 90 deg angles in all 4 corners. Also, a number of long and short vertical lines will be used to guide the drafting. It is important to note that these vertical lines should be parallel to the centre line.
Make sure that your vertical lines are not swaying left or right by checking the measurements at the start and end of each vertical line. If you have access to grid paper and long straight ruler, that will be helpful too.
Drafting the Hybrid Face Mask
Step 1
Start by drawing a 25 cm by 15.5cm rectangle.

Step 2
Using a straight line parallel to the short edge of the rectangle, mark out the middle of the rectangle.

Step 3
Using the measurements in the pictures, mark out the points for the nose dart.

Step 4
Connect the points marked out in Step 3 to draw the nose dart.

Step 5
Begin marking out the points to draw the chin darts.
Mark out 2 points on the bottom of the rectangle, approximately 1.8cm from the centre line (from Step 2).

Step 6
Continue to mark out the points for the chin darts.
Mark out the bottom of the chin darts using the measurements provided in the picture.
Note: The longer vertical line should be parallel to the centre line
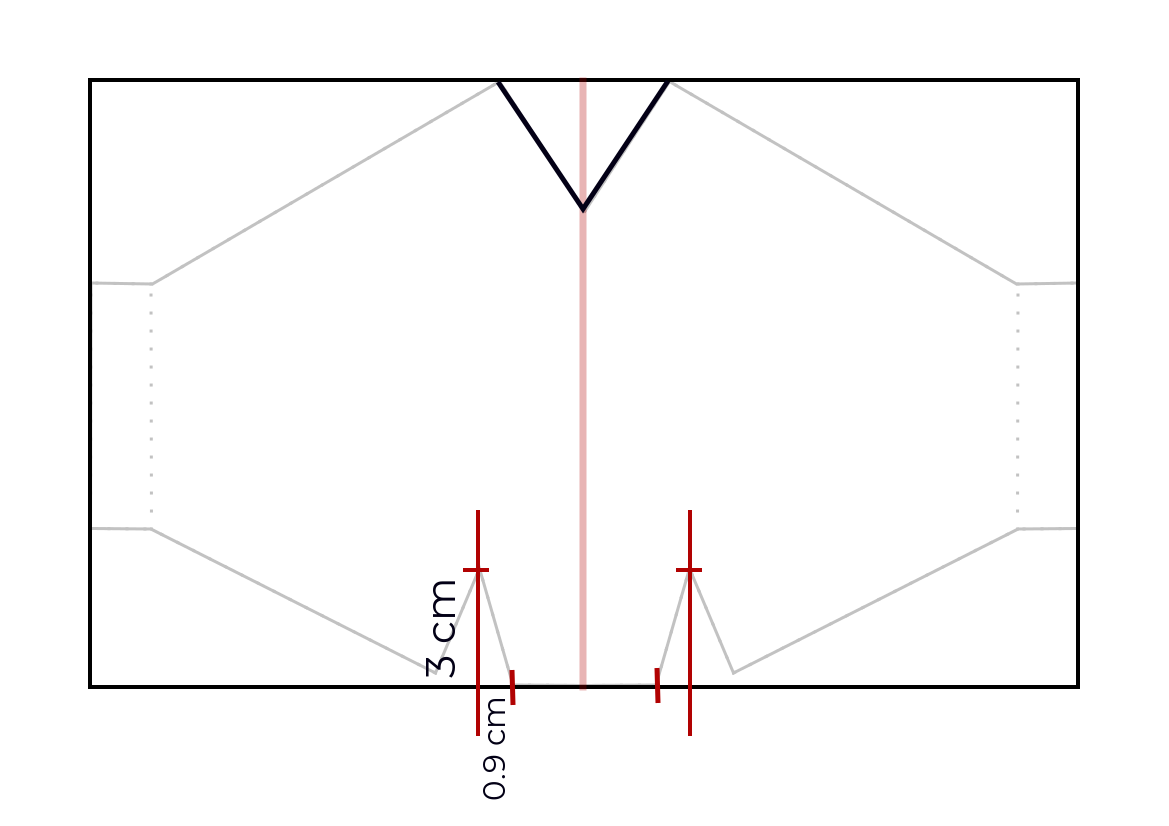
Step 7
Using the points marked out in Steps 5 and 6, draw out part of the chin darts.

Step 8
Begin marking out the points to draw the other half of the chin dart.
Mark out a short vertical line approximately 1.9cm from the chin dart point from Step 5.
Note: This line should be parallel to the centre line

Step 9
Draw a short line perpendicular to the line in Step 8, approximately 0.3cm from the bottom of the original rectangle. This creates a point to guide the drawing of the second half of the chin dart.

Step 10
Complete the chin dart by connecting a straight line from the point marked out in Step 9 to the other half of the chin dart marked out from Step 8.

Step 11
Begin drawing the elastic casing.
Mark out the edges of the elastic casing using the measurements provided in the picture.
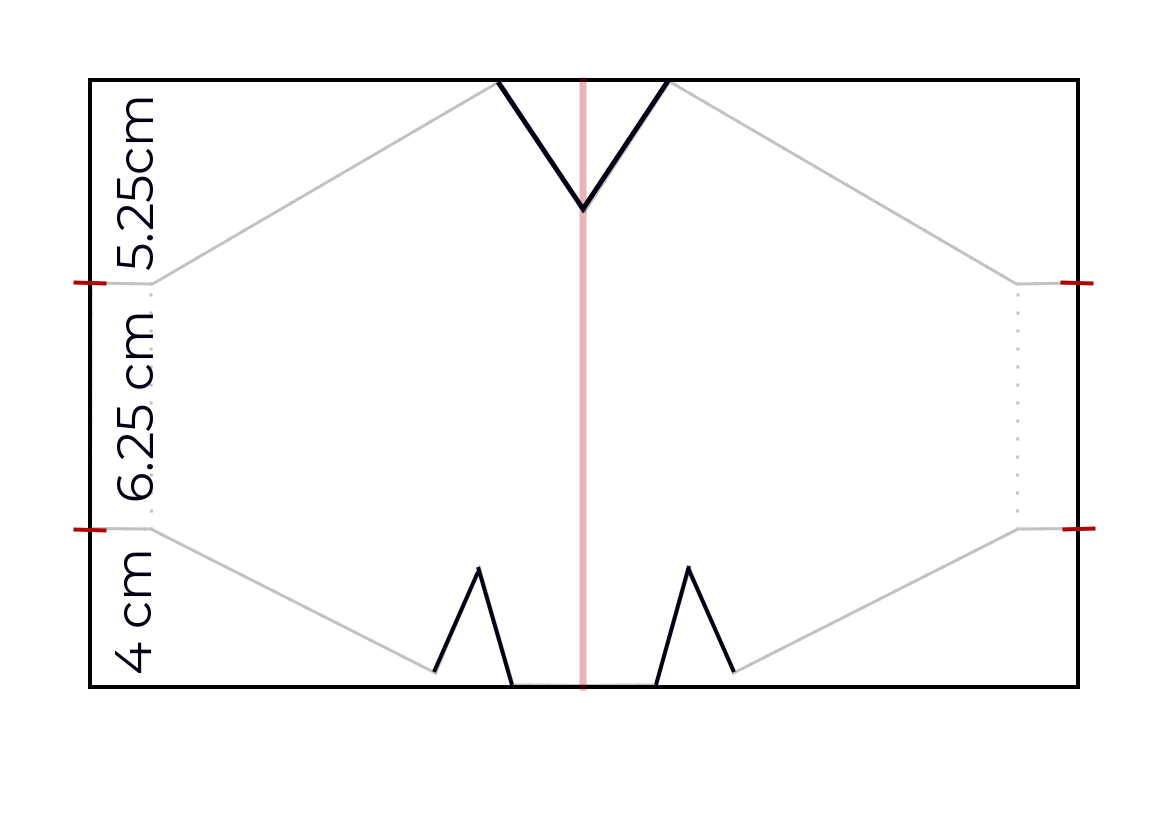
Step 12
Mark out the width of the elastic casing by drawing a vertical line through the entire height of the rectangle, approximately 1.5cm from the short edge.
Note: This vertical line should be parallel to the centre line

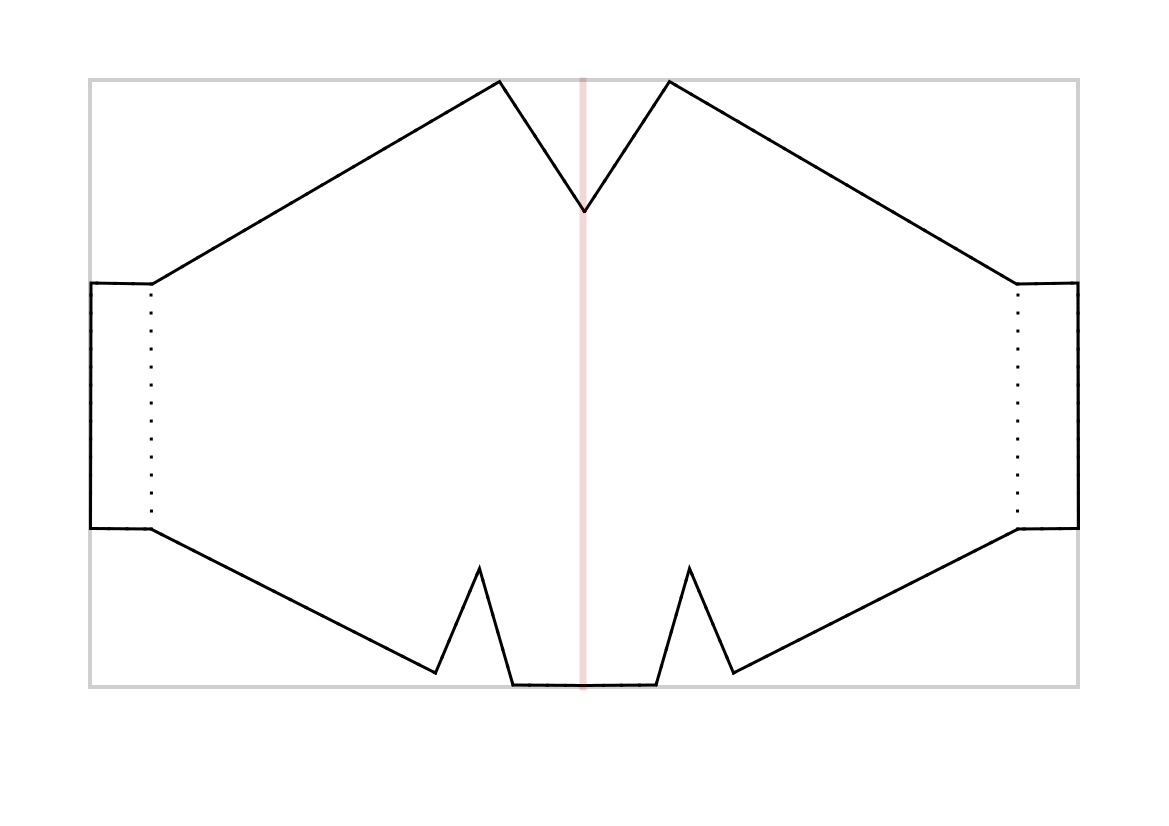
Step 13
Using horizontal lines, join the points marked out in Step 11 to the vertical line drawn out in Step 12. This is the elastic casing.

Step 14
Join the nose + chin darts to the elastic casing to complete the template. Cut the pattern out with a pair of scissors.
That's it!
Drafting the flap and casing rectangle
While you're at it, you might also want to start drafting the template for the nose flap and the casing rectangle.

Illustration of template for nose flap and casing rectangle
This image is not to scale
The measurements for these are as follows:
Nose flap (cut 1): 8 cm by 20 cm rectangle
Casing rectangle (cut 2): 7cm by 10 cm rectangle
While the nose flap is crucial for this pattern, the casing rectangle is an optional piece to the pattern. Sewing in the elastic casing is an alternative method of finishing the Hybrid Face Mask.
My step-by-step photo tutorial shows how to finish the Hybrid Face Mask using 2 different methods: 1) Creating the double-fold method to create an elastic casing, 2) Sewing an elastic casing using a casing rectangle.

4-step process of sewing the elastic casing for the Hybrid Face Mask
More details in the original tutorial
Don't forget to use the hashtag #GSMHybridFaceMask when sharing your versions on all social media platforms so people can see what it looks like on different faces! Personally, that has really helped me in deciding if I want to try a pattern out - mask or not!
Let me know if you have any questions about self-drafting the Hybrid Face Mask in the comments below!

This work is licensed under a Creative Commons Attribution-NonCommercial 4.0 International License.