

Sewing an easy vintage-inspired knit top (Audrey Top by Sew Over It)
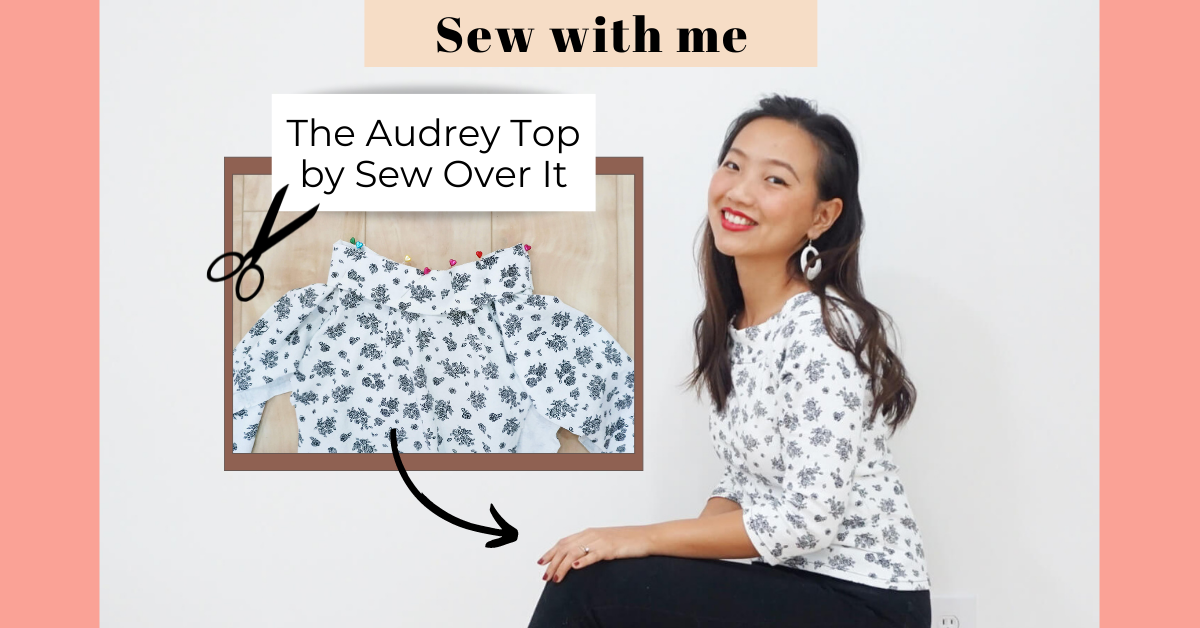

Earlier this year, Sew Over It gave away a copy of their Audrey Top sewing pattern to their newletter subscribers as part of their International Women's Day celebration. Since then, I have been waiting for the appropriate knit fabric to come along so I could sew this top. The chance finally came when I found this white floral cotton jersey in an estate sale last month. Today, I am sharing my process of sewing the vintage-inspired Audrey Top by Sew Over It!
The Audrey Top by Sew Over It
Size: Bust 31" - 57"; Waist 24" - 50"
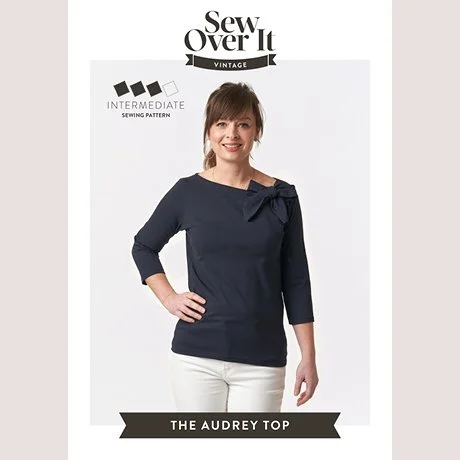
The Audrey Top is a vintage-inspired knit top by Sew Over It. It features a classic boatneck and raglan sleeves, providing both elegance in style and ease of movement. There are 3 sleeve-length options: short, 3/4, and full, as well as 3 different neckband options: flat, small tie, and big bow. With these different design options, there are 6 different ways to sew your Audrey Top!
Sewing the vintage-inspired Audrey Top by Sew Over It

For reference, here's my body measurements:
High bust = 31″
Full bust = 30.5″
Under bust = 26.5″
Waist = 25.5″
Front waist length = 16 1/8"
Back waist length = 15 1/2"
High Hip = 33″
Full Hip = 36.5″
Here's how I made my version of the vintage-inspired Audrey Top by Sew Over It:
Fabric used
As I mentioned, the fabric I used for this Audrey Top is a medium-weight cotton jersey that I found at an estate sale last month. Being an estate sale find, there's no information on the fibre content of this cotton jersey. However, from my experience with knit fabrics, I hypothesised that this is a cotton jersey with no elastane/spandex. It has little recovery and is stable when sewing on a regular machine even without a walking foot (i.e. it does not stretch out too much). Also, it simply feels like cotton.
And then, I did a burn test and confirmed my hypothesis - it is cotton!
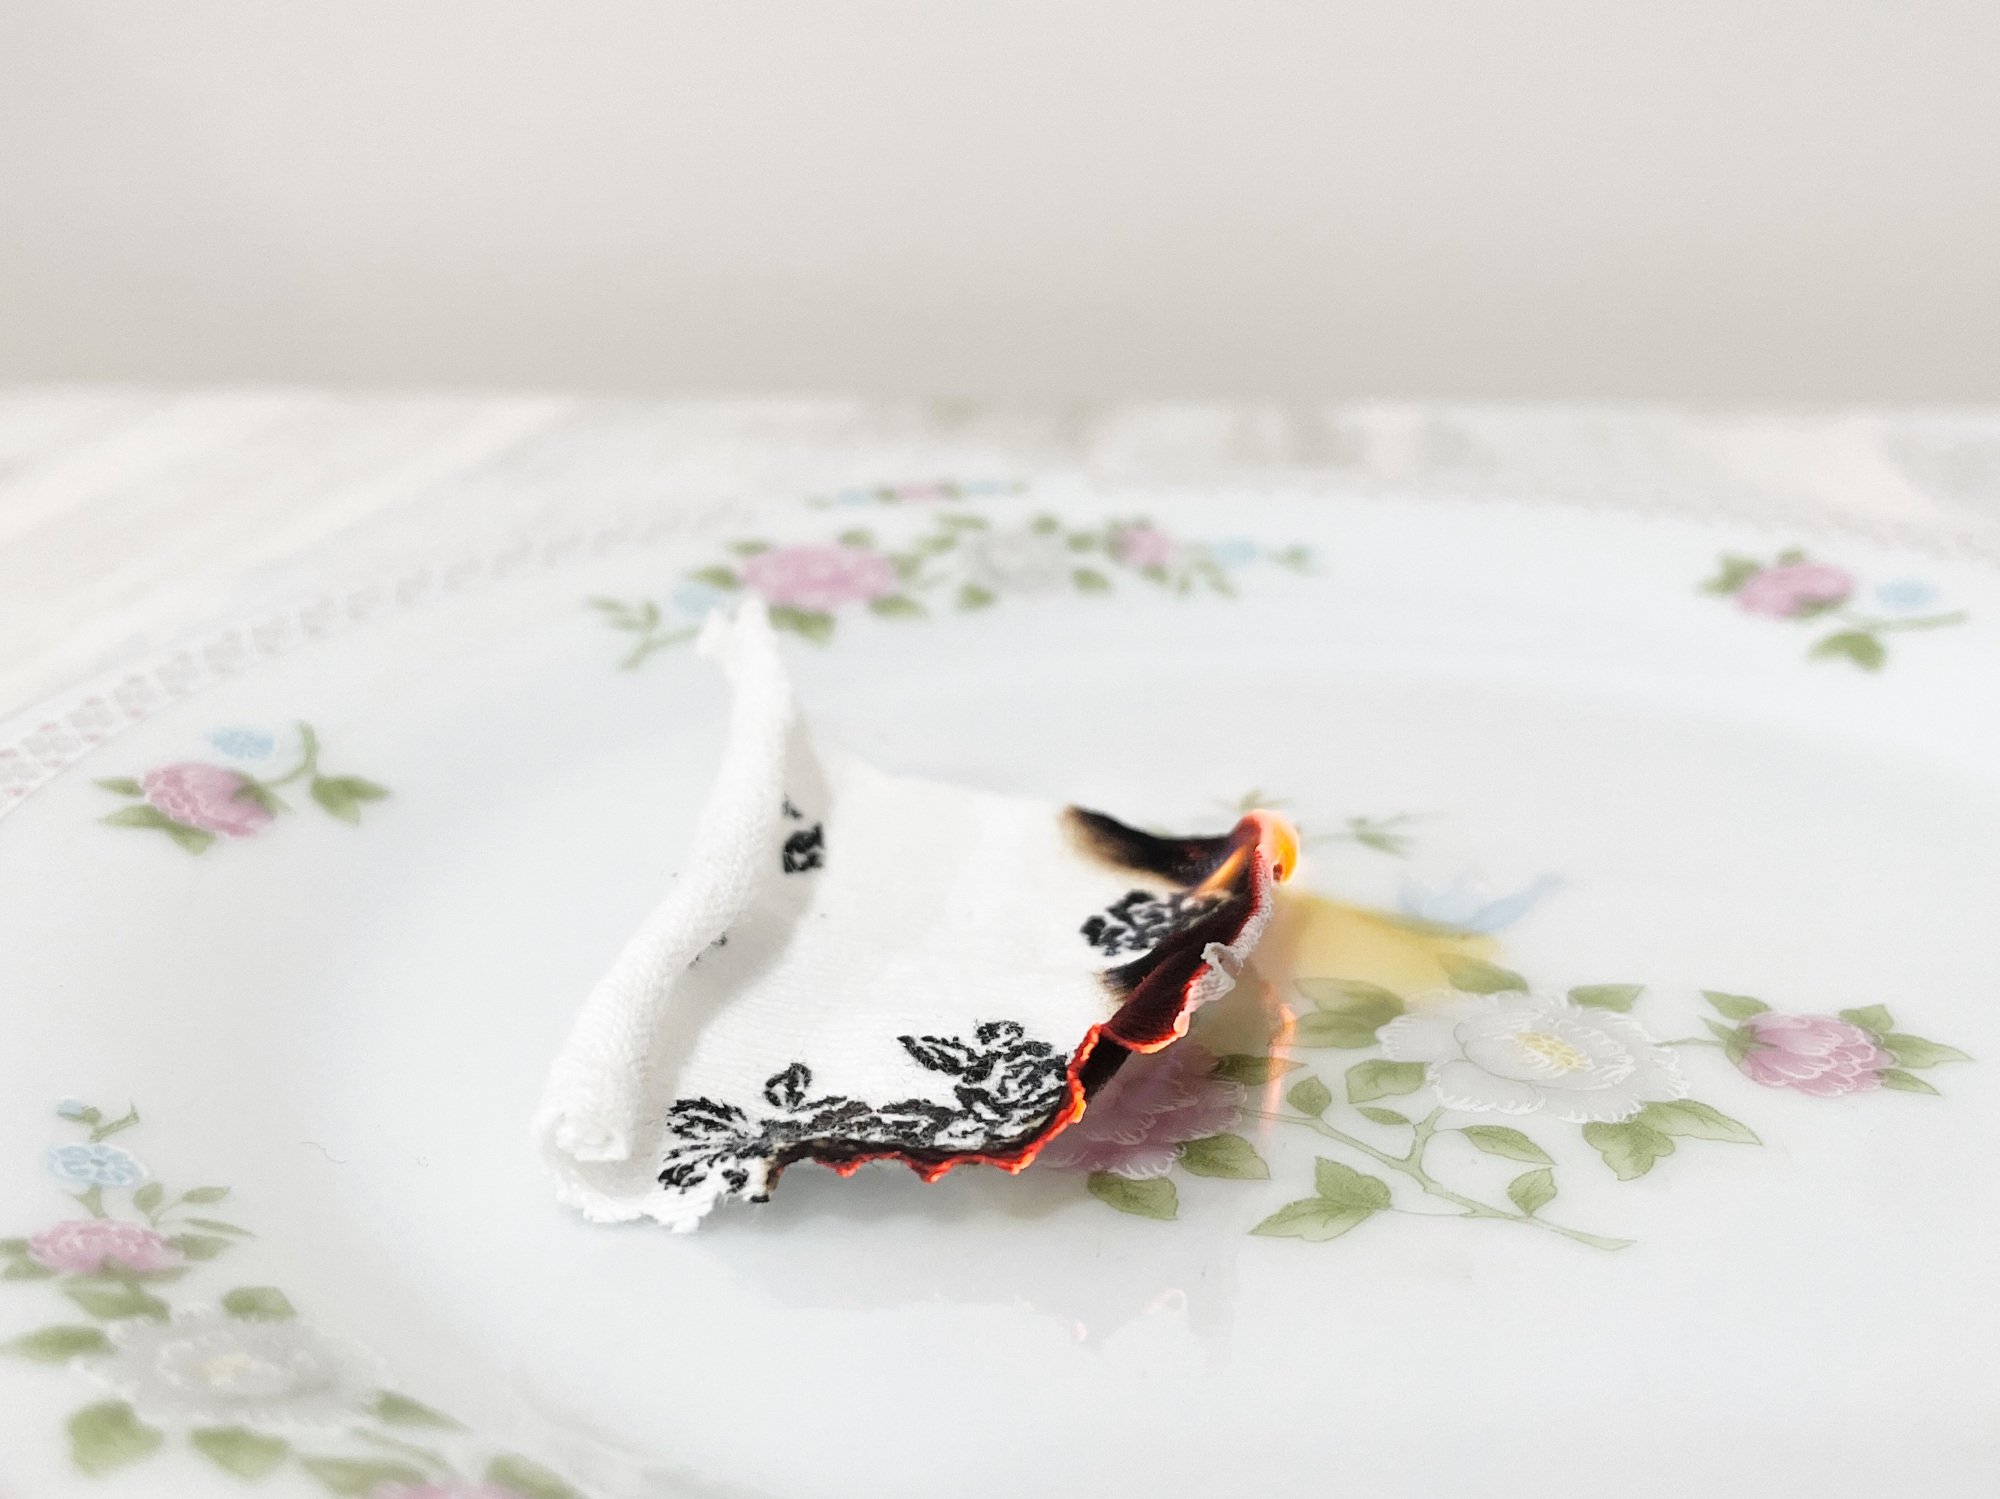
Not self-extinguishing, smelled like burning paper, grey ash
Pattern modification(s)
Based on the measurements provided on the size chart, I chose to cut the pattern in a size 6 with the following modifications:
shortened length of bodice by 4.5"
shortened length of 3/4 sleeves by 1"

Bodice length modification based on comparison with bodice sloper when sewing the vintage inspired Audrey Top
I determined the amount of bodice length to reduce by comparing the pattern for the Audrey Top with my own bodice sloper. The bustline and waistline of the pattern match up with my sloper pretty well, but the length of the Audrey Top is designed to extend all the way to the full hip. I wanted my top to stop around my half hipline, so I measured the difference between my half hipline on the sloper and the full hipline of the Audrey Top, and took off that difference.

Fabric cutting when sewing the vintage inspired Audrey Top
Why stop at the half hip?
I love wearing everything high-waisted and tuck my tops in most of the time. Because of that, I find having a top that goes all the way to my full hips create a lot of bulk inside the bottoms when I have the top tucked in. More importantly, having sewn even tops myself, I just know I like how a top that stops at the half hipline look on me better!
Construction modification(s) for sewing the vintage-inspired Audrey Top
Watch the video of my sewing process on Youtube!
I followed the pattern to a T (tee? hehe) except for the following:
sewing the sleeve hem before sewing the side seams and underarm seam
practising directional sewing when sewing the side seams
Sewing the sleeve hem first
I didn't like the idea of sewing the side seam + underarm seam first and then sewing the sleeve hem with just a small sleeve opening to work with. Sure, I could go slow and be careful but I just didn't like the idea of risking pulling the sleeve hem while sewing by accident. In my opinion, this doesn't really change the look of the sleeve opening at all.
Additionally, sewing the sleeve hem first (before sewing the underarm seam) makes unpicking and application of a seam stabiliser easier. Fortunately, the fabric is rigid enough on the machine and the sleeve hem stayed pretty flat after sewing, and even flatter after a light round of steaming

Practising directional sewing
While I don't usually practise directional sewing with wovens, I decided to be mindful of my sewing directions when sewing the side seams + underarm seams for the Audrey Top. Practising directional sewing when working with a knit fabric helps to prevent uneven stretching of the garment on both sides.

Using directional sewing when sewing the vintage inspired Audrey Top - picture shows an arrow that denotes the direction of sewing from the bottom of the side seam, going across the underarm seam and then finishing at the sleeve hem
For both left and right sides of the top, I started from the bottom of top, sewed along the side seams and then worked along the underarm seam to the sleeve hem.
Overall fit and style of the vintage-inspired Audrey Top


Gwen wears the Audrey Top in white with black floral design with a pair of black skinny jeans.
The process of sewing the vintage-inspired Audrey Top by Sew Over It was pretty straightforward and I was able to finish the project in a single day! I love how easy the pattern is and I really love the fit of the top.
I'd definitely make the pattern again, but perhaps in a solid shade when I need to add a versatile knit top to my wardrobe. This white floral print seems tad grandma-sy to me.. (or dare I say.. grandma-core!?)...
I love the (grandma) beatnik vibes it gives when worn with my black skinny jeans (with a mid-rise which is why the top is not tucked in). Tell me it's not grandma-sy or tell me it's grandma-sy. Let me know what you think in the comments!
