

Everything you need to know about ME2066 sewing pattern
This post contains Amazon affiliate links marked with (*)

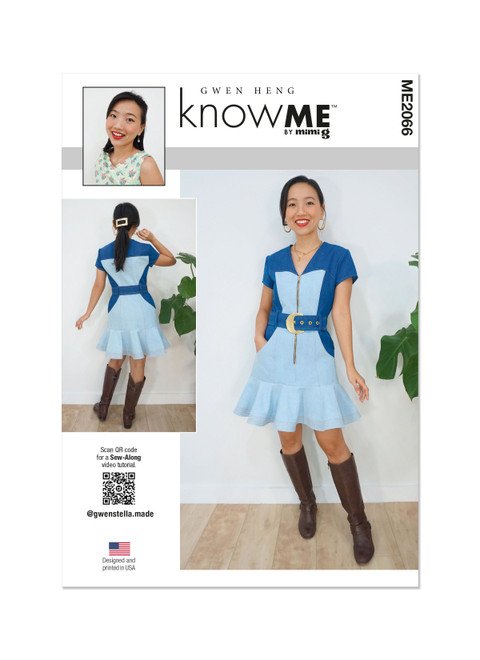
Another season, another new design! The ME2066 is my newest design for Know Me Patterns (part of Simplicity Patterns) for Early Spring 2024 and in this article, I’m going to talk about the design inspiration, fabric suggestions, dress construction, and everything you need to know to sew your own version of this dress!
What is the design inspiration behind ME2066?
Many of you who’ve been here for a while know that my designs usually lean towards retro-inspired style. (Well, that or adorkable things like my scalloped detachable collar).
For the Know Me Early Spring ‘24 collection, I originally wanted to design a 70’s style denim jumpsuit. But looking at the huge catalog of beautiful jumpsuits that are already available via Simplicity et al. (like this vintage 70’s reproduction pattern), I decided to abandon my original idea and create something different instead.
I created a moodboard and… started sketching!

As you can see from my moodboard, I wanted a design that will work well with bottomweight fabrics (e.g., twill, denim, corduroy), with feminine style lines combined with a “hardy” workwear vibe. To make things fun, I also decided to use contrast to bring out the feminine style lines. By adding more design lines (i.e. more seams and thus more pattern pieces), I also hoped that this sewing pattern will be a good candidate for a patchwork look. Imagine cutting each pattern piece from secondhand jeans!


Last but not least, with the contrast already in place, I decided to throw in a clever, hidden front pocket as well. It just seemed like the natural thing to do!
The process of designing isn’t a straightforward path from A to B. I usually throw in some ideas and concepts I like with the style and fabric types I have in mind, then take some stuff out and add other features as I go. That’s kind of how this dress came together.

What is the size range available for ME2066?
The range of finished garment measurements for this sewing pattern is as follows:
Bust: 34” - 49.5”
Waist: 25” - 40”
Hips: 36” - 51”


This dress is designed to have a close-fit to your body. Close but NOT snug. I made my version with a small bust adjustment and shortened the bodice
Bodice adjustments
Depending on your body measurements, you may want to size up or down and then do a small / full bust adjustment as appropriate. Unfortunately, I can’t tell you which method works best for you because garment-fitting is very specific to the individual.
Make a muslin!
As always, make a muslin!
When making a muslin, you don’t always have to make the entire dress. Personally, I usually only make a muslin for the bodice. The pattern adjustment for the skirt is more straightforward since the design is an A-line skirt that is free beneath the hips.
When adjusting the pattern and calculating finished garment measurement from measuring the paper pattern, please remember that the exposed zipper also ADDS a bit of ease to your final garment measurements.
What are the best fabrics to use for sewing the ME2066?
Fabric type
This is dress is perfect for bottomweight fabrics! Think about fabrics you would use to make jeans, pants, and jackets. It should have the right amount of structure so the flounce in the skirt will sit the way it’s designed. Don’t choose a fabric that looks “slinky” or drapes and falls.
If you would like your finished garment to be more snug, you can choose bottomweight fabrics with some stretch. This provides some “give” and makes the snug fit more comfortable to wear. Make sure your fabric has a good recovery so it keeps its shape around the bodice.
I made the denim version on the pattern envelope using 10oz denim that was also labelled as “soft” and “midweight”. This denim is made of 100% cotton and has no stretch. To make sure that the texture and weight of the fabrics are the same, I bought 2 different colourways of the same denim.


The red and pink version featured in the sewalong video is made using 7oz twill (100% cotton, no stretch) from Organic Cotton Plus. This fabric is a little costly but I decided to purchase it because I have worked with their twill before and I knew it wouldn’t be a matter of a guessing game. Also, I love the range of colours they have available!
Interestingly, the 7oz twill ended up with a slightly stiffer feel when worn compared to the “soft” 10oz denim. That said, the 7oz twill was definitely much easier to sew than the 10oz denim since it is less thick.
I’m planning to start picking up some dark pink denim every time I go to the thrift store and gather enough material to make a full dark pink version sometime in the future!
Colour combinations
While my previous 2 designs (the ME2021 and ME2029) work very well with funky prints, this design works better with solids. For the best result, choose 2 shades of the same colour (e.g., light blue vs dark blue) or 2 complementary colours for a distinct colourblock design.

Here are some colour combinations suggestions! Some of these are suggested to me on social media.


Fabric prints
Prints can work with the fabric too but I think smaller prints will work better.
Larger prints may not be suitable due to the number of seams in the design which may result in too many interference to the visual flow of the prints. You may end up with a very “messy” overall look.


Do I need any special sewing supplies to make the ME2066?

Needle and thread
When sewing the denim dress, I used the Schmetz 100/16 Jeans* sewing machine.
When sewing the topstitching detail, I used a separate sewing machine and had a topstitching needle in place with a topstitching thread loaded as my top thread.

Having a separate sewing machine set up with the topstitching needle and topstitching top thread helped to speed up my process of the sewing. I didn’t have to keep switching the needle and top thread. Once I had set up the machine with my preferred stitch length, I DID NOT TOUCH THE KNOBS AGAIN. This way, I was able to make sure that my topstitching stitch length remained the same throughout the entire project.
When sewing the pink and red twill dress, I found that my 90/14 Schmetz Universal needle worked just fine. I also used the same needle for topstitching with 2 strands of regular thread on 2 separate bobbins loaded as the top thread on the machine.
Belt

To make the matching belt, you will also need a belt buckle and grommets. For my denim dress, I used a belt buckle I purchased from Etsy and the Dritz ¼” wide large gold eyelet*.
Unfortunately, I was unable to match the buckle with the grommets. The grommets actually turned out more like a shiny gold while my buckle was a dull gold. To overcome this mismatch, I dulled the grommet lightly with some copper wool after installing them on my belt. This step is probably not crucial but my perfectionistic brain was unable unsee the difference and I simply had to do it to be happier with the final result of the dress.
For my red and pink version, I used a plastic mod flower belt buckle and made my own belt. If you are unable to find a buckle of the exact size recommended by the pattern, then you will have to adjust the width of the pattern for the belt. This is easy because it is only a matter of altering the width of the pattern so the final fabric belt fits your choice of buckle.
Watch my video on the modern and vintage methods of sewing your own belt for more tips!
Where can I buy a copy of the ME2066?
The ME2066 is now available in some big craft stores in the US, as well as online via the Simplicity website in both paper and PDF formats.
How will you make your version?

What colour combinations are you planning on using for this design? Are you using prints? Let me know your ideas in the comment section below!
As I am writing this, I am also working on a video showing my process of batch sewing the pink and red version of the dress for the sewalong video that is linked to the sewing pattern.
If you haven’t already, subscribe to my Youtube channel for more sewing, style and DIY projects! Chat soon x